Spring – MVC TextArea
Last Updated :
24 Feb, 2022
Here we will be learning about the Spring MVC TextArea form tag. We will create a basic Spring MVC project in the Spring tool suite(STS) to get some data from the user using the TextArea form tag.
spring-form.tld
We can use Java Server Pages (JSPs) as a view component in Spring Framework. To help you implement views using JSP, the Spring Framework provides a form tag library namely spring-form.tld with some tags for evaluating errors, setting themes, formatting the fields for inputting and outputting internationalized messages.
‘textarea’ tag: The textarea is one of the tag provided by the spring-form.tld library. It renders an input HTML ‘textarea‘. Below are the various attributes available in textarea tag.
Attributes in ‘textarea’ tag
1. HTML Standard Attributes
HTML Standard attributes are also called global attributes that can be used with all HTML elements.
| Attribute Name |
Description |
| accesskey |
To specify a shortcut key to activate/focus on an element. |
| id |
To specify a unique ID for the element. |
| lang |
To specify the language of the content. |
| tabindex |
To specify tabbing order of an element. |
| title |
To specify extra information about the element. |
| dir |
To specify text direction of elements content. |
2. HTML Event Attributes
HTML Event Attributes are used to trigger a function when a particular event occurred on the element.
| Attribute Name |
Description |
| onblur |
To execute a javascript function when a user leaves the text field. |
| onchange |
To execute a javascript function when a user changes the text. |
| onclick |
To execute a javascript function when the user clicks on the field. |
| ondblclick |
To execute a javascript function when the user double clicks on the element. |
| onfocus |
To execute a javascript function when the user focuses on the text box. |
| onkeydown |
To execute a javascript function when the user is pressing a key on the keyboard. |
| onkeypress |
To execute a javascript function when the user presses the key on the keyboard. |
| onkeyup |
To execute a javascript function when the user is releasing the key on the keyboard. |
| onmousedown |
To execute a javascript function when the user is pressing a mouse button. |
| onmousemove |
To execute a javascript function when the user is moving the mouse pointer. |
| onmouseout |
To execute a javascript function when the user is moving the mouse pointer out of the field. |
| onmouseover |
To execute a javascript function when the user is moving the mouse pointer onto the field. |
| onmouseup |
To execute a javascript function when the user is releasing the mouse button. |
| onselect |
To execute a javascript function when the user selects the text. |
3. HTML Required Attributes
| Attribute Name |
Description |
| cols |
To specify the column value of the text area. |
| rows |
To specify the row value of the text area. |
4. Other HTML Attributes
| Attribute Name |
Description |
| cssClass |
To specify a class name for an HTML element to access it. |
| cssStyle |
To add styles to an element, such as color, font, size, etc. |
| cssErrorClass |
Used when the bounded element has errors. |
| disabled |
To specify the element to be disabled or not. |
| htmlEscape |
To enable/disable HTML escaping of rendered values. |
| path |
To specify the path to a property for binding the data. |
| readonly |
To make the HTML element read-only field. |
Spring MVC Application
Below is the application we will be creating.

Spring MVC Textarea – Example application
Procedure
The steps to create an application is as follows:
Step 1: Create a Spring MVC project in Spring Tool Suite.
Step 2: In STS, while creating the project based on the developer selection, it will download all the required maven dependencies, *.jar, lib files and it will provide an embedded server.
Step 3: Below is the final project structure of the Spring MVC project after creating *.java and *.jsp files also.
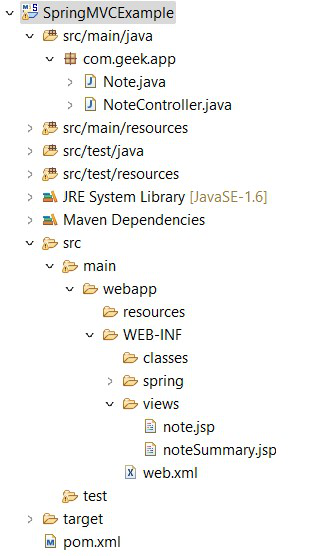
Project Structure
Implementation
Files to be created are as follows:
- Note.java: Bean class to define the properties and getter/setter methods of the properties.
- NoteController.java: Controller class to process the request and generate the output.
- note.jsp: Jsp file to get the input from the user from the browser.
- noteSummary.jsp: Jsp file to display the processed output to the user.
A. File: note.jsp
HTML
<%@ page session="false"%>
<html>
<head>
<title>GeeksforGeeks - Note</title>
</head>
<body>
<h1>Welcome to GeeksforGeeks!</h1>
<form:form action="submit" method="post" modelAttribute="note">
<table>
<tr>
<td><form:label path="noteDetail">Feedback Note: </form:label></td>
<td><form:textarea id="feedBack" path="noteDetail" rows="5" cols="40" title="GFG"
onfocus="color()" onblur="remove()" cssStyle="font-style:italic"/></td>
</tr>
<tr>
<td><form:button>Submit</form:button></td>
</tr>
</table>
</form:form>
<script type="text/javascript">
function color() {
document.getElementById("feedBack").style.backgroundColor = "CBF7C7";
}
function remove() {
document.getElementById("feedBack").style.backgroundColor = "FFFFFF";
}
</script>
</body>
</html>
|
This is the JSP page that interacts with the user to get the information. Inside the form, to display the fields properly, we are using a table tag. Provide a label and the text area to enter some data in it using the form tag – textarea. The tag textarea will internally provide an HTML textarea box while processing.
B. File: Note.java
Java
package com.geek.app;
public class Note {
public String noteDetail;
public String getNoteDetail() { return noteDetail; }
public void setNoteDetail(String noteDetail)
{
this.noteDetail = noteDetail;
}
}
|
- This is the Java Bean class to define the properties.
- Create noteDetail property to input the user entered data in it.
- Generate getter/setter methods of the property to get/set the value of the property.
C. NoteController.java
Java
package com.geek.app;
import org.springframework.stereotype.Controller;
import org.springframework.ui.Model;
import org.springframework.web.bind.annotation.ModelAttribute;
import org.springframework.web.bind.annotation.RequestMapping;
import org.springframework.web.bind.annotation.RequestMethod;
@Controller
public class NoteController {
@RequestMapping(value = "/")
public String viewNote(Model model) {
Note note = new Note();
model.addAttribute("note", note);
return "note";
}
@RequestMapping(value = "/submit", method = RequestMethod.POST)
public String submitNote(@ModelAttribute("note") Note note) {
return "noteSummary";
}
}
|
This is the Spring controller class where it process the methods based on the mapping of the requests. Here, @Controller, conveys to the container that this class is the spring controller class. The annotation, @RequestMapping, maps the request URL’s to the specified method based on the value provided.
D. noteSummary.jsp
HTML
<%@ page language="java" contentType="text/html; charset=ISO-8859-1"
pageEncoding="ISO-8859-1"%>
<!DOCTYPE html>
<html>
<head>
<meta charset="ISO-8859-1">
<title>GeeksforGeeks - Feedback Summary</title>
</head>
<body>
<h2>Feedback submitted successfully!</h2>
<span>Feedback details: </span>
<span>${note.noteDetail}</span>
</body>
</html>
|
- This is the Jsp page to display the output of the processed input.
- When the controller process the input, we are displaying the output to the user using this Jsp page.
Execution
- After creating all the required java and jsp files, run the project on the server.
- Right on the Project, Run as -> Run on the server.
- Select the server in the localhost to run the application.
- Open the URL: http://localhost:8080/app/ in the browser to get the below screen.

Welcome page – note.jsp
- As we provided different attributes to the textarea , we can see those functionality.
HTML
<form:textarea id="feedBack" path="noteDetail" rows="5" cols="40" title="GFG"
onfocus="color()" onblur="remove()" cssStyle="font-style:italic"/>
|
- As we discussed above, id attribute specifies the ID for the text box.
- path attribute specifies the pathname to which the entered data has to be bind.
- rows attribute specifies the number of rows that can be entered in the text box.
- cols attribute specifies the number of columns that can be entered in the text box.
- title attribute displays the value given – GFG with the cursor on the text box.
- onfocus, onblur is the event attributes that execute the respective functions when the event occurred.
- cssStyle attribute can be used to provide any styles to the entered data in the text box like font color, font style, font family, etc.
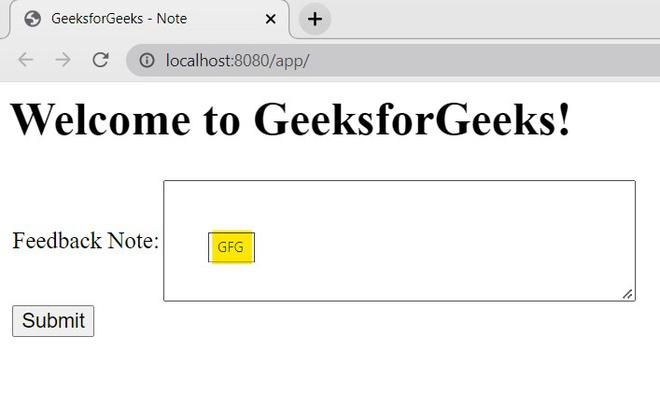
title attribute
- We can see the value GFG on the textarea box when the cursor is placed on the text box as we specified the attribute title=”GFG”.
- Once you click on the text box, the color will change based on the onfocus attribute like below.
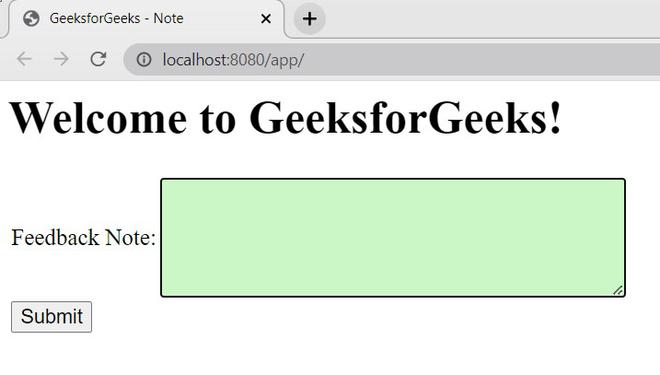
onfocus attribute
- Enter the data in the text box and click on submit.
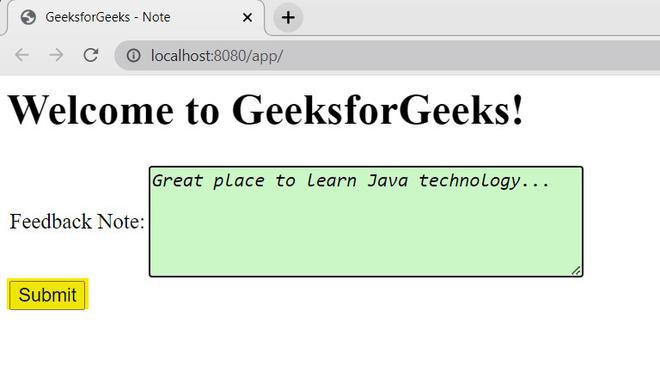
cssStyle attribute
- As we specified the attribute cssStyle = “font-style:italic”, the text entered by the user have the italic font.
- Once the page is submitted, based on the URL mapping, the controller class will execute the submitNote method in it and provides the below output.
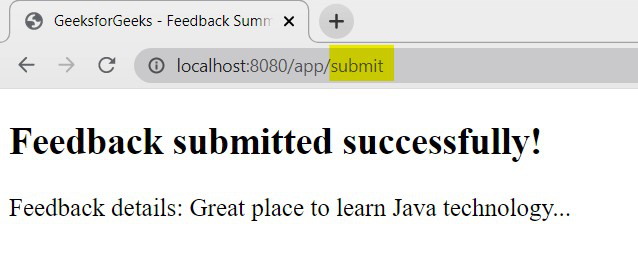
Output – noteSummary.jsp
This way we can use the tag – textarea in forms with the required attributes based on the requirement provided while developing Spring MVC applications.
Like Article
Suggest improvement
Share your thoughts in the comments
Please Login to comment...