In enterprise applications, we use RESTful services to establish the communication between client and server. The general idea is that the client sends the request to the server and the server responds to that request with some response. Generally, we have three different layers in most of the application Web Layer, Business Layer, and Database Layer. The objects in these layers are mostly different from each other. For example, The web layer object is completely different from the same object in the database layer. As database objects may contain fields that are not required in the web layer object such as auto-generated fields, password fields, etc.
What is DTO?
DTO stands for Data Transfer Object, these are the objects that move from one layer to another layer. DTO can be also used to hide the implementation detail of database layer objects. Exposing the Entities to the web layer without handling the response properly can become a security issue. For example, If we have an endpoint that exposes the details of entities class called User. The endpoint handles the GET request. If the response is not handled properly with the GET endpoint one can get all the fields of the User class even the password also, which is not a good practice for writing restful services. To overcome these problems DTO came into the picture, with DTO we can choose which fields we need to expose to the web layer.
ModelMapper is a maven library which is used for the conversion of entities object to DTO and vice-versa.
In this example, we will create a restful application for user services that uses model mapper library conversion of entity to DTO.
Step By Step Implementation
Step 1: Create Spring Boot Project
In this step, we will create a spring boot project. To know how to create a spring boot project please refer to How to Create and Setup Spring Boot Project in Eclipse IDE?
Step 2: Add Dependency
In this step, we will add the dependency to our project. We will add the following dependency.

Step 3: Create Database Schema
We will be using MySQL for our application as a database. We need to create a database schema. Here, we will be using MySQL Workbench to create the database schema. For this Open MySQL Workbench > Schemas > Right-Click > Create Schema.

This will open a popup window, where we need to fill in the name of our schema. Here, we are naming our schema as model_mapper_db.

Once, we add the name of our schema, we need to click on Apply button, it will pop up one more window where we need to click again on Apply button. This will create our schema.

Step 4: Configure Database
In this step, we will configure our database in our spring boot application. We need to write the following properties in our application.properties file.
server.port = 9090
#database configuration
spring.datasource.url=jdbc:mysql://localhost:3306/model_mapper_db
spring.datasource.username=root
spring.datasource.password=root
spring.jpa.properties.hibernate.dialect=org.hibernate.dialect.MySQL57Dialect
#the ddl-auto=update : It will create the entity schema and map it to db automatically
spring.jpa.hibernate.ddl-auto=update
spring.jpa.show-sql=true
After this, we will run our application to see whether our application is configured to a database or not. For this go to Main Class In Spring Boot(Here, ModelMapperApplication.java) Right-Click > Run As > Java Application.

Once, we run our application as Java Application, we can see in the console that our application is started and set up the connection to the database.

Step 5: Create Entity Class
Now, we need to create our entity class. For our application, we will be using the User class as our entity class. It will have the following fields id, name, email, and password.
User.java
Javaimport jakarta.persistence.Column;
import jakarta.persistence.Entity;
import jakarta.persistence.GeneratedValue;
import jakarta.persistence.GenerationType;
import jakarta.persistence.Id;
@Entity
public class User {
@Id
@GeneratedValue(strategy = GenerationType.IDENTITY)
@Column(name="user-id")
private int id;
@Column(name="user-name")
private String name;
@Column(name="user-email")
private String email;
@Column(name="user-password")
private String password;
// NoArgsConstructor
public User() {
super();
}
// Getters & Setters
public int getId() {
return id;
}
public void setId(int id) {
this.id = id;
}
public String getName() {
return name;
}
public void setName(String name) {
this.name = name;
}
public String getEmail() {
return email;
}
public void setEmail(String email) {
this.email = email;
}
public String getPassword() {
return password;
}
public void setPassword(String password) {
this.password = password;
}
}
Once, we have written our entity class. We will run our application, As we have done the database configuration, JPA will create the User table in the database automatically using the annotation we have added to our entity class.

Step 6: Create a User Repository
In this step, we will create an interface and name it as UserRepository and extends this class to the JPA repository. So, we can have CRUD operations easily available.
UserRepository.java
Javaimport org.springframework.data.jpa.repository.JpaRepository;
import com.geeksforgeeks.ModelMapper.data.User;
// In the arguments we need to pass our model class and
// the second argument is the type of id we have used
// in our model class
public interface UserRepository extends JpaRepository<User, Integer> {
}
Step 7: Create User Service
Now, we will create a service interface and name it as UserService. We will add only two methods to it. One to add the user and the other to get the user.
UserService.java
Javaimport com.geeksforgeeks.ModelMapper.data.User;
public interface UserService {
public User createUser(User user);
public User getUser(int userId);
}
After this, we will add the implementation of our user service interface.
UserServiceImpl.java
Javaimport org.springframework.beans.factory.annotation.Autowired;
import org.springframework.stereotype.Service;
import com.geeksforgeeks.ModelMapper.data.User;
import com.geeksforgeeks.ModelMapper.repository.UserRepository;
@Service
public class UserServiceImpl implements UserService {
@Autowired
private UserRepository userRepository;
@Override
public User createUser(User user) {
User userSavedToDB = this.userRepository.save(user);
return userSavedToDB;
}
@Override
public User getUser(int userId) {
User user = this.userRepository.getById(userId);
return user;
}
}
Step 8: Create a Controller
In this step, we will create a user controller for handling and mapping our request.
UserController.java
Javaimport org.springframework.beans.factory.annotation.Autowired;
import org.springframework.web.bind.annotation.*;
import com.geeksforgeeks.ModelMapper.data.User;
import com.geeksforgeeks.ModelMapper.service.UserService;
@RestController
@RequestMapping("/users")
public class UserController {
@Autowired
private UserService userService;
@PostMapping
public User createUser(@RequestBody User user) {
return userService.createUser(user);
}
@GetMapping("/{userId}")
public User getUser(@PathVariable int userId) {
return userService.getUser(userId);
}
}
Step 9: Run the Application
In this step, we will run our application using postman and test our restful services.
1. CREATE A USER:
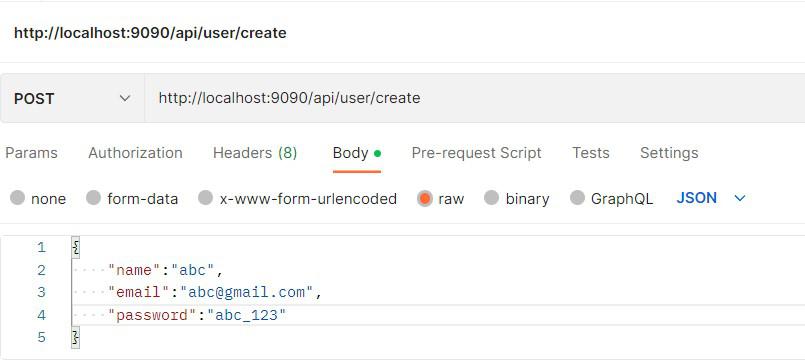
Once, we send our request. We will get the following output.
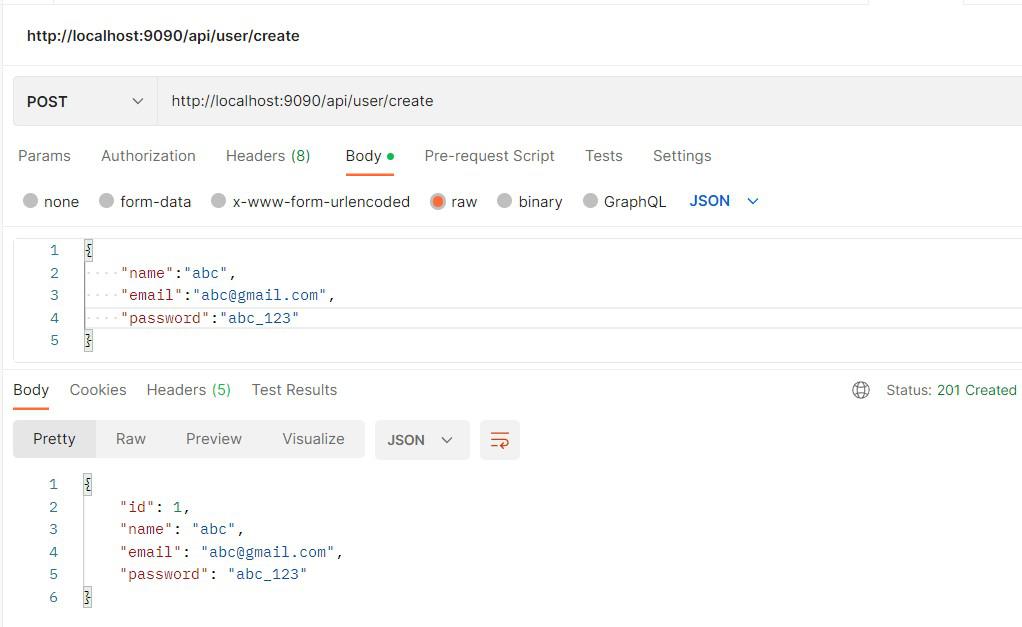
We can also check our database for new user entries.

2. GET A USER:
We will be using the GET endpoint and userid to retrieve users from the database.

As we can see in the above response, we will also receive passwords which is not a good practice to write restful APIs. To overcome this problem, we will use DTO.
Step 10: Create DTO
In this step, we will create UserDTO class that will contain only those fields that are required and necessary for the web layer.
UserDto.java
Javapublic class UserDto {
private String name;
private String email;
// NoArgsConstructor
public UserDto() {
super();
}
// Getters & Setters
public String getName() {
return name;
}
public void setName(String name) {
this.name = name;
}
public String getEmail() {
return email;
}
public void setEmail(String email) {
this.email = email;
}
}
Step 11: Adding Model Mapper Dependency
We need to add the following dependency in our pom.xml file.
<dependency>
        <groupId>org.modelmapper</groupId>
        <artifactId>modelmapper</artifactId>
        <version>3.1.1</version>
</dependency>
Step 12: Modify Classes
Now, to use UserDto, we need to modify our UserService, UserServiceImpl, and UserController class.
UserService.java
Javaimport com.geeksforgeeks.ModelMapper.data.User;
import com.geeksforgeeks.ModelMapper.dto.UserDto;
public interface UserService {
public User createUser(User user);
// updated it with UserDto
public UserDto getUser(int userId);
}
UserServiceImpl.java
Javaimport org.modelmapper.ModelMapper;
import org.springframework.beans.factory.annotation.Autowired;
import org.springframework.stereotype.Service;
import com.geeksforgeeks.ModelMapper.data.User;
import com.geeksforgeeks.ModelMapper.dto.UserDto;
import com.geeksforgeeks.ModelMapper.repository.UserRepository;
@Service
public class UserServiceImpl implements UserService {
@Autowired
private UserRepository userRepository;
@Autowired
private ModelMapper modelMapper;
@Override
public User createUser(User user) {
User userSavedToDB = this.userRepository.save(user);
return userSavedToDB;
}
// update it with UserDto
@Override
public UserDto getUser(int userId) {
User user = this.userRepository.findById(userId).get();
UserDto userDto = this.modelMapper.map(user, UserDto.class);
return userDto;
}
}
UserController.java
Javaimport org.springframework.beans.factory.annotation.Autowired;
import org.springframework.http.HttpStatus;
import org.springframework.http.ResponseEntity;
import org.springframework.web.bind.annotation.GetMapping;
import org.springframework.web.bind.annotation.PathVariable;
import org.springframework.web.bind.annotation.PostMapping;
import org.springframework.web.bind.annotation.RequestBody;
import org.springframework.web.bind.annotation.RequestMapping;
import org.springframework.web.bind.annotation.RestController;
import com.geeksforgeeks.ModelMapper.data.User;
import com.geeksforgeeks.ModelMapper.dto.UserDto;
import com.geeksforgeeks.ModelMapper.service.UserServiceImpl;
@RestController
@RequestMapping("/api/user")
public class UserController {
@Autowired
private UserServiceImpl userServiceImpl;
@PostMapping("/create")
public ResponseEntity<User> createUser(@RequestBody User user){
User userCreated = this.userServiceImpl.createUser(user);
return new ResponseEntity<User>(userCreated, HttpStatus.CREATED);
}
// update it with UserDto
@GetMapping("/get/{id}")
public ResponseEntity<UserDto> getUser(@PathVariable("id") int userId){
UserDto userDto = this.userServiceImpl.getUser(userId);
return new ResponseEntity<UserDto>(userDto, HttpStatus.OK);
}
}
Step 13: Add Model Mapper Bean
In this step, we will add model mapper bean to our main spring boot class.
Javaimport org.modelmapper.ModelMapper;
import org.springframework.boot.SpringApplication;
import org.springframework.boot.autoconfigure.SpringBootApplication;
import org.springframework.context.annotation.Bean;
@SpringBootApplication
public class ModelMapperApplication {
public static void main(String[] args) {
SpringApplication.run(ModelMapperApplication.class, args);
}
@Bean
public ModelMapper getModelMapper() {
return new ModelMapper();
}
}
Step 14: Run the Application
Now, we will again run our application and use the GET endpoint to see the response.

As we can see in the above response, we are getting only the necessary fields required by the web layer. Although, we will create a new User with all the fields but will send only the required fields to the web layer.
Like Article
Suggest improvement
Share your thoughts in the comments
Please Login to comment...