Spring Boot – How Thymeleaf Works?
Last Updated :
09 Jan, 2024
Thymeleaf is a Java library, and template engine used to parse and render the data produced by the application to template files – thus providing transformation. It is just like HTML but is provided with more attributes for working with rendered data. It allows caching of the parsed data/file to increase efficiency while in production. Types of templates it can process are – HTML, JAVASCRIPT, CSS, XML, TEXT, and RAW.
Template engines used with Spring-Boot:
- Thymeleaf
- FreeMarker
- Mustache
- Groovy
- Java Server Pages
How Thymeleaf work with Spring-Boot?
- Thymeleaf follows a De-Coupled Architecture – It is unaware of any web framework.
- In the same way, it is unaware of Spring’s abstraction of the model and thus cannot handle the data that the controller places in the Model.
- When Spring-Boot’s autoconfiguration detects Thymeleaf in the classpath, it creates beans supporting Thymeleaf view for Spring MVC.
- It can work with request attributes of Servlet.
- Therefore, Spring copies the model data into request attributes that the Thymeleaf template can work with.
Simple life-cycle of Thymeleaf template


To use Thymeleaf, add its dependency in the project build.
Maven – pom.xml
<dependency>
 <groupId>org.springframework.boot</groupId>
 <artifactId>spring-boot-starter-thymeleaf</artifactId>
</dependency>
Gradle – build.gradle
compile group: 'org.springframework.boot', name: 'spring-boot-starter-thymeleaf'
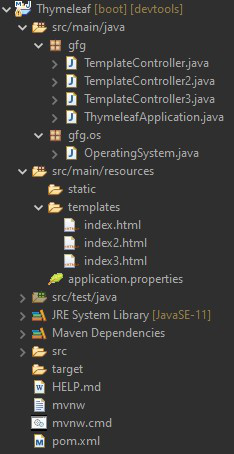
Place the template files in the following directory:
/src/main/resources/templates/
1. Rendering a single model attribute
To render an attribute, use ‘th:text’ attribute in Thymeleaf Template
<p th:text="${attributeKey}"> attributeValue will be placed here </p>
Controller (TemplateController.java) file:
Java
package gfg;
import org.springframework.stereotype.Controller;
import org.springframework.ui.Model;
import org.springframework.web.bind.annotation.GetMapping;
import org.springframework.web.bind.annotation.RequestMapping;
@Controller
@RequestMapping("/")
public class TemplateController {
@GetMapping("/template1")
public String template(Model model) {
String msg = "Welcome to Thymeleaf Template";
model.addAttribute("message", msg);
return "index";
}
}
|
Template (index.html) file:
HTML
<!DOCTYPE html>
<head>
<title>GFG</title>
</head>
<body>
<h1>Welcome to GeeksForGeeks...</h1>
<div id="one">
<h1 th:text="${message}">
<span>message will print here</span>
</h1>
</div>
</body>
</html>
|
Output:

2. Rendering a collection
To render a collection, use ‘th:each’ attributes in the Thymeleaf template
<p th:each="variable:${collectionName}">
   <span th:text=${variable}> items iterated will be placed here </span>
</p>
Note: span tag will be iterated as much as the number of collection items.
Controller (TemplateController2.java) file:
Java
package gfg;
import java.util.ArrayList;
import java.util.List;
import org.springframework.stereotype.Controller;
import org.springframework.ui.Model;
import org.springframework.web.bind.annotation.GetMapping;
import org.springframework.web.bind.annotation.RequestMapping;
@Controller
@RequestMapping("/")
public class TemplateController2 {
@GetMapping("/template2")
public String template(Model model) {
String message = "Top 5 Cloud Service Providers";
List<String> list = new ArrayList<>();
list.add("Amazon Web Services");
list.add("Microsoft Azure");
list.add("Google Cloud");
list.add("Alibaba Cloud");
list.add("IBM Cloud");
model.addAttribute("message", message);
model.addAttribute("cloudProvider", list);
return "index2";
}
}
|
Template (index2.html) file:
HTML
<!DOCTYPE html>
<head>
<title>GFG2</title>
</head>
<body>
<div id="one">
<h2 th:text="${message}">
<span>message will print here</span>
</h2>
</div >
<div id="two" th:each="List:${cloudProvider}">
<ul>
<li>
<span th:text=${List}>items will print here</span>
</li>
</ul>
</div>
</body>
</html>
|
Output:

3. Binding data to object
Pre-requisites:
- Object to which values will be bound must have ‘getter/setter’ methods for each field.
- You can use the ‘Lombok’ library to generate these methods by ‘@Data’ annotation.
Add dependency of Lombok : Maven (pom.xml)
<dependency>
 <groupId>org.projectlombok</groupId>
 <artifactId>lombok</artifactId>
 <optional>true</optional>
</dependency>
Using Thymeleaf, the input data is bound to the object using ‘th:object’ attribute
<form
    method="POST" th:object="${objectName}">
</form>
To map the input to a specific field of object use ‘th:field’ attribute
<input type="text" th:field="*{fieldName}" />
Controller (TemplateController3.java) file:
Java
package gfg;
import org.springframework.stereotype.Controller;
import org.springframework.ui.Model;
import org.springframework.web.bind.annotation.GetMapping;
import org.springframework.web.bind.annotation.ModelAttribute;
import org.springframework.web.bind.annotation.PostMapping;
import org.springframework.web.bind.annotation.RequestMapping;
import gfg.os.OperatingSystem;
@Controller
@RequestMapping("/template3")
public class TemplateController3 {
@GetMapping
public String template(Model model) {
model.addAttribute("ops", new OperatingSystem());
return "index3";
}
@PostMapping
public String template( @ModelAttribute("ops") OperatingSystem os , Model model) {
model.addAttribute("message", os.getOS1()+" "+os.getOS2()+" "+os.getOS3());
return "index";
}
}
|
Class of the object to be bound (OperatingSystem.java) file:
Java
package gfg.os;
import lombok.Data;
@Data
public class OperatingSystem {
public String OS1 ,OS2, OS3;
}
|
Template (index3.html) file:
HTML
<!DOCTYPE html>
<head>
<title>GFG3</title>
</head>
<body>
<h1>Welcome to GeeksForGeeks...</h1>
<form method="POST" th:object="${ops}">
<div><label for="first">First OS</label></div>
<input id="first" type="text" th:field="*{OS1}" />
<div><label for="second">Second OS</label></div>
<input id="second" type="text" th:field="*{OS2}" />
<div><label for="third">Third OS</label></div>
<input id="third" type="text" th:field="*{OS3}" />
<input type="submit" value="Send" />
</form>
</body>
</html>
|
Output:


Note:
- You can use other attributes of Thymeleaf as well.
- The caching of the template is enabled by default.
- You can turn off caching by specifying the following in the ‘application.properties’ file.
spring.thymeleaf.cache=false
Like Article
Suggest improvement
Share your thoughts in the comments
Please Login to comment...