Snowfall Animation in Android
Last Updated :
05 May, 2021
In this article, we are going to create snowfall animation using the android-snowfall library. Here we will be just creating a layout of Snowfall View and will be specifying the background color. The snowfall animation we have created is easy to create since we are using a library. A sample GIF is given below to get an idea about what we are going to do in this article. Note that we are going to implement this project using the Java language.
Step by Step Implementation
Step 1: Create a New Project
To create a new project in Android Studio please refer to How to Create/Start a New Project in Android Studio. Note that select Java as the programming language.
Step 2: Add dependency and JitPack Repository
Navigate to the Gradle Scripts > build.gradle(Module:app) and add the below dependency in the dependencies section.
compile ‘com.github.jetradarmobile:android-snowfall:1.2.1’
Add the JitPack repository to your build file. Add it to your root build.gradle at the end of repositories inside the allprojects{ } section.
allprojects {
repositories {
…
maven { url “https://jitpack.io” }
}
}
After adding this dependency sync your project and now we will move towards its implementation.
Step 3: Working with the activity_main.xml file
Navigate to the app > res > layout > activity_main.xml and add the below code to that file. Below is the code for the activity_main.xml file.
XML
<?xml version="1.0" encoding="utf-8"?>
<LinearLayout
android:layout_width="match_parent"
android:layout_height="match_parent"
android:gravity="center"
android:orientation="vertical"
tools:context=".MainActivity">
<com.jetradarmobile.snowfall.SnowfallView
android:layout_width="match_parent"
android:layout_height="match_parent"
android:background="@color/black"
app:snowflakeAlphaMax="255"
app:snowflakeAlphaMin="150"
app:snowflakeAngleMax="5"
app:snowflakeSizeMax="10dp"
app:snowflakeSizeMin="2dp"
app:snowflakeSpeedMax="12"
app:snowflakeSpeedMin="4"
app:snowflakesAlreadyFalling="false"
app:snowflakesFadingEnabled="true" />
</LinearLayout>
|
Step 4: Working with the MainActivity.java file
Go to the MainActivity.java file and refer to the following code. For this project, we have done nothing in the MainActivity.java file.
Java
import android.os.Bundle;
import androidx.appcompat.app.AppCompatActivity;
public class MainActivity extends AppCompatActivity {
@Override
protected void onCreate(Bundle savedInstanceState) {
super.onCreate(savedInstanceState);
setContentView(R.layout.activity_main);
}
}
|
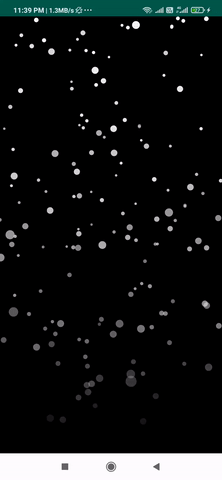
Output:
Share your thoughts in the comments
Please Login to comment...