React Native is used to creating apps for Both Android and iOS platforms. It allows you to use a single codebase for both platforms. One of the biggest advantages React Native provides is that it’s easy to learn because you don’t need to learn a whole new programming language for it. Because it uses well-known javascript under the hood. So developers who are already familiar with javascript can easily shift to React Native to build mobile apps.
But the thing is that React Native also supports typescript programming language. But even today’s time, many developers still use javascript in React Native to build apps. Before going into the question of whether should you use typescript with React Native or not, let us take a look at typescript first.
TypeScript: TypeScript is a programming language developed by Microsoft to fill what lacks in JavaScript.
JavaScript is a loosely typed language. It means that you don’t have to specify what type of information you will be stored in a variable in advance. JavaScript automatically types a variable based on what kind of information you assign to it.
This way JavaScript’s type system gives you more flexibility but it lacks the advantages of a strongly typed system. You don’t get any errors even if you are trying to assign the wrong type of information to objects. This is where Typescript comes into the picture.
Typescript simply adds types to javascript. Under the hood, it is also javascript. Adding types means to declare the type of a value or function or anything that requires type. This means that, by declaring the true expected type, the system can determine if the value we are passing to a function is valid or not. This allows us to find any possible errors at compile time rather than run time.
TypeScript adds additional syntax to JavaScript to support a strong integration with your editor. This way your editor can catch errors early.
Features of TypeScript
- TypeScript is basically JavaScript under the hood. Typescript adopts the basic building blocks of your program from JavaScript. Therefore, you only need to know JavaScript to use TypeScript. All TypeScript code is converted into its JavaScript equivalent for the execution.
- TypeScript supports all JavaScript libraries. You can use all your existing JavaScript frameworks, tools, etc.
- JavaScript is also a TypeScript. This means that any valid .js file can be converted to .ts file and compiled with other TypeScript files.
- TypeScript is portable across all browsers and operating systems. It can run on any environment that JavaScript runs on. TypeScript doesn’t require any specific environment to execute.
Syntax: A syntax in javascript looks like this:
let varible_name = "GeeksforGeeks";
A syntax in typescript looks like this:
let varible_name: string = "GeeksforGeeks";
Here in typescript, we also provide the type for the variable.
Advantages of using TypeScript in React Native:
- Self Documentation: When you start writing types of variables and functions in your code, you are documenting what values you expect in those components. It becomes easy for other developers to understand your code better.
- Refactoring becomes easy: Whenever you make any mistake like providing wrong values to variables or passing wrong arguments to functions, typescript will give you an error so that you can correct your mistakes before running the app.
- Easy Debugging: Debugging the code becomes a lot easy with typescript because you have all the types documented in the code itself. It also helps other developers working on the same code.
- Valid Output: If you have written a valid typescript, then you can confidently say that it will generate a Valid JavaScript output. You don’t get the same level of confidence with javascript.
- Text editor or IDE will also help you: TypeScript can integrate with all editors and IDE. This allows your editor to use TypeScript definitions and autocomplete the code and let you know what to pass to components.
- It becomes easy to think and grow: By defining types for the variable and functions, you get a structure of your entire app. It helps you to think better in terms of scopes and the context of the whole app. You can easily grow your app.
- Can be adopted easily: Typescript is not a whole new language. If you are already familiar with javascript then you can easily learn typescript.
No programming language is perfect. Typescript also has some disadvantages.
Disadvantages of using TypeScript in React Native:
- More dependencies need to be managed : You have to add types for each object you create and you have to keep these types in mind while assigning values to it.
- New syntax: TypeScript is not a whole new programming language but still it comes with some new syntax. You have to adapt it and it takes some time to get used to it.
- Time consuming: You get many benefits by writing types for objects but it also very time consuming compare to plain JavaScript.
- Lack of Knowledge: JavaScript is used more than Typescript. So there are fewer people who have knowledge of it. So they need to spend some time learning it to work with your project code.
With all these advantages and disadvantages, Typescript still provides great value to your project. You will save many hours of debugging time by using TypeScript. Therefore, you should definitely use TypeScript in your React Native Project.
How to use typescript in React Native:
Step 1: Open your Terminal and run the below command. It will install Expo CLI globally in your system.
npm install -g expo-cli
Step 2: Now, create a new React Native Project by running the below command.
expo init "Your_Project_Name"
Step 3: You’ll be asked to choose a template. Select blank(TypeScript) or tabs(TypeScript) template instead of the first one.

By choosing this template, a new React Native project with typescript integrated will be generated for you.
Project Structure: It will look like the following.
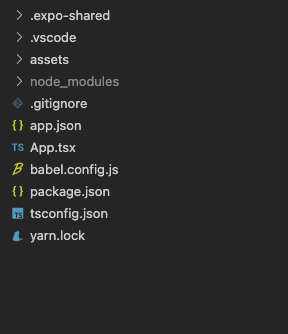
Project Structure
In the following example, we will be creating a custom component called GeeksforGeeks.tsx which we will render in the main App.tsx file. We will pass an object to this custom component and this component will also contain a type definition for that object.
Create a new file called GeeksforGeeks.tsx. This file is a custom component that we will render in the main App.tsx file.
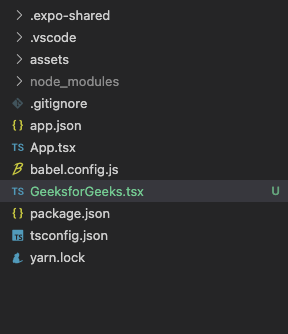
GeeksforGeeks.tsx file
Example: Below example will illustrate the use of TypeScript with React Native
Step 1: Open GeeksforGeeks.tsx file write below code in that file. This component will receive 1 object as a prop from the App.tsx file. This object will have 2 properties, id, and title. Both will be of type string and we have to define these types in this component because we are using TypeScript. Then we will simply display this id and title to the screen with some styling.
This is basically JavaScript, we only add a few lines of code for the type definition. You will write this code in the .tsx file.
As you can see in the code, we provide a type definition for GeeksforGeeksProps. You need to use export type syntax to define all the types.
GeeksforGeeks.tsx
import { StyleSheet, Text, View } from 'react-native';
import React from 'react';
export type GeeksforGeeksProps = {
text: {
id: string;
title: string;
}
}
const GeeksforGeeks = (props: GeeksforGeeksProps) => {
return (
<View style={styles.container}>
<Text style={styles.id}>
{props.text.id}</Text>
<Text style={styles.title}>
{props.text.title}</Text>
</View>
)
}
export default GeeksforGeeks
const styles = StyleSheet.create({
container: {
alignItems: "center",
justifyContent: "center",
backgroundColor: "#3B5323",
height: 300,
width: 300
},
id: {
fontSize: 40,
fontWeight: "bold",
color: "#fff"
},
title: {
fontSize: 40,
fontWeight: "500",
color: "#fff"
}
})
|
Step 2: Open the App.tsx file and write the below code in that file.
App.tsx is the main file that renders first when you run your app. In this file, we will create a constantly called text. We will pass this text in our GeeksforGeeks component as a prop and render it on the main screen.
This is also basically JavaScript, we only add a few lines of code for the type definition. You will write this code in the .tsx file.
App.tsx
import { StyleSheet, Text, View } from 'react-native';
import GeeksforGeeks from './GeeksforGeeks';
export default function App() {
const text = {
id: "1",
title: "GeeksforGeeks"
}
return (
<View style={styles.container}>
<GeeksforGeeks text={text} />
</View>
);
}
const styles = StyleSheet.create({
container: {
flex: 1,
backgroundColor: '#fff',
alignItems: 'center',
justifyContent: 'center',
},
});
|
id and title both have string types. If you don’t follow this type of rule, the editor will give you an error. For example, if you provide 1 to id instead of “1”, your editor will tell you that “type number is not assignable to type string”.
This is how TypeScript will help you to solve the errors before the execution of your code. If you don’t have any errors in your code then you will get a successful output like below.
Output:

Share your thoughts in the comments
Please Login to comment...