As Android developers, we create Android apps and rely on a variety of third-party libraries (SDK tools) because we can’t do everything ourselves. It’s possible that you’ll have to use Google Maps or other Google Play services. Because the majority of these services are paid, securing the API keys of these libraries in our application’s code becomes critical. Some of you could have used XML or Gradle to secure your API keys, but reverse engineering might readily reveal them. So, in this blog, you’ll discover how to use the Android Native Development Kit to secure API keys. We’ve organized the entire article into the following topics to make it easier to understand:
- Proposed Solution to the Current Issue
- What is the best way to achieve this with Android? (in three different ways)
- Final Thoughts
Even if you utilize the Android NDK technique to secure the API keys, you can still get them through reverse engineering, but the point is that we’re merely adding extra layers to secure the API keys since something is better than nothing, and we have everything.
The Present Issue
We employ a variety of third-party libraries when developing Android applications to speed up the development process. We just call some functions in these libraries based on our requirements, and we are unconcerned about the code of these functions. However, in order to call these functions, we’ll require API keys that are unique to each user. Some of these libraries are paid, and if your API key is stolen, you could face hefty payment costs and a slew of other issues. We used to place our API keys in strings.xml or gradle files when we first started learning Android development.
<resources>
    <string name="your_app_name">SomeSecureAPI</string>
    <string name="MyAPIKey">YOUR_AWESOME_KEY</string>
</resources>
The difficulty with this strategy is that anyone can reverse engineer the API key. Another method that was used was the gradle file method. In the gradle.properties file, we add the API key as follows:
# the gradle.properties file

# Your API Key
someAPIKey = "YOUR_API_KEY"
The API key should then be imported as a buildConfigField in the build.gradle file.
buildTypes {
    debug {
        buildConfigField 'String', "someAPIKey", someAPIKey
        resValue 'string', "YOUR_API_KEY", someAPIKey
    }
}
However, by reverse engineering your code, anyone can obtain the API key. As a result, neither technique was successful in securing the API keys. We need a concrete approach that may be used so that no one can access the needed API key even after reverse-engineering the code. Let’s work together to find a solution.
Solution Suggestion
In the last section, we discussed the issue. So, what should we do to ensure that no one can obtain the API key even after reverse engineering? The use of native language in our application code is one answer to the above difficulty. The Android Native Development Kit (NDK) converts code written in native languages such as C or C++ to a.so file. The advantage of this is that it contains binary numbers, i.e., 0s and 1s. So, even after reverse engineering, you’ll end up with 0s and 1s, and it’ll be impossible to figure out what’s written in 0s and 1s. There are certainly methods for obtaining code from 0s and 1s, but as I previously stated, we are simply adding some more security layers to our code.
What is the best way to achieve this with Android? (in three different ways)
With the help of the Android Native Development Kit, we can support native languages in Android (NDK). JNI (Java Native Interface) is also available on Android. JNI specifies a way for bytecode created from Java or Kotlin code to interface with native code, such as C or C++ code. As a result, we can secure API keys using the Android NDK. We have three options for securing our API keys, depending on the version of Android Studio we’re using:
- Using the Native C++ template is a great way to get started.
- Making a project with CMake
- Using the ndk-build command

Image #1: The android studio plugin
- LLBD: Android Studio uses this to debug the native code in your project.
- Native Development Kit (NDK): The Native Development Kit (NDK) is used to program in C and C++, which are native languages for Android.
- CMake is an open-source system that manages the build process regardless of the operating system or compiler.
- Now that we’ve finished downloading the tools, let’s move on to the methods for safeguarding API keys.
Using the Native C++ template is a great way to get started
We now have support for native code, i.e. C and C++, in the most recent versions of Android Studio. To include Native C++ in your project, follow the steps below:
Step #1:
In Android Studio, create a new project using the Native C++ template like this:

Image #2: Selecting a template
Step #2:
Fill up the project’s details and click Next.
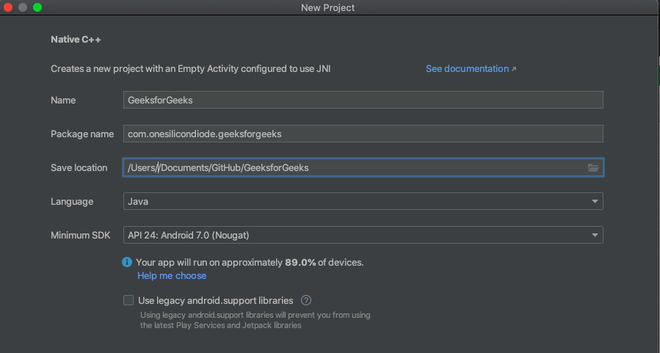
Image #3: Choosing things
Step #3:
You’ll notice that the native-lib.cpp file and the CMakeLists.txt file have been added to your project by default in the cpp directory.
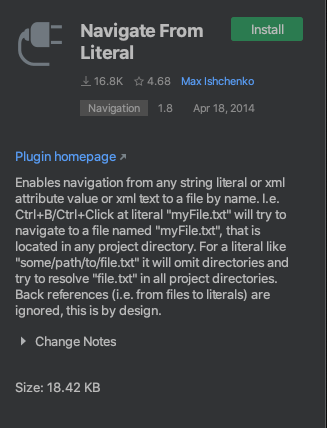
Image #4: Texting
The native-lib.cpp file is where your API keys are stored. You can add your API keys to the file in the following format:
#include <jni.h>
#include <string>
extern "C" JNIEXPORT jstring JNICALL
Java_com_mindorks_myapplication_APIKeyLibrary_getAPIKey(JNIEnv* env, jobject /* this */) {
    std::string api_key = "YOUR_AWESOME_API_KEY_GOES_HERE";
    return env->NewStringUTF(api_key.c_str());
}
The following is a description of the code in question:
You must use the combination of PackageName ActivityName MethodName in this case. In the aforementioned example, the package name is com.geeksforgeeks.application, the file name is APIKeyLibrary, and the method used to acquire the API keys from the native code is getAPIKey. You can return the API key directly, however, most people encrypt the API key using some sort of encryption mechanism. The UTF-8 encoding is done via the NewStringUTF() function.
initialize {
        mySystem.loadLibrary("native-lib")
}
Step #4:
Create a Kotlin external function with the same name as the native function.
external fun getTheAPI(): String
Step #5:
Finally, you can obtain the API key by dialing the following number:
KeyLib.getTheAPI()
If you’re using a previous version of Android Studio that doesn’t support the Native C++ template, you’ll need to upgrade. After that, you may use CMake. The difference between these two ways is that with CMake, you must manually add the files, whereas, with the previous approach, everything is automatically added.
Making a Project with CMake
In addition to using the Native C++ template, we can utilize CMake to secure the API keys, which means we can manually add the files to our project.
CMake is a tool that allows you to control the software compilation process using simple platform and compiler-independent configuration files, as well as generate native makefiles and workspaces for usage in your preferred compiler environment.
The steps for securing API keys using CMake are as follows:
Download and install the essential tools listed in the blog’s prerequisites section. Create a cpp directory in the app/src/main directory. Create a native file in the cpp directory where you wish to keep your API keys. Create a file called api-keys.cpp and paste the following code in it
C++
#include <jni.h>
#include <string>
extern "C" JNIEXPORT jstring CALLJNI
Java_com_geeksforgeeks_application_APIKeyLibrary_getAPIKey(JNIEnv* env, jobject ) {
std::string api_key = "YOUR_KEY_API";
return env->NewStringUTF(api_key.c_str());
}
|
Create a text file named CMakeLists.txt in your app/ directory. It’s a build script for CMake. Fill in the blanks with the following information:
# For more information about using CMake with Android Studio, read the
# documentation: https://d.android.com/studio/projects/add-native-code.html

# Sets the minimum version of CMake required to build the native library.

cmake_minimum_required(VERSION 3.4.1)

# Creates and names a library, sets it as either STATIC
# or SHARED, and provides the relative paths to its source code.
# You can define multiple libraries, and CMake builds them for you.
# Gradle automatically packages shared libraries with your APK.

add_library( # Sets the name of the library.
api-keys

# Sets the library as a shared library.
        SHARED

# Provides a relative path to your source file(s).
src/main/cpp/api-keys.cpp )

# Searches for a specified prebuilt library and stores the path as a
# variable. Because CMake includes system libraries in the search path by
# default, you only need to specify the name of the public NDK library
# you want to add. CMake verifies that the library exists before
# completing its build.

find_library( # Sets the name of the path variable.
log-lib

# Specifies the name of the NDK library that
# you want CMake to locate.
        log )

# Specifies libraries CMake should link to your target library. You
# can link multiple libraries, such as libraries you define in this
# build script, prebuilt third-party libraries, or system libraries.

target_link_libraries( # Specifies the target library.
native-lib

# Links the target library to the log library
# included in the NDK.
        ${log-lib}
The location of your CMakeLists file must now be specified in the build.gradle file. So, in the build.gradle file, add the following code:
android {
    defaultConfig {
    }
    buildTypes {
    }
    externalNativeBuild {
        cmake {
            path 'LIST.txt'
        }
    }
}
You may now access the API keys from your Activity or file by repeating the steps (Steps 5, 6, and 7) from the prior way, namely the Native C++ template approach. If your version of Android Studio doesn’t support CMake, you can also utilize the NDK to encrypt your API keys. You can use the ndk-build procedure here. Let’s have a look at how to accomplish this.
Using the ndk-build command
Android Studio uses the ndk-build command to compile the native code in the project. You will have an Android.mk build file, which will be used by ndk-build. The Android.mk file can be found in the jni/ folder. It tells the build system about your sources and shared libraries. The Android.mk file’s primary function is to declare project-wide settings not covered by the build system, Application.mk, or environment variables. The Android.mk file’s syntax also allows you to organize your sources into modules.
LOCAL_PATH := $(call dir_mine)

include $(CLEAR_VARS)

LOCAL_MODULE    := api-keys
LOCAL_SRC_FILES := api-keys.c

include $(BUILD_SHARED_LIBRARY)
Make a directory called jni in the app/src/main directory. Our.mk files and the native code file will be stored here. Create a file named Android.mk in the jni directory you created in the previous step, and add the following lines of code to it: The source file’s location is indicated by the LOCAL PATH variable. The build system provides a macro function called my-dir that returns the current directory.
- CLEAR VARS clears various LOCAL XXX variables for you, such as LOCAL MODULE, LOCAL SRC FILES, and so on. LOCAL PATH is not cleared.
- The name of the module you want to build is stored in the LOCAL MODULE variable. The module name must be unique, and no spaces should be used in the name.
- A list of C or C++ files found in the module is stored in the LOCAL SRC FILES variable.
- The variable BUILD SHARED LIBRARY is used to connect everything.
In the jni directory, make a new file called Application.mk and paste the following code in it:
APP_ABI := all
The project-wide options for the ndk-build are specified in the Application.mk file. The variable APP ABI is used to specify the ABIs for which the build system should generate code. The build system builds code for all non-deprecated ABIs by default. Last but not least, put your native code file in the jni directory. So, create a file called api-keys.c in the jni directory and paste the following code into it:
C++
#include <jni.h>
JNIEXPORT jstring JNICALL
Java_com_mindorks_myapplication_APIKeyLibrary_getAPIKey(JNIEnv *env, jobject instance) {
return (*env)-> NewStringUTF(env, "YOUR_KEY");
}
|
Our next goal is to specify the location to our Android.mk file in the build.gradle file after adding the essential files to your jni directory.
android {
    defaultConfig {
    }
    buildTypes {
    }
    externalNativeBuild {
        ndkBuild {
            path 'src/main/jni/Android.mk'
        }
    }
}
Conclusion
We learned how to use the Android Native Development Kit to encrypt our API keys in this article. We observed three approaches for doing so in our project: the ndk-build technique, the CMake method, and the easiest method, which is to use the native C++ template.
Like Article
Suggest improvement
Share your thoughts in the comments
Please Login to comment...