Scrapy is a well-organized framework, used for large-scale web scraping. Using selectors, like XPath or CSS expressions, one can scrape data seamlessly. It allows systematic crawling, and scraping the data, and storing the content in different file formats. Scrapy comes equipped with a shell, that has different uses. In this article, we will learn about Scrapy Shell.
Scrapy Shell
Scrapy, comes along with an interactive shell that allows to run simple commands, scrape data without using spider code, and allows test the written expressions. Using XPath or CSS expressions, one can view the scraped data, by passing the URL, of the web page desired. To install Scrapy, use the following command at the terminal:
pip install Scrapy
Configure the Shell
Once we install Scrapy, using the pip command, we can execute the shell, on the standard Python terminal, in any IDE by writing the command:
scrapy shell
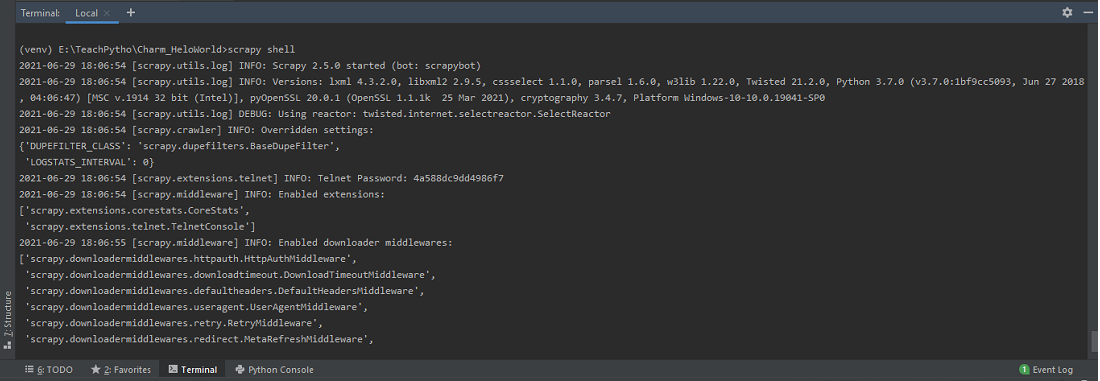
The Scrapy shell, by default, in PyCharm IDE Terminal , after installing Scrapy library
Alternatively, one can use IPython, a command shell, for a variety of programming languages. It is a rich option that offers elegant media, shell syntax, colored output, historical information, and many more features. It is extra beneficial if one is working on the UNIX operating system. Every Scrapy project has a ‘scrapy.cfg’ file, which is a configuration file. We can define project settings here. Once a scrapy project is created, using the ‘startproject ‘ command, one can set the shell value, to ‘ipython’. Create a Scrapy project using the ‘startproject’ command as:
startproject Project_name

The scrapy.cfg configuration file as present in a Scrapy project
Scrapy.cfg file is present in your Scrapy project created. To use ipython, set the ‘shell’ value to ‘ipython’, in scrapy.cfg as shown below:
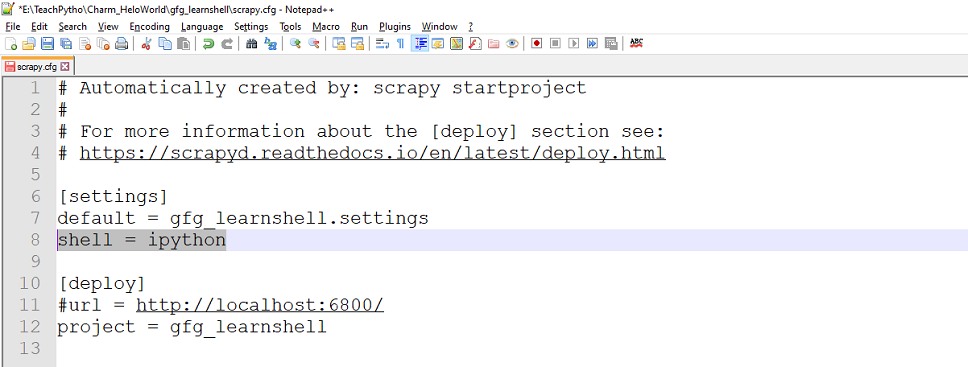
Set value of ‘shell’ to ‘ipython’ to use IPython Shell
Apart from IPython, one can also configure the ‘bpython’ shell, which is another exquisite interface interpreter, for Python interpreters.
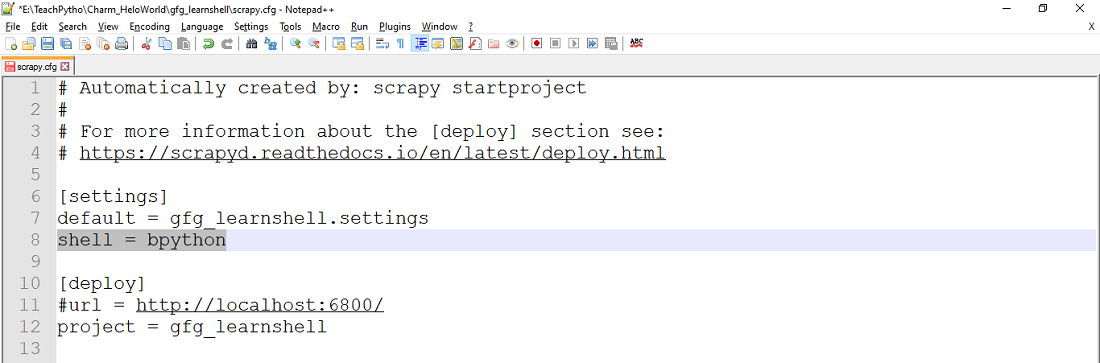
Set value of ‘shell’ to ‘bpython’ to use BPython Shell
One can also set the environment variable, SCRAPY_PYTHON_SHELL to ‘ipython’ or ‘bpython’. In this article, we are using the standard Python terminal, for studying the Shell further.
Launch the Shell
To launch the shell, one can use the following command, at the terminal:
scrapy shell
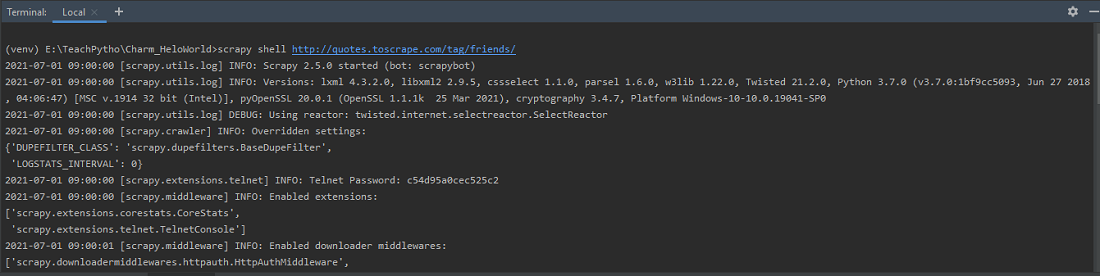
After executing the command, we can see the details as shown below:
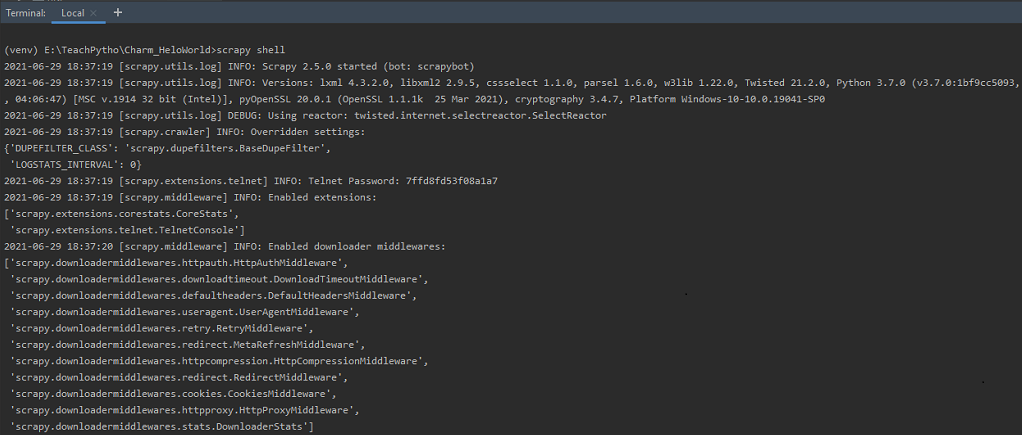
Executing the command ‘scrapy shell’ at the terminal
If we just execute the command, ‘scrapy shell’ at the terminal, then it starts, the Telnet console, for examining and controlling the running Scrapy process. Telnet console is enabled by default and is a built-in Scrapy extension. It is mainly a regular Python shell, running within the Scrapy process. By default, it listens to port 6023. It displays information about enabled middlewares, extensions, etc. It also displays available Scrapy objects, and, their details. Usually, we launch a shell, by passing the URL of the webpage, to be scraped as follows:
Syntax: scrapy shell <url_to_be_scraped>
Example:
scrapy shell http://quotes.toscrape.com/tag/friends/
Launch shell with URL ‘http://quotes.toscrape.com/tag/friendship/’
The shell is active, and the response fetched from the URL, is as shown below:

Spider is opened for URL and response is fetched
After executing the above command, we get statistics, about Telnet console, Scrapy objects etc. Mainly, since we pass an URL, the spider object is opened, and, the response code is displayed. If the request was a success, then an HTTP 200 code, is seen in the output.
Shortcuts available on the Shell
Once we learn to launch the shell, we can mainly use it for testing scraping code. Before writing any Python spider code, one should test the webpage, for scraping, using the shell. The Scrapy shell has some shortcuts available. Once we launch the shell, they are available. Let us go through them one by one:
shelp(): The shelp() command, displays the list of Scrapy Objects, and, useful shortcuts. One can see, that the request object represents the GET request sent to the link http://quotes.toscrape.com/tag/friends/. Also, the response object, contains a 200 HTTP code, indicating the request was a success. Apart from that, it mentions the location of Crawler and Spider object.
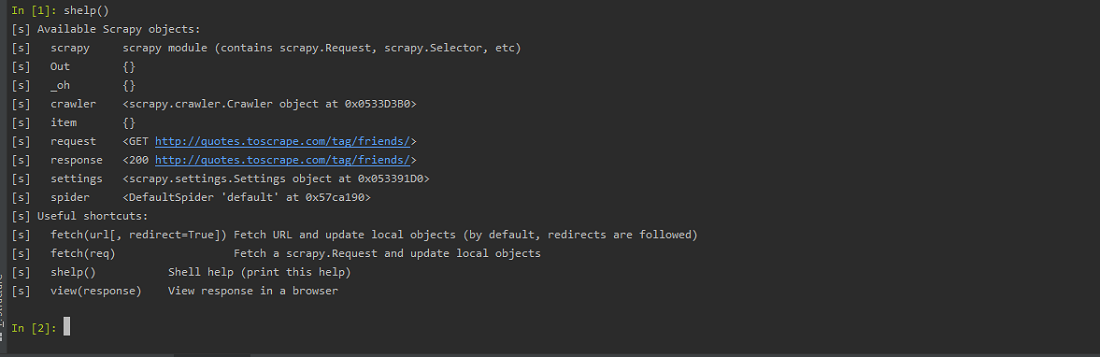
Using ‘shelp’ shortcut
fetch(URL): The ‘URL’ is the link to the webpage, we need to scrape. The fetch shortcut accepts an URL, the webpage to be scraped. It returns the spider information, and, whether the response was a success, or, a failure. In the example below, we have a valid URL, and an invalid one. Depending on the nature of the request, the fetch displays an error or success code.
fetch('http://quotes.toscrape.com/tag/friends/')
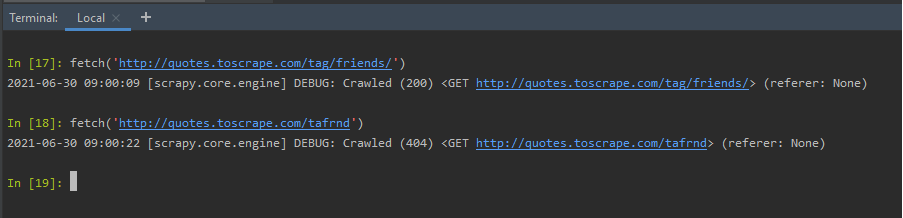
Using fetch(URL) shortcut
fetch(request): We can create a request object, and, pass it to the fetch method. To do so, create an object of scrapy. Request class mention the HTTP method desired, URL of the webpage, headers if any. We want to scrape the URL ‘http://quotes.toscrape.com/tag/friends/’, so, we prepare the request object as:
fetch(request_object)
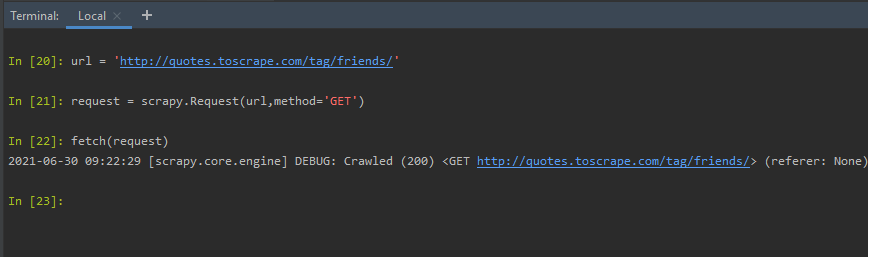
Using fetch(requestObject) shortcut
view(response): The view shortcut, opens the webpage, in the default browser. The webpage is the one that was sent as a request object, or, URL in the fetch method. Hence, when we type view(response), after the above fetch(request), the webpage gets opened in the default browser.
view(response)
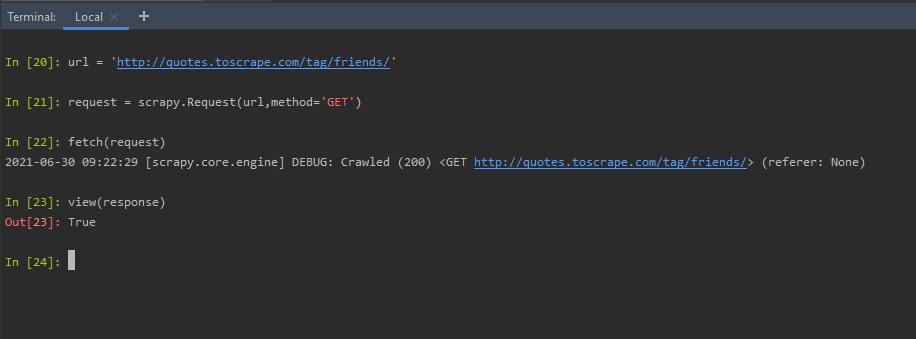
Using view(response) shortcut
The webpage is a temporary file, created on the local machine. It can be seen in the browser as follows:
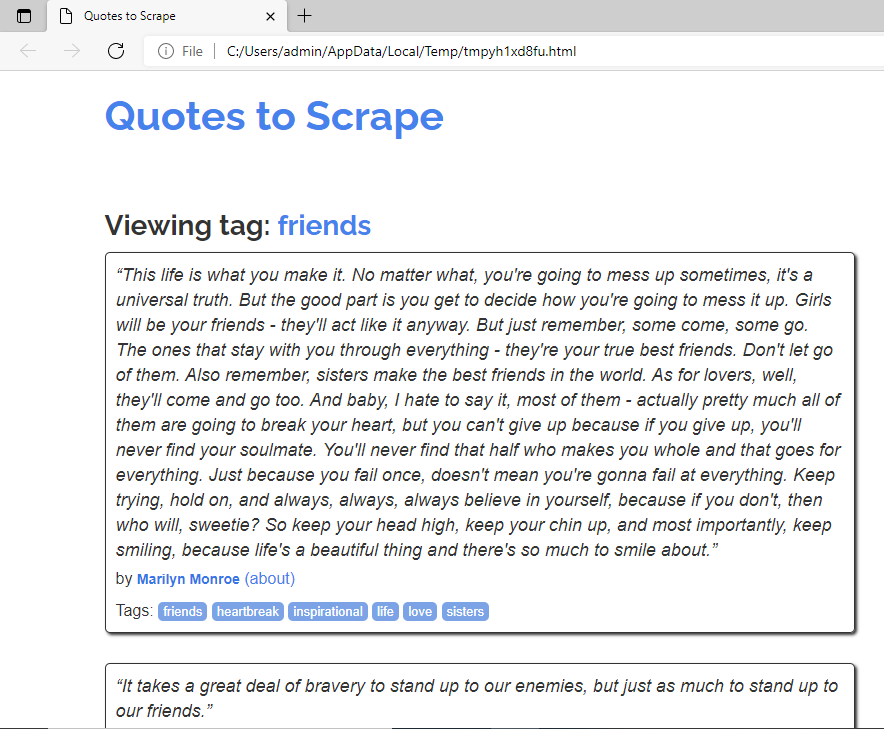
Webpage opened with view(response)
Scrapy Objects on the Shell
After using the fetch shortcut, with an URL or a request object, we can check the Scrapy objects available. Let us see the Scrapy objects available –
Crawler: Once the fetch method is executed, we can learn about the current Crawler object. The Crawler object provides access to Scrapy core components. The crawler object is usually instantiated with the Spider, and, Settings object. The crawler crawls a webpage, with the help of a spider object, created based on the URL.
crawler
Request; After fetch() method, we get details of the URL, that was sent as a request. It tells us, if the request method used, was a GET or POST, or any other along with the URL.
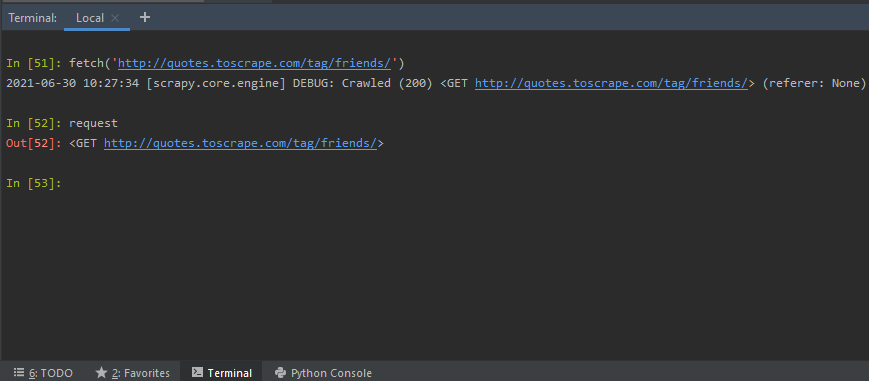
Using Request scrapy object
Response: After executing the fetch(), we can check the details of the response received. One can test the scraping code, to be used in spider code, using the response object. The scraping code is written using selectors, with XPath or CSS expressions.
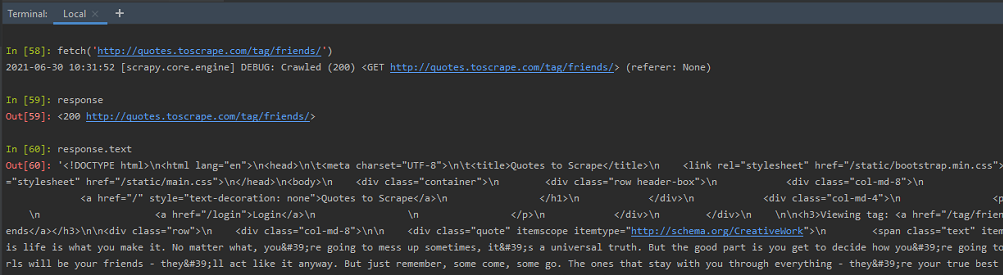
Using Response scrapy object
As shown above, we can get the HTML code, of the entire page, by writing response.text, at the shell. Let us see how we can test scraping code, using the response object, with XPath or CSS expressions. Scrapy allows the use of Selectors, to scrape certain information required from web pages. These selectors, navigate to the HTML tags, and, retrieve data from them.
Settings: The Scrapy settings object, allows us to customize numerous behavior of Scrapy components, like the Scrapy core, the extensions, spiders, and many more. We have the option, of setting values, related to FTP Password, HTTPCACHE, FEED exports, TELNETCONSOLE, and many more.
Setting
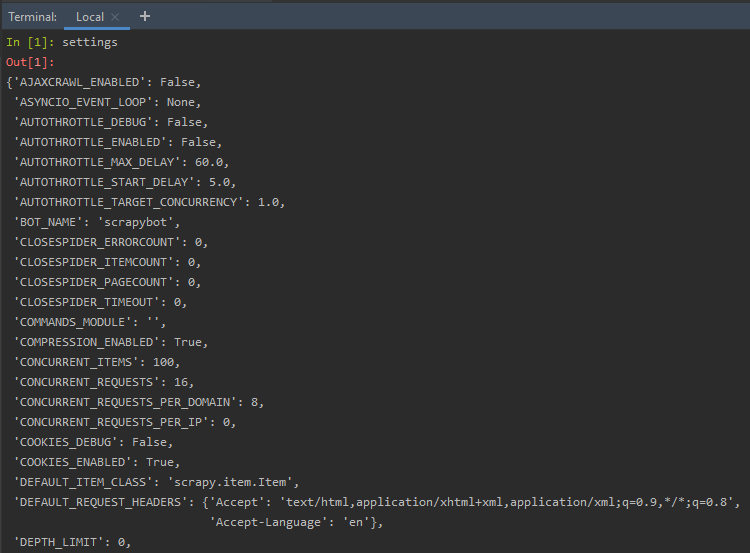
Using Settings Scrapy object
Invoke Shell from Scrapy Spiders
At times, it is necessary to analyze the response object in the spider code created. This can be done by creating a spider, and, referring to the Shell module, from the code. To learn about the same, follow the steps:
Step 1: Create a Scrapy Spider Project – The Spider Project can be created using ‘startproject’ at the terminal as
scrapy startproject gfg_learnshell
This command will create a Scrapy project or folder called ‘gfg_learnshell’, containing all required Scrapy configuration files. It also creates a Spider folder, where all the code related to spiders can be written. The ‘startproject’ is as shown below:
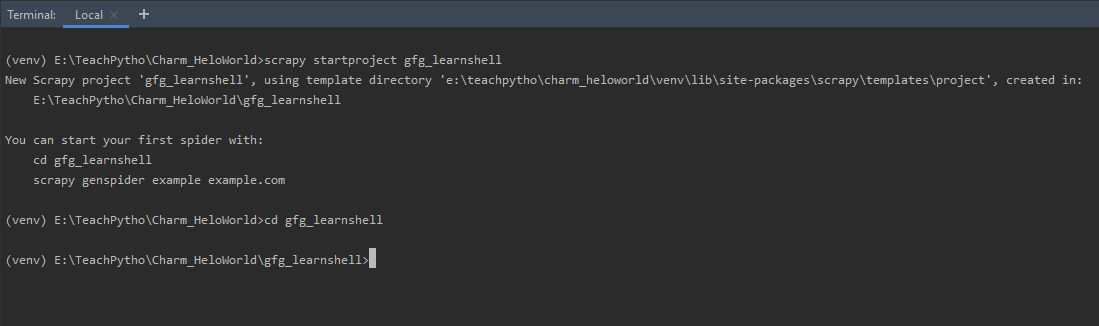
Create a Scrapy project using startproject command
Step 2: Create a Spider Python file, then change the directory to the newly created folder ‘gfg_learnshell’. Create a Spider Python file, mentioning the URL, to be scrapped, by using the ‘genspider’ command as:
scrapy genspider spider_name url_to_be_scraped
In this example, we will scrape the webpage ‘http://quotes.toscrape.com/tag/friends/’. Hence, we will execute the command, at the terminal as:
scrapy genspider learnshell quotes.toscrape.com/tag/friends
The above command will create a Python file, called ‘learnshell.py’, in the spiders folder. This is our spider, where the scraping code is written. The spider code, by default, looks like:
Python3
import scrapy
class LearnshellSpider(scrapy.Spider):
name = 'learnshell'
allowed_domains = ['quotes.toscrape.com/tag/friends/']
def parse(self, response):
pass
|
We will invoke the Scrapy Shell from the code, and, inspect a response. Now, the spider code is as shown below:
Python3
import scrapy
class LearnshellSpider(scrapy.Spider):
name = 'learnshell'
allowed_domains = ['quotes.toscrape.com/tag/friends']
def parse(self, response):
if "quotes" in response.url:
from scrapy.shell import inspect_response
inspect_response(response, self)
quotes = response.xpath('//*[@class="author"]/text()').extract()
yield{'Authors': quotes}
|
Explanation:
- The spider name, allowed domain and URL, are assigned when we run the ‘genspider’ command.
- The default parse method is a callback method, called when the spider crawls. It returns a response object.
- We are invoking the Scrapy shell, by using the scrapy.shell, module. It has an ‘inspect_response’ method, that allows us to inspect any Selector expression in the shell. Hence, when we run the spider code using ‘crawl’ syntax, it opens the shell window, in between the executions, and allows us to inspect any response. The crawl syntax is ‘scrapy crawl spider_name’.
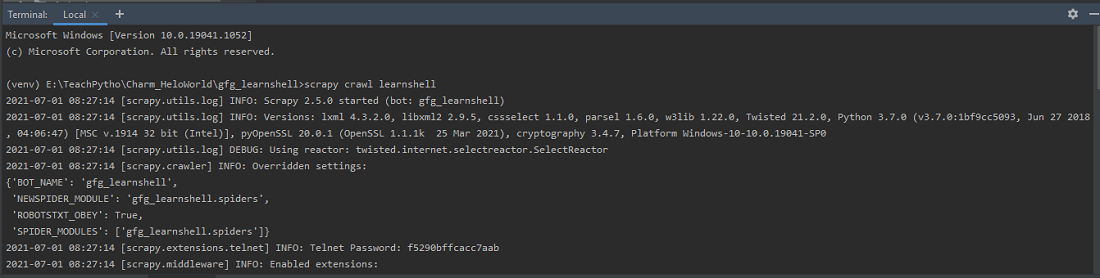
Run spider using the ‘crawl’ command
Step 3: So, in between the execution, if we type any syntax at the shell, for example, check the length of the response body, by using the command:
len(response.text)
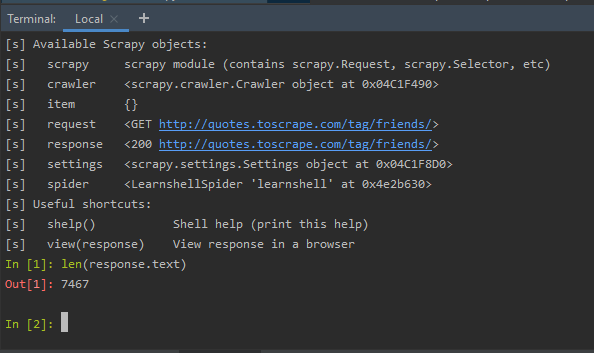
Inspect the response object in between the spider code execution
The above inspection is possible, as we have used the inspect_response method in the Spider python code. Once we type exit(), we will exit the shell, and the rest of spider code execution is done. It is as shown below –
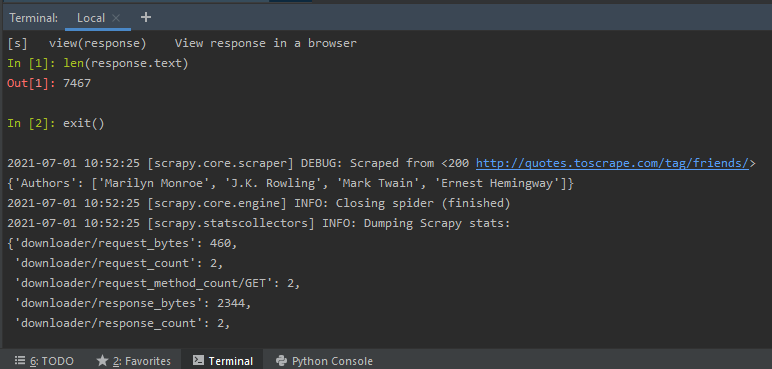
After exit() rest of the spider code is executed and scraped
After exit(), the rest of the python code is executed, and the author’s names are scraped, according to the selectors written in the code.
Like Article
Suggest improvement
Share your thoughts in the comments
Please Login to comment...