Save and load models in Tensorflow
Last Updated :
07 Mar, 2022
The development of the model can be saved both before and after testing. As a result, a model will pick up where it left off to eliminate lengthy training periods. You can still share your model and have others replicate it if you save it. Most machine learning professionals share the following when publishing test models and techniques:
- Code to create the model
- The trained weights for the model
Sharing this information allows others to better understand how the model operates and to test it with new data.
Aside from that, teaching the machine learning models will take a lot of time and effort. Shutting down the notebook or machine, though, causes all of those weights and more to disappear as the memory is flushed. It’s important to save the models to optimize reusability in order to get the most out of your time.

As soon as we are done evaluating our model, we can move forward with saving it.
Ways we can save and load our machine learning model are as follows:
- Using the inbuilt function model.save()
- Using the inbuilt function model.save_weights()
Using save() method
Now we can save our model just by calling the save() method and passing in the filepath as the argument. This will save the model’s
- Model Architecture
- Model Weights
- Model optimizer state (To resume from where we left off)
Syntax: tensorflow.keras.X.save(location/model_name)
- Here X refers to Sequential, Functional Model, or Model subclass. All of them have the save() method.
- The location along with the model name is passed as a parameter in this method. If only the model name is passed then the model is saved in the same location as that of the Python file.
We can load the model which was saved using the load_model() method present in the tensorflow module.
Syntax: tensorflow.keras.models.load_model(location/model_name)
The location along with the model name is passed as a parameter in this method.
NOTE: If we specify “.h5”, the model will be saved in hdf5 format; if no extension is specified, the model will be saved in TensorFlow native format.
Using save_weights() method
Now you can simply save the weights of all the layers using the save_weights() method. It saves the weights of the layers contained in the model. It is advised to use the save() method to save h5 models instead of save_weights() method for saving a model using tensorflow. However, h5 models can also be saved using save_weights() method.
Syntax: tensorflow.keras.Model.save_weights(location/weights_name)
The location along with the weights name is passed as a parameter in this method. If only the weights name is passed then it is saved in the same location as that of the Python file.
Below is a program where we save weights of an initial model:
Python3
import tensorflow
model=tensorflow.keras.Model()
path='Weights_folder/Weights'
model.save_weights(path)
|
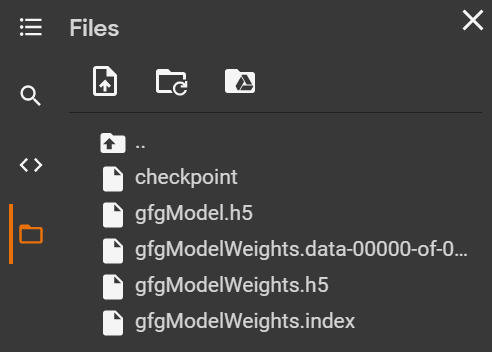
It will create a new folder called the weights folder and save all the weights as my weights in Tensorflow native format. There will be three folders in all.
- checkpoint: It’s a human-readable file with the following text,
model_checkpoint_path: "Weights"
all_model_checkpoint_paths: "Weights"
- data-00000-of-00001: This file contains the actual weights from the model.
- index: This file tells TensorFlow which weights are stored where.
We can load the model which was saved using the load_weights() method.
Syntax:
tensorflow.keras.Model.load_weights(location/weights_name)
The location along with the weights name is passed as a parameter in this method.
Note: When loading weights for a model, we must first ensure that the model’s design is correct. We can not load the weights of a model(having 2 dense layers) to a sequential model with 1 Dense layer, as both are not congruous.
Below is an example that depicts all the above methods to save and load the model. Here we develop a model and train it using an inbuilt dataset and finally save and load the model again in various ways.
Import the modules.
Python3
import tensorflow as tf
import numpy as np
import matplotlib.pyplot as plt
from tensorflow.keras.layers import Input, Conv2D, Dense, Flatten, Dropout
from tensorflow.keras.layers import GlobalMaxPooling2D, MaxPooling2D
from tensorflow.keras.layers import BatchNormalization
from tensorflow.keras.models import Model
from tensorflow.keras.models import load_model
|
Load and split the dataset and then change some attributes of the data.
Python3
cifar10 = tf.keras.datasets.cifar10
(x_train, y_train), (x_test, y_test) = cifar10.load_data()
print(x_train.shape, y_train.shape, x_test.shape, y_test.shape)
x_train, x_test = x_train / 255.0, x_test / 255.0
y_train, y_test = y_train.flatten(), y_test.flatten()
|
Output:

Develop the model by adding layers.
Python3
K = len(set(y_train))
print("number of classes:", K)
i = Input(shape=x_train[0].shape)
x = Conv2D(32, (3, 3), activation='relu', padding='same')(i)
x = BatchNormalization()(x)
x = Conv2D(32, (3, 3), activation='relu', padding='same')(x)
x = BatchNormalization()(x)
x = MaxPooling2D((2, 2))(x)
x = Conv2D(64, (3, 3), activation='relu', padding='same')(x)
x = BatchNormalization()(x)
x = Conv2D(64, (3, 3), activation='relu', padding='same')(x)
x = BatchNormalization()(x)
x = MaxPooling2D((2, 2))(x)
x = Conv2D(128, (3, 3), activation='relu', padding='same')(x)
x = BatchNormalization()(x)
x = Conv2D(128, (3, 3), activation='relu', padding='same')(x)
x = BatchNormalization()(x)
x = MaxPooling2D((2, 2))(x)
x = Flatten()(x)
x = Dropout(0.2)(x)
x = Dense(1024, activation='relu')(x)
x = Dropout(0.2)(x)
x = Dense(K, activation='softmax')(x)
model = Model(i, x)
model.summary()
|
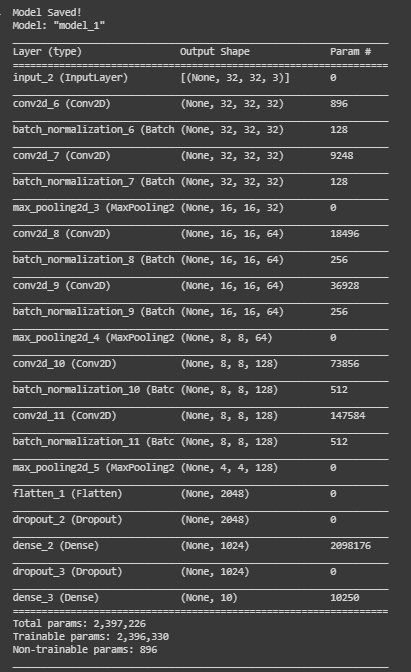
Output:
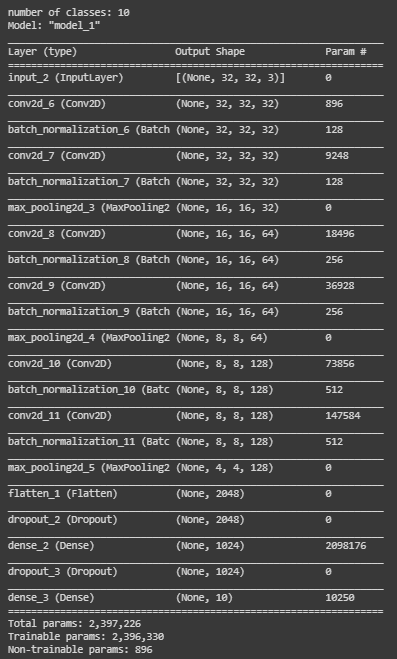
Save the model in h5 format using the save() method.
Python3
model.save('gfgModel.h5')
print('Model Saved!')
savedModel=load_model('gfgModel.h5')
savedModel.summary()
|
Output:
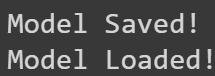
Save the model weights using the save_weights() method.
Python3
model.save_weights('gfgModelWeights')
print('Model Saved!')
savedModel = model.load_weights('gfgModelWeights')
print('Model Loaded!')
|
Output:
Save the model in h5 format model using the save_weights() method.
Python3
model.save_weights('gfgModelWeights.h5')
print('Model Saved!')
savedModel = model.load_weights('gfgModelWeights.h5')
print('Model Loaded!')
|
Output:
The above model was developed in Google colab. So on saving the models, they are stored temporarily and can be downloaded. Below are the models and weights saved:
Like Article
Suggest improvement
Share your thoughts in the comments
Please Login to comment...