React Environment Setup
Last Updated :
22 Jan, 2024
To run any React application, we need to first setup a ReactJS Development Environment. In this article, we will show you a step-by-step guide to installing and configuring a working React development environment.
We will discuss the following approaches to setup environment in React.
Pre-requisite:
We must have NodeJS installed on our PC. So, the very first step will be to install NodeJS. Once we have set up NodeJS on our PC, the next thing we need to do is set up React Boilerplate.
Method 1: Using create-react-app (CRA commond)
Step 1: Navigate to the folder where you want to create the project and open it in terminal
Step 2: In the terminal of the application directory type the following command
npx create-react-app <<Application_Name>>
Step 3: Navigate to the newly created folder using the command
cd <<Application_Name>>
Step 4: A default application will be created with the following project structure and dependencies
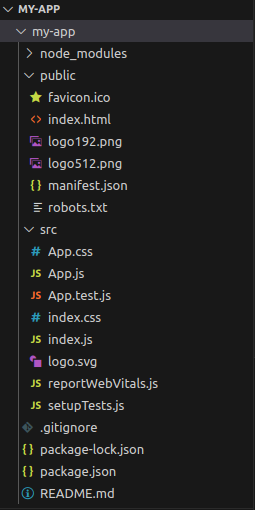
Application structure
It will install some packages by default which can be seen in the dependencies in package.json file as follows:
"dependencies": {
    "@testing-library/jest-dom": "^5.17.0",
    "@testing-library/react": "^13.4.0",
    "@testing-library/user-event": "^13.5.0",
    "react": "^18.2.0",
    "react-dom": "^18.2.0",
    "react-scripts": "5.0.1",
    "web-vitals": "^2.1.4"
}
Step 5: To run this application type the following command in terminal
npm start
Step 6: The following output will be displayed in the browser
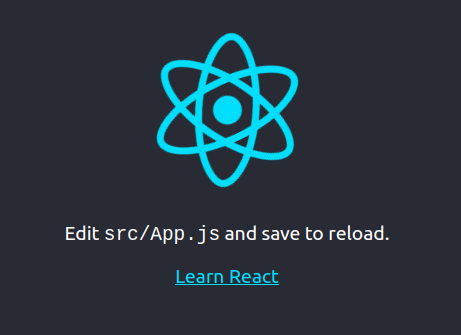
ReactJS Installation
You can modify the application according to your preferences and change the code accordingly.
Method 2: Using webpack and babel
To setup a react development environment using webpack and babel is a long process and we have to import each package and create setup files ourselves.
We have to create the setup using ‘npm init -y’ command and then import the necessary packages in the folder and then install react using the command.
npm i react react-dom
To install the necessary packages in our project use the command
npm i webpack webpack-cli @babel/core @babel/preset-env@babel/preset-react
            babel-loader html-webpack-plugin webpack-dev-server --save-dev
P.S.: This tutorial covers only the steps to install the packages. To understand how to configure these packages refer to the Introduction to babel article.
Step 1: Navigate to the folder where you want to create the project and open it in terminal
Step 2: In the terminal of the application directory type the following command.
npm create vite@latest <<Application_name>>
npm create vite@latest
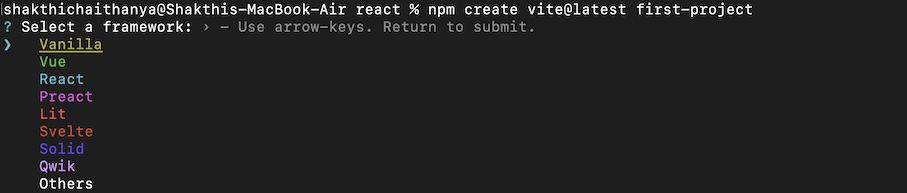
Step 3: Select the React Framework and then variant as JavaScript from options.


select javascript variant
Step 4: Navigate to the newly created folder using the command.
cd <<Application_name>>
now, we can see the basic project structure show in below image.

project structure
Step 5: Use the below command in terminal to install all required dependencies.
npm install
      OR
npm i

npm install
After successfully executing this command we can see a new folder named “node_module” in the project folder which contains all the dependencies.
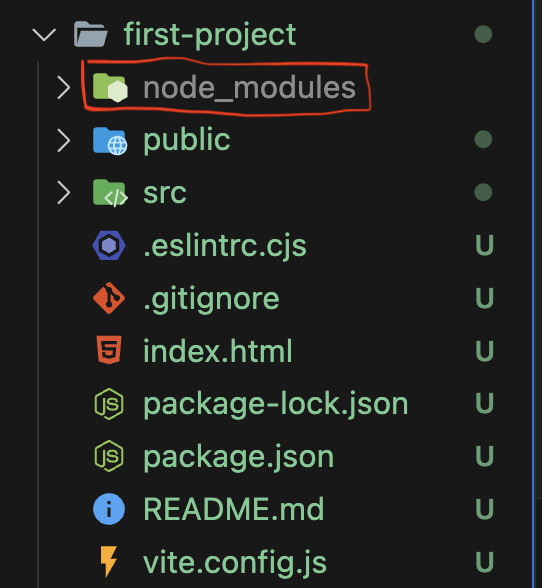
node_modules
Step 6: To run the application use the following command in terminal.
npm run dev

vite+react page
Share your thoughts in the comments
Please Login to comment...