React JSX
Last Updated :
20 Feb, 2024
React JSX is a syntax extension of JavaScript for writing React Code in a simple way. Using JSX it is easier to create reusable UI components with fewer lines of code in a template-type language with the power of JavaScript.
What is JSX ?
JSX stands for JavaScript XML. JSX is basically a syntax extension of JavaScript.
React JSX helps us to write HTML in JavaScript and forms the basis of React Development. Using JSX is not compulsory but it is highly recommended for programming in React as it makes the development process easier as the code becomes easy to write and read.
JSX creates an element in React that gets rendered in the UI. It is transformed into JavaScript functions by the compiler at runtime. Error handling and warnings become easier to handle when using JSX
React JSX sample code:
const ele = <h1>This is sample JSX</h1>;
This is called JSX (JavaScript XML), it somewhat looks like HTML and also uses a JavaScript-like variable but is neither HTML nor JavaScript. With the help of JSX, we have directly written the HTML syntax in JavaScript.
Why JSX ?
- It is faster than normal JavaScript as it performs optimizations while translating to regular JavaScript.
- It makes it easier for us to create templates.
- Instead of separating the markup and logic in separate files, React uses components for this purpose. We will learn about components in detail in further articles.
- As JSX is an expression, we can use it inside of if statements and for loops, assign it to variables, accept it as arguments, or return it from functions.
Expressions in JSX
In React we are allowed to use normal JavaScript expressions with JSX. To embed any JavaScript expression in a piece of code written in JSX we will have to wrap that expression in curly braces {}. The below example specifies a basic use of JavaScript Expression in React.
Syntax:
const example = "JSX"
const ele = <div>This component uses {example} </div>
Example 1: This example wraps the JSX code in curly braces
javascript
import React from "react";
const name = "Learner";
const element = (
<h1>
Hello,
{name}.Welcome to GeeksforGeeks.
</h1>
);
ReactDOM.render(element, document.getElementById("root"));
|
Output:

ReactJS JSX Expression
In the above program, we have embedded the javascript expression const name = “Learner”; in our JSX code. We can use conditional statements instead of if-else statements in JSX.
Example 2: In this example where conditional expression is embedded in JSX:
javascript
import React from "react";
let i = 1;
const element = (
<h1>{i == 1 ? "Hello World!" : "False!"} </h1>
);
ReactDOM.render(element, document.getElementById("root"));
|
Output:

In the above example, the variable ‘i’ is checked if for the value 1. As it equals 1 so the string ‘Hello World!’ is returned to the JSX code. If we modify the value of the variable ‘i’ then the string ‘False!’ will be returned.
Attributes in JSX
JSX allows us to use attributes with the HTML elements just like we do with normal HTML. But instead of the normal naming convention of HTML, JSX uses the camelcase convention for attributes.&
- The change of class attribute to className:The class in HTML becomes className in JSX. The main reason behind this is that some attribute names in HTML like ‘class‘ are reserved keywords in JavaScript. So, in order to avoid this problem, JSX uses the camel case naming convention for attributes.
- Creation of custom attributes:We can also use custom attributes in JSX. For custom attributes, the names of such attributes should be prefixed by data-* attribute.
Example: This example has a custom attribute with the <h2> tag and we are using className attribute instead of class.
javascript
import React from "react";
import ReactDOM from "react-dom";
const element = (
<div>
<h1 className="hello">Hello Geek</h1>
<h2 data-sampleAttribute="sample">
Custom attribute
</h2>
</div>
);
ReactDOM.render(element, document.getElementById("root"));
|
Output:

Specifying attribute values :
JSX allows us to specify attribute values in two ways:
Wrapping elements or Children in JSX
Consider a situation where you want to render multiple tags at a time. To do this we need to wrap all of these tags under a parent tag and then render this parent element to the HTML. All the subtags are called child tags or children of this parent element.
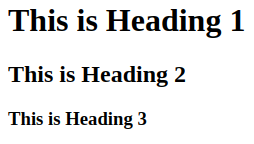
Example: In this example we have wrapped h1, h2, and h3 tags under a single div element and rendered them to HTML:
Javascript
import React from "react";
import ReactDOM from "react-dom";
const element = (
<div>
<h1>This is Heading 1 </h1>
<h2>This is Heading 2</h2>
<h3>This is Heading 3 </h3>
</div>
);
ReactDOM.render(element, document.getElementById("root"));
|
Output:
REactJS JSX
Note: JSX will throw an error if the HTML is not correct or if there are multiple child elements without a parent element.
JSX allows us to use comments as it allows us to use JavaScript expressions. Comments in JSX begin with /* and ends with */. We can add comments in JSX by wrapping them in curly braces {} just like we did in the case of expressions. The below example shows how to add comments in JSX:
Javascript
import React from "react";
import ReactDOM from "react-dom";
const element = (
<div>
<h1>Hello World !{}</h1>
</div>
);
ReactDOM.render(element, document.getElementById("root"));
|
Output:

Converting HTML to JSX
Let us take the following HTML Code and Convert it into JSX
HTML
<!DOCTYPE html>
<html>
<head>
<title>Basic Web Page</title>
</head>
<body>
<h1>Welcome to GeeksforGeeks</h1>
<p>A computer science portal for geeks</p>
</body>
</html>
|
The Converted JSX Code will look like:
Javascript
<>
<title>Basic Web Page</title>
<h1>Welcome to GeeksforGeeks</h1>
<p>A computer science portal for geeks</p>
</>
|
Rules to Write JSX
- Always return a single Root Element: When there are multiple elements in a component and you want to return all of them wrap them inside a single component
- Close all the tags: When we write tags in HTML some of them are self closing like the <img> tag but JSX requires us to close all of them so image tag will be represented as <img />
- Use camelCase convention wherever possible: When writing JSX if we want to give class to a tag we have to use the className attribute which follows camelCase convention.
Like Article
Suggest improvement
Share your thoughts in the comments
Please Login to comment...