Radio Button in Excel
Last Updated :
20 May, 2021
Radio button, also known as Option Button is used extensively when we have a choice of selecting one option from a set of predefined options. We can see radio buttons on websites during a Review or Feedback, Survey or in online competitive exams mostly. It looks like a small circle and when we click on it fills up with a black dot inside the circle which indicates the option is marked. The same radio button can be implemented in Excel.
In this article, we are going to see how to insert, organize radio buttons in Excel with an example. Suppose we want to design a rating system in which our mentors can rate the geek students performance in our enrolled courses. The ratings are solely based on their performances in the individual courses based on various parameters. The rating starts from a single star and goes maximum to five stars.
Implementation :
Step 1: In the Microsoft Excel tabs, select the Developer Tab. Initially, the Developer Tab may not be available.

The Developer Tab can be enabled easily by a two-step process :
- Right-click on any of the existing tabs at the top of the Excel window.
- Now select Customize the Ribbon from the pop-down menu.
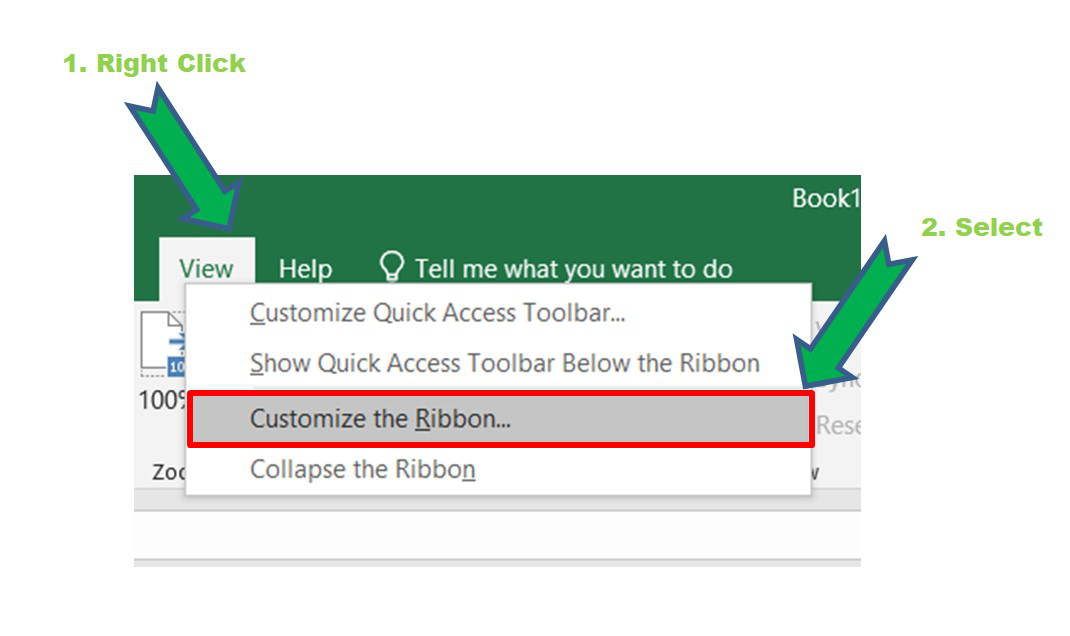
Customize Ribbon
- In the Excel Options Box, check the box Developer to enable it and click on Ok.

- Now, the Developer Tab is visible and can be accessed to insert the radio button.

Step 2: To insert the radio button into the Excel sheet, click on Developer Tab and then click Insert. The Form Control pop down will be shown.
Developer Tab -> Insert -> Select Option Button from Form Control
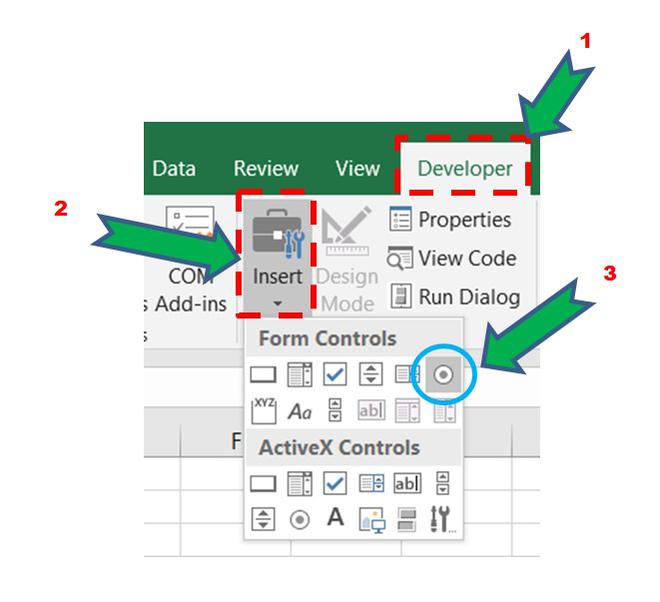
Radio Button Insertion
Place this button in any of the cells. Initially, it will show Option Button 1. Drag and copy-paste the buttons based on the number of requirements. The radio buttons now can be accessed for various purposes. Initially, on clicking the radio button it will just be selected but show nothing. In our case, we took five radio buttons which will be discussed below.
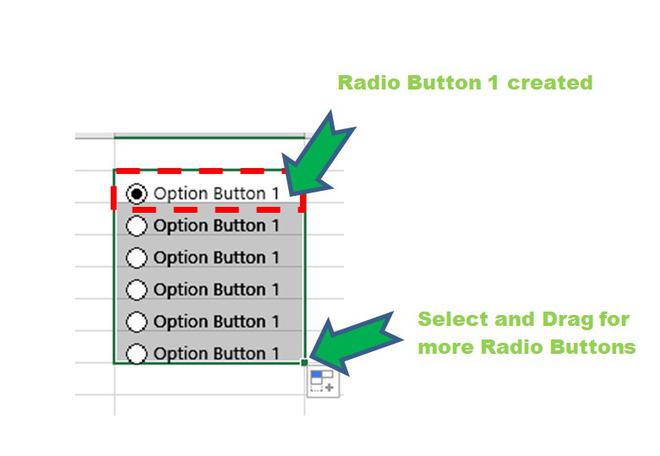
Placing the Radio Buttons
Step 3: Now, we need to configure the Option Button. For that right-click on any of the set of radio buttons and go to the Format Control box.

In the Format Control, under the Control Tab two operations need to be performed :
1. The value button needs to be checked in case it is unchecked.
2. We have to provide a cell link. It can be done in two ways :
- Manually insert the cell location The syntax is : “$Column_Number$Row_Number”.
- Select the cell link box and then click on the cell where you want to link the Radio button.
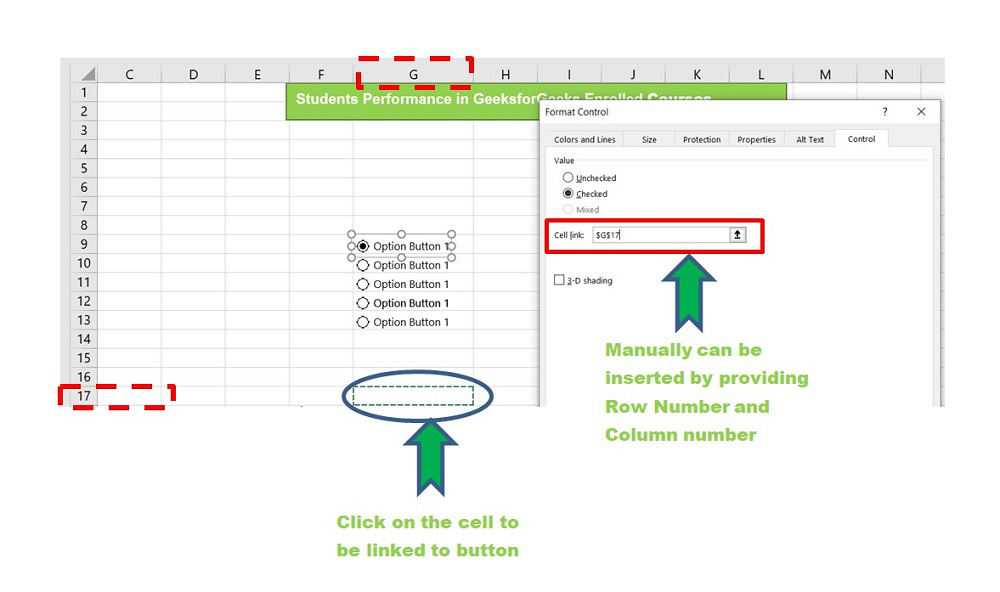
Linking cell to radio button
We have allocated the cell link to G17 successfully till now. By default, Excel will assign integers starting from 1 to the radio buttons. In our case, we have five radio buttons, so if we click on the first radio button we see 1 in the G17 location. Similarly, if we select radio button 3, G17 will show 3.
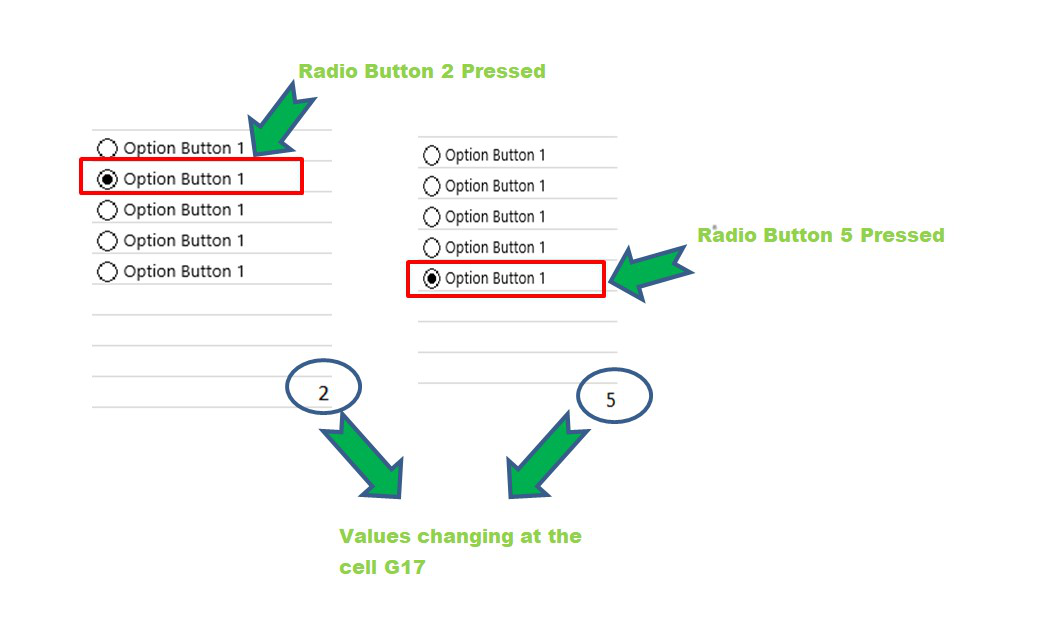
Radio Buttons Ready
Step 4: Now various modifications can be done to the Options buttons.
Right-click on the Radio button and click on Format Control to change the color, size, shape, and width of the button. You can also provide a suitable name for the radio button.
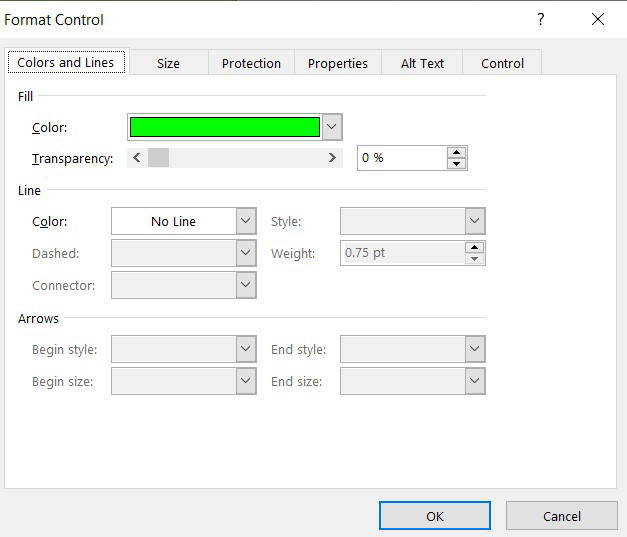
Format Control Box
Step 5: It is the most important part of Excel while dealing with Radio buttons. Suppose, we need a set of radio buttons for different groups. Say, 5 radio buttons in Group 1 and 3 radio buttons in Group 2. By default, it is not possible in Excel because it takes the integer associated with the radio button sequentially.
So, for this, we need the help of “Group Box”. It will separate the set of buttons into various groups and help to work on them individually. To access multiple groups :
Select Developer -> Click Insert -> Group Box
Now, drag the Group Box on the set of option buttons and provide a suitable name to individual groups as shown below.

Step 6: Now, you have to repeat Step 3 for every individual group and provide a suitable cell link where you want to show the output by pressing the Radio Button.
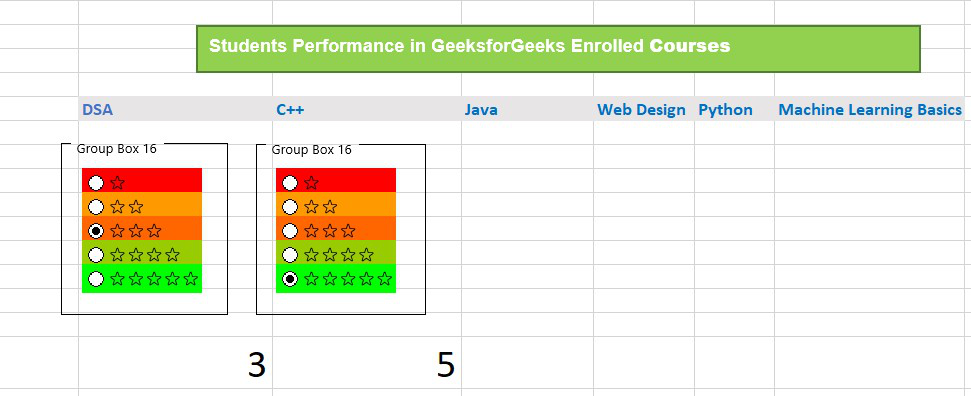
Grouped
We can see in the above picture, we have two separate groups for DSA and C++. Two group boxes are used to cover the radio buttons. The cell links are different for both groups. We can see the output as “Rating 3” in DSA and “Rating 5” in C++ when the buttons are clicked.
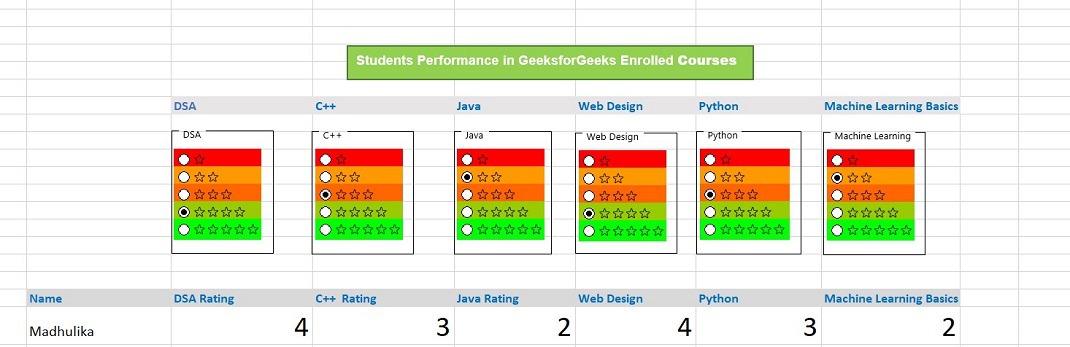
Similarly, we can do this for all the groups by copy-pasting the option buttons and repeating step 3 for every group. The rating system is ready to use. Our mentors can now input the name of students and rate the students in individual courses based on his/her performance.
Final Outcome :

Rating of Geek 1
Rating of Geek 2
Now, you can copy-paste these data and form a table and convert it to a beautiful chart as shown below. The chart is linked with a radio button for individual students. You can see by clicking on the button “Srishti” we get Srishti’s performance chart and similarly for others.
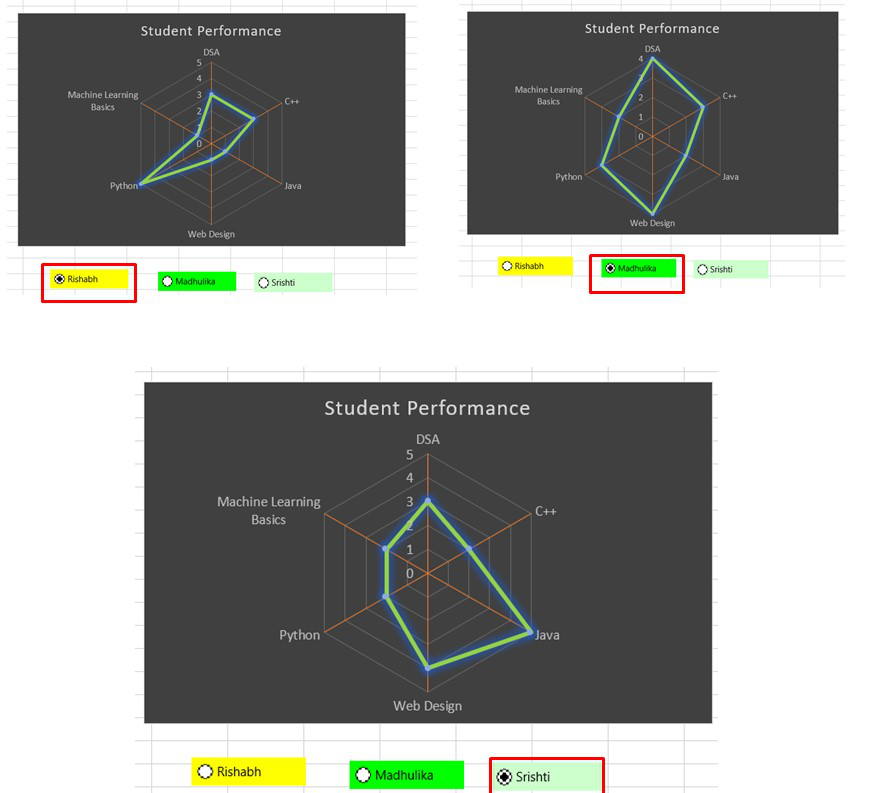
Analysis Chart
You can do the above example as an exercise to get more insights about the Radio or Options button and their linking with the cells in Excel. There are tons of other things which can be performed using the Radio or Options button in Excel.
Like Article
Suggest improvement
Share your thoughts in the comments
Please Login to comment...