Graphical User Interfaces (GUIs) play a pivotal role in enhancing user interaction and experience. Python, known for its simplicity and versatility, has evolved into a prominent choice for building GUI applications. With the advent of Python 3, developers have been equipped with a plethora of tools and libraries to create robust and aesthetically pleasing graphical interfaces. Let’s delve into an overview of Python 3 for GUI applications, exploring its capabilities, tools, and popular libraries.
Popular Packages for Python GUI Development
In addition to the aforementioned tools, several third-party libraries extend Python’s capabilities for GUI development:
Tkinter
TKinter is an open-source and standard GUI toolkit for Python. TKinter is a wrapper around tcl / TK graphical interface. TKinter is popular because of its simplicity and having a very old and active community. Also, it comes included with most binary distributions of Python. TKinter is fully portable for Macintosh, Windows, and Linux platforms. It’s a good toolkit to start with since TKinter is mostly preferred for small-scale GUI applications.
Setting Up Tkinter
Tkinter comes pre-installed with Python, so there’s no need to install any additional packages. Developers can import the tkinter module in their Python scripts to start building GUI applications.
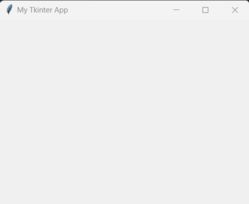
Creating a Basic Window using Tkinter
The foundation of any Tkinter application is the main application window. Developers can create a basic window using the Tk() constructor and customize its properties such as title, size, and geometry.
Python
import tkinter as tk
root = tk.Tk()
root.title("My Tkinter App")
root.geometry("400x300")
root.mainloop()
|
Output
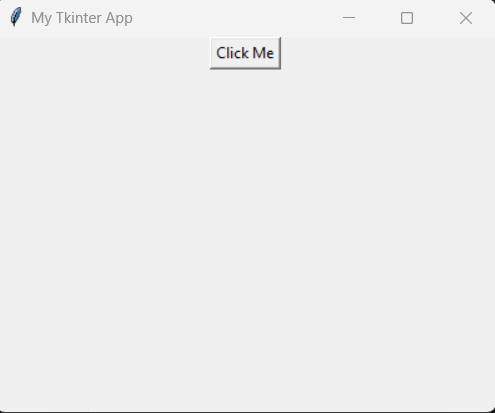
Adding Widgets for Tkinter Window
Widgets can be added to the application window using various Tkinter classes such as Label, Button, Entry, etc. These widgets can be configured with properties and event handlers to define their behavior.
Python
label = tk.Label(root, text="Hello, Tkinter!")
label.pack()
button = tk.Button(root, text="Click Me", command=lambda: print("Button clicked!"))
button.pack()
|
Output
.png)
Handling Events in Tkinter
Tkinter allows developers to define event handlers or callbacks to respond to user interactions such as button clicks, mouse movements, or keyboard input. Event handlers can be attached to widgets using the bind() method or by specifying command functions directly.
Python
def button_clicked():
print("Button clicked!")
button = tk.Button(root, text="Click Me", command=button_clicked)
button.pack()
|
Output
PyQt
PyQt toolkit is a wrapper around the QT framework. PyQt is one of the most loved cross-platform Python binding over C++ implementing QT-library for QT framework. PyQT can be used for large-scale GUI applications since it takes no time to develop a GUI. One can simply design the window using QT Designerbe bound and easily convert the UI code to (Python) code and after that logic can be bound to each widget. But at the beginning stage of learning PyQt, writing code manually is always a good practice, because that is how you learn.
Getting Started With PyQt
To start using PyQt for GUI development, developers can install the PyQt package using Python package managers like pip:
pip install PyQt5
Once installed, developers can import the PySide modules and begin creating GUI applications using familiar Python syntax:
Simple Code Implementation of PyQt
This code creates a simple PyQt application with a window containing a button. When the button is clicked, it prints “Button Clicked!” to the console.
Python
import sys
from PyQt5.QtWidgets import QApplication, QWidget, QPushButton, QVBoxLayout
class MyWindow(QWidget):
def __init__(self):
super().__init__()
self.initUI()
def initUI(self):
self.setWindowTitle('PyQt Dummy Example')
self.setGeometry(100, 100, 300, 200)
button = QPushButton('Click Me', self)
button.clicked.connect(self.onButtonClick)
layout = QVBoxLayout()
layout.addWidget(button)
self.setLayout(layout)
def onButtonClick(self):
print('Button Clicked!')
if __name__ == '__main__':
app = QApplication(sys.argv)
window = MyWindow()
window.show()
sys.exit(app.exec_())
|
Output

PySide
Just like PyQt, PySide is also a Python binding of the cross-platform GUI toolkit Qt. PySide was released by Nokia (the former owners of the Qt toolkit) with a license after Nokia failed to reach an agreement with PyQt developers Riverbank Computing to change its licensing terms to include LGPL as an alternative license. It’s totally up to the developer’s choice, whether he/she wants to use PyQt or Pyside.
Getting Started with PySide
To start using PySide for GUI development, developers can install the PySide package using Python package managers like pip:
pip install PySide2
Once installed, developers can import the PySide modules and begin creating GUI applications using familiar Python syntax:
Simple Code Implementation of PySide
This simple example creates a window with a label displaying the text “Hello, PySide!” and starts the event loop to handle user interactions.
Python
import sys
from PySide2.QtWidgets import QApplication, QWidget
app = QApplication(sys.argv)
mainwindow = QWidget()
mainwindow.resize(550, 400)
mainwindow.setWindowTitle('GeeksForGeeks')
mainwindow.show()
app.exec_()
|
Output
.png)
PyGTK
PyGTK is a set of Python bindings for the GTK+ toolkit, a popular open-source framework for developing graphical applications. GTK+ provides a comprehensive collection of graphical elements, including buttons, menus, windows, and dialogs, enabling developers to create visually appealing and feature-rich interfaces.
By integrating Python with GTK+, PyGTK facilitates rapid application development by providing a Pythonic interface to GTK+ functionalities. This allows developers to leverage the flexibility and simplicity of Python while harnessing the power of GTK+ for GUI development.
Getting Started with PyGTK
To start using PyGTK for GUI development, developers can install the PyGTK package using Python package managers like pip:
sudo apt install python3-pip
Once installed, developers can import the PyGTK modules and begin creating GUI applications using familiar Python syntax:
Simple Code Implementation of PyGTK
This code creates a window with a button that prints a message to the console when clicked. Here’s a simple example of a PyGTK application that creates a basic window with a button:
Python
from gi.repository import Gtk
import gi
gi.require_version("Gtk", "3.0")
window = Gtk.Window(title="Test Window")
window.show()
window.connect("destroy", Gtk.main_quit)
Gtk.main()
|
Output
.png)
Kivy
Kivy is an OpenGL accelerated framework, very popular among developers for developing GUI apps. Kivy is an open-source Python library, which can also be used for developing NUI (Natural User Interface). With Kivy, mobile applications and other multitouch application software can be developed. Applications developed with Kivy can run on Android, IOS, Linux, and Windows. Developing an application using Kivy is interesting. If you ever heard about this awesome Android app ‘2048’, it was developed using Kivy.
Getting Started with Kivy
To start using Kivy for GUI development, developers can install the Kivy package using Python package managers like pip:
pip install Kivy
Once installed, developers can import the Kivy modules and begin creating GUI applications using familiar Python syntax:
Simple Code Implementation of Kivy
Save the code in a file with a .py extension, then run the file using a Python interpreter. It will launch a window with a button that changes its text every time you click on it. This is a basic example to demonstrate how to create a simple GUI application using Kivy.
Python
from kivy.app import App
from kivy.uix.button import Button
from kivy.uix.boxlayout import BoxLayout
class MyKivyApp(App):
def build(self):
layout = BoxLayout(orientation='vertical')
self.button = Button(text='Click Me!')
self.button.bind(on_press=self.on_button_click)
layout.add_widget(self.button)
return layout
def on_button_click(self, instance):
if self.button.text == 'Click Me!':
self.button.text = 'Button Clicked!'
else:
self.button.text = 'Click Me!'
if __name__ == '__main__':
MyKivyApp().run()
|
Output

NiceGUI
NiceGUI is a lightweight Python library built on top of Tkinter, Python’s standard GUI toolkit. It aims to simplify GUI development by providing an intuitive and user-friendly interface for creating graphical applications. With NiceGUI, developers can quickly design and implement GUIs without sacrificing aesthetics or functionality.
Getting Started with NiceGUI
To start using NiceGUI for GUI development, developers can install the NiceGUI package using Python package managers like pip:
pip install nicegui
Once installed, developers can import the nicegui modules and begin creating GUI applications using familiar Python syntax:
Simple Code Implementation of NiceGUI
In this example, We then define a function on_button_click() to handle button click events. Next, we create a button widget with the label “Click me!” and specify the on_click parameter to execute the on_button_click() function when the button is clicked. Finally, we create an application window titled “NiceGUI Example” and add the button widget to its contents using the ng.App() constructor. We call the run() method to start the application loop and display the window with the button.
Python
from nicegui import ui
class Demo:
def __init__(self):
self.number = 1
demo = Demo()
ui.slider(min=1, max=5).bind_value(demo, 'number')
ui.number().bind_value(demo, 'number')
ui.toggle({1: 'A', 2: 'B', 3: 'C', 4:'D', 5: 'E'}).bind_value(demo, 'number')
ui.run()
|
Output
.png)
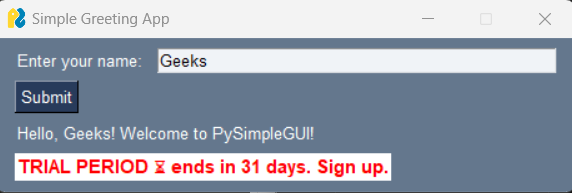
PySimpleGUI
PySimpleGUI follows a straightforward approach to building GUIs, making it accessible to developers of all skill levels. It offers a variety of pre-built elements, or “widgets,” that you can easily incorporate into your interface. Some of the available widgets include buttons, input fields, sliders, checkboxes, and more.
Getting Started with PySimpleGUI
To start using PySimpleGUI for GUI development, developers can install the NiceGUI package using Python package managers like pip:
pip install PySimpleGUI
Once installed, developers can import the PySimpleGUI modules and begin creating GUI applications using familiar Python syntax:
Simple Code Implementation of PySimpleGUI
In this example, we import the PySimpleGUI module and define the layout of our GUI using a list of lists. Each inner list represents a row in the interface, with widgets arranged horizontally. We then create a window using sg.Window() and start an event loop to handle user interactions.
The event variable captures the type of event that occurred (e.g., button click), while values contains the current values of the input fields. We check for specific events such as window closure or button clicks and respond accordingly.
Python
import PySimpleGUI as sg
layout = [
[sg.Text("Enter your name:"), sg.InputText()],
[sg.Button("Submit")],
[sg.Text(size=(40, 1), key="-OUTPUT-")]
]
window = sg.Window("Simple Greeting App", layout)
while True:
event, values = window.read()
if event == sg.WINDOW_CLOSED:
break
elif event == "Submit":
name = values[0]
greeting_message = f"Hello, {name}! Welcome to PySimpleGUI!"
window["-OUTPUT-"].update(greeting_message)
window.close()
|
Output
Key Points of GUI Python Packages
The Graphical User Interface (GUI) serves as the primary means through which users interact with software applications. Its role is multifaceted and crucial in determining the overall user experience. Here are some key roles of GUIs:
- User Interaction: GUIs enable users to interact with software applications through intuitive graphical elements such as buttons, menus, and icons.
- Usability Enhancement: GUIs simplify complex workflows and minimize cognitive load, making it easier for users to navigate and perform tasks efficiently.
- Visual Data Representation: GUIs present data and information in visually comprehensible formats such as charts, graphs, and tables.
- Feedback Mechanism: GUIs provide immediate feedback to users in response to their actions, keeping them informed and engaged throughout their interaction.
- Customization and Accessibility: GUIs allow users to customize their interface preferences and ensure accessibility for users with diverse abilities.
- Brand Representation: GUIs reflect the visual style and personality of a brand, contributing to brand recognition and identity.
Like Article
Suggest improvement
Share your thoughts in the comments
Please Login to comment...