PyQt in Python : Designing GUI applications
Last Updated :
12 Mar, 2024
Building GUI applications using the PYQT designer tool is comparatively less time-consuming than coding the widgets. It is one of the fastest and easiest ways to create GUIs.
The normal approach is to write the code even for the widgets and for the functionalities as well. But using Qt-designer, one can simply drag and drop the widgets, which is very useful while developing big-scale applications.
In this article, we will explore How to install PyQt and widgets, How to save the file, How to add Signals and Slots, How we can handle events, and so on.
How to install PyQt?
For Linux:
sudo apt-get install python3-pyqt6
For Windows:
 pip install pyqt5
 pip install pyqt5-tools
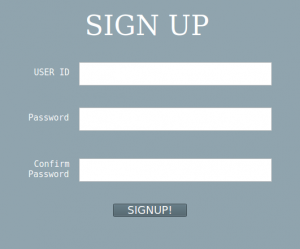
Let’s create a signup form using the QT designer tool. No code is required for creating forms, buttons, text boxes, etc! It is a rather drag and drops environment. So, using PyQt is a lot simpler than Tkinter.
QT Designer will be located at MyPythonInstallationDir\Lib\site-packages\pyqt5-tools and is named designer.exe (on Windows OS).
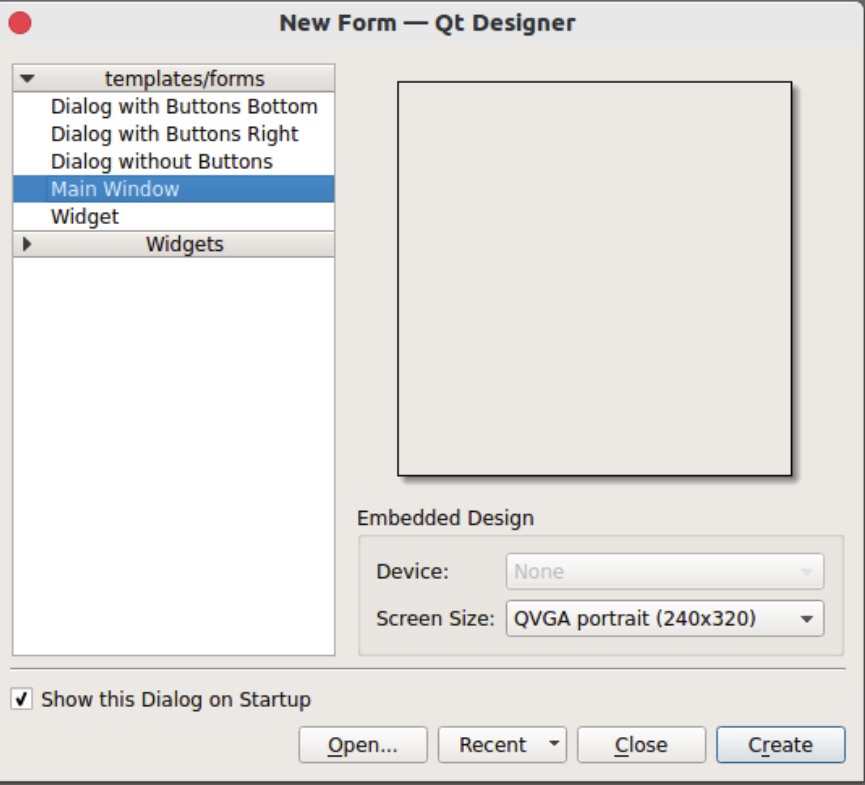
Open Qt Designer, then select Main Window and click Create. Set your preferred size of the window by dragging the edges of the window.
Widgets are box that are rectangular and they are the graphical elements or components that users interact with no perform action. It can include a wide range of elements, from a simple button and text boxes to complex items such as table and slider.
To create the layout of the Signup form, the following PyQt widgets are needed :
- Three text edit boxes.
- One button.
- Four Text Labels (SignId Banner, UserName label, Password and Confirm Password label).
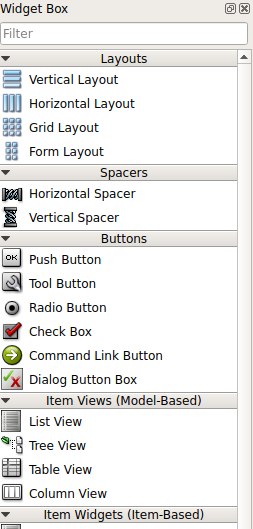
One has to find those widgets in Widget Tool Box. Just drag and drop the required widgets onto the Main Window or the window working on.
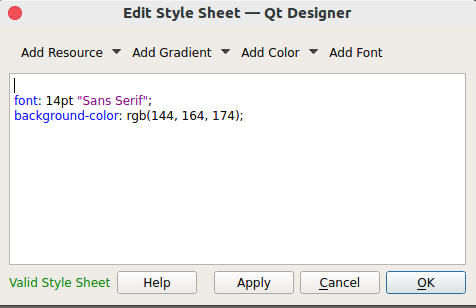
To change the appearance of the window or the widget, just right click on the widget and click Change StyleSheet.
To get a preview of the window, press Ctrl + R.
Save the file
The file will be saved with the .ui extension. To convert this file (.ui extension) to a Python file (.py extension), follow these steps :
- Open the terminal and navigate to the folder where the layout.UI file is present.
- To convert into a Python file, type pyuic5 -x layout.ui -o layout.py on a terminal.
- Run layout.py using python.
Signals and Slots
Signals and Slots in PyQt are used to communicate between various objects. After creating the GUI in Qt Designer and convert it to Python, users need to connect signals(like button clicks) to slots (functions that handles those clicks). For example , If you have a submit button and when it is clicked to validate user input or save data.
Python3
# In your generated Python file (layout.py)
from PyQt5.QtWidgets import QApplication, QMainWindow
from layout import Ui_MainWindow
class MyApp(QMainWindow, Ui_MainWindow):
    def __init__(self):
        super().__init__()
        self.setupUi(self)
        # Connect the button click to a function
        self.submitButton.clicked.connect(self.submit_clicked)
    def submit_clicked(self):
        # Add logic to process the form data
        username = self.usernameLineEdit.text()
        password = self.passwordLineEdit.text()
        # ... (add more code as needed)
Output:
Button clicked!
This is because the button_clicked method contains a print statement that outputs the specified text when the button is clicked. The if __name__ == ‘__main__’: block ensures that the application is executed when the script is run.
Enhancing PyQt GUI Applications
Enhancing PyQt GUI applications involves improving the user interface, optimizing performance, and adding new features. Few techniques for optimizing PyQt GUI Applications:
- Adding Functionality: The generated Python file provides the basic structure for the GUI but lacks the application logic. Users need to extend it by adding code to handle user interactions, validate inputs, and perform any other actions required by the application. For example, you might want to check if the entered password meets certain criteria or if a username already exists in a database.
- Using Layouts: Layouts in Qt help organize and manage the placement of widgets in a window. Qt Designer simplifies this process by allowing users to add layouts to their forms easily. Encourage users to use layouts for better scalability and responsiveness. This ensures that the GUI looks good and functions properly, even when resizing the window.
- Handling Events: PyQt provides methods for handling various events, such as mouse clicks or key presses. Users can override these methods in their Python code to add custom behavior. For instance, handling a mouse click on a specific widget or capturing keyboard input.
- Customizing Stylesheets: Qt Designer enables users to change the appearance of widgets using stylesheets, which are similar to CSS. Users can right-click on a widget, choose “Change StyleSheet,” and modify the appearance using CSS-like syntax. This allows for a high degree of customization in terms of colors, fonts, and other visual elements.
- Debugging: PyQt applications, like any other software, might encounter issues. Users should be familiar with debugging techniques, such as printing debug statements, using breakpoints, or using an integrated development environment (IDE) debugger to identify and fix problems in their code.
- Version Compatibility: Users should be aware of the PyQt version compatibility between the version used in the Qt Designer tool and the version installed in their Python environment. Mismatched versions can lead to unexpected behavior or errors. It’s advisable to check the official PyQt documentation for compatibility information.
Conclusion
By considering these points, users will not only be able to create a GUI with Qt Designer but also develop a more robust and functional application. They’ll have the tools to customize the interface, handle user interactions, and troubleshoot issues effectively.
Like Article
Suggest improvement
Share your thoughts in the comments
Please Login to comment...