Python – Create a box in GTK+ 3
Last Updated :
03 Jun, 2020
Prerequisite – Python – Creating window, button in GTK+ 3
In GTK+ rather than specifying the position and size of each widget in the window, you can arrange your widgets in rows, columns, and/or tables. The size of your window is determined automatically, based on the sizes of the widgets it contains. And the sizes of the widgets are, in turn, determined by the amount of text they contain. Perfecting the layout can be completed by specifying padding distance and centering values of widgets.
GTK+ arranges widgets hierarchically, using containers. There are two types of containers single-child containers and multiple-child containers. The most commonly used are vertical or horizontal boxes (Gtk.Box) and grids (Gtk.Grid).
Follow below steps:
- import GTK+ 3 module.
- Create main window.
- Create Box.
- Create Button.
Note: In IDE’s like Pycharm we can install a package named PyGObject in order to use GTK+ 3.
Boxes are invisible containers into which we can pack our widgets. When packing widgets into a horizontal box, the objects are inserted horizontally Gtk.Box.pack_start() (left to right ) or Gtk.Box.pack_end() (right to left). In a vertical box, widgets are packed from top to bottom or vice versa.
Example : Creating a box with button.
import gi
gi.require_version("Gtk", "3.0")
from gi.repository import Gtk
class MyWindow(Gtk.Window):
def __init__(self):
Gtk.Window.__init__(self, title ="GfG")
self.box = Gtk.Box(spacing = 6)
self.add(self.box)
self.button1 = Gtk.Button(label ="Click Here")
self.button1.connect("clicked", self.on_button1_clicked)
self.box.pack_start(self.button1, True, True, 0)
def on_button1_clicked(self, widget):
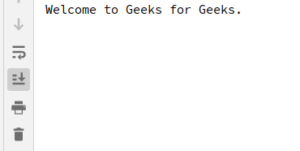
print("Welcome to Geeks for Geeks.")
win = MyWindow()
win.connect("destroy", Gtk.main_quit)
win.show_all()
Gtk.main()
|
Output :

On clicking this we get.
Like Article
Suggest improvement
Share your thoughts in the comments
Please Login to comment...