Python | Canvas in Kivy using .kv file
Last Updated :
04 Jul, 2022
Kivy is a platform-independent GUI tool in Python. As it can be run on Android, IOS, Linux and Windows etc. It is basically used to develop the Android application, but it does not mean that it can not be used on Desktop applications.
Kivy Tutorial – Learn Kivy with Examples.
Canvas :
The Canvas is the root object used for drawing by a Widget. A kivy canvas is not the place where you paint. Each Widget in Kivy already has a Canvas by default. When you create a widget, you can create all the instructions needed for drawing. If self is your current widget. The instructions Color and Rectangle are automatically added to the canvas object and will be used when the window is drawn. To use Canvas you must have to import:
from kivy.graphics import Rectangle, Color
Basic Approach -
-> import kivy
-> import kivy App
-> import widget
-> import Canvas i.e.:
      from kivy.graphics import Rectangle, Color
-> set minimum version(optional)
-> Extend the Widget class
-> Create the App Class
-> create the .kv file:
    -> create the canvas
    -> Add action/callback if needed
-> return a Widget
-> Run an instance of the class
Implementation of the Approach: 1) Creating A simple canvas: main.py file
Python3
import kivy
kivy.require("1.9.1")
from kivy.app import App
from kivy.uix.widget import Widget
from kivy.graphics import Rectangle, Color
class CanvasWidget(Widget):
pass
class CanvasApp(App):
def build(self):
return CanvasWidget()
CanvasApp().run()
|
Kivy looks for a Kv file with the same name as your App class in lowercase, minus “App” if it ends with ‘App’ e.g: CanvasApp –> canvas.kv
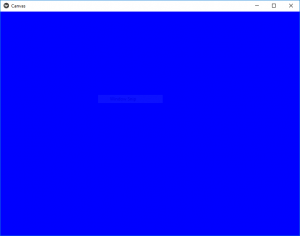
canvas.kv file:
Python3
<CanvasWidget@Widget>
canvas:
Color:
rgba: 0, 0, 1, 1
Rectangle:
pos: self.pos
size: self.size
|
Output:
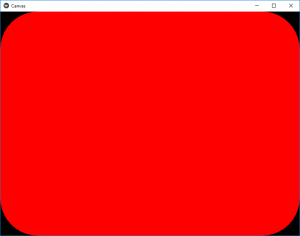
Now, How can we change the color of canvas by any action so below is an example in which clicking the color of the screen changes.
main.py file:
Python3
import kivy
kivy.require("1.9.1")
from kivy.app import App
from kivy.graphics import Rectangle, Color
from kivy.uix.button import ButtonBehavior
from kivy.uix.label import Label
class CanvasWidget(ButtonBehavior, Label):
pass
class CanvasApp(App):
def build(self):
return CanvasWidget()
CanvasApp().run()
|
.kv file:
Python3
<CanvasWidget>
canvas:
Color:
rgb: (1, 0, 0, 1) if self.state == 'normal' else (0, 0, 1, 1)
RoundedRectangle:
size: self.size
pos: self.pos
radius: 100, 100, 100, 100
on_release:
print("I have been clicked")
|
Output: 
Note: Kivy drawing instructions are not automatically relative to the position or size of the widget. Therefore you need to consider these factors when drawing. In order to make your drawing instructions relative to the widget, the instructions need either to be declared in the KvLang or bound to pos and size changes.
Like Article
Suggest improvement
Share your thoughts in the comments
Please Login to comment...