pv command in Linux with Examples
Last Updated :
13 Feb, 2023
pv is a terminal-based (command-line based) tool in Linux that allows us for the monitoring of data being sent through pipe. The full form of pv command is Pipe Viewer. pv helps the user by giving him a visual display of the following,
- Time Elapsed
- Completed Progress (percentage bar)
- Current data transfer speed (also referred to as throughput rate)
- Data Transferred
- ETA (Estimated Time) (Remaining time)
Installing pv command
1. Debian based distributions:
$ apt-get install pv
2. RedHat based distributions
$ yum install pv
How to use the pv command?
pv is used to provide the ability of monitoring progress of a given application which lacks the mentioned functionality. It can be used by placing a pipe operator (|) between two processes.
Syntax of pv command:
pv fileName
pv OPTIONS fileName
pv fileName > outputFileName
pv OPTIONS | command > outputFileName
command1 | pv | command2
Standard Input of the pv command is passed to Standard Output and then the result is printed to Standard Error.
Options for pv command
1. General Options
- -help : Displays the usage information.
- –version : Displays the version information.
2. Display Modifiers
- –progress / -p : Displays the progress bar.
- –timer / -t : Displays the elapsed time.
- –eta / -e : Displays the Estimated Time for the operation. Guess for the time is based on the previous data transfer rate and the size of data to be transferred.
- –rate / -r : Turns on the rate counter for the operation.
- –bytes / -b : Displays the total amount of data transferred till now.
- –numeric / -n : Displays integer percentage instead of the visual representation.
- –quiet / -q : No output
3. Output Modifiers
- –wait / -W : To wait for transfer of first byte before displaying progress.
- –interval SECONDS / -i SECONDS : Specified the time interval between updates.
- –force / -F : Forces an operation, i.e. forces pv to display visuals even when Standard Error is not a terminal.
- –size SIZE / -s : Assume the total data to be transferred is SIZE bytes for calculating computing percentage or ETA.
- –line-mode / -L : Instead of counting size, progress bar will move if new line is found.
- –name NAME / -n NAME : Prefix output info with name.
- –cursor / -c : Use cursor positioning escape sequence instead of using carriage returns.
4. Data Transfer Modifier
- –rate-limit RATE / -L RATE : Limit transfer to max of RATE byte per second.
- –buffer-size BYTES / -B BYTES : Use transfer buffer size of BYTE bytes.
- –remote PID / -R PID : If PID is instance of pv, will cause that instance to act, through it has been given instance’s command line instead.
When no option is selected -p, -t, -e, -r, -b options are selected by default.
Examples
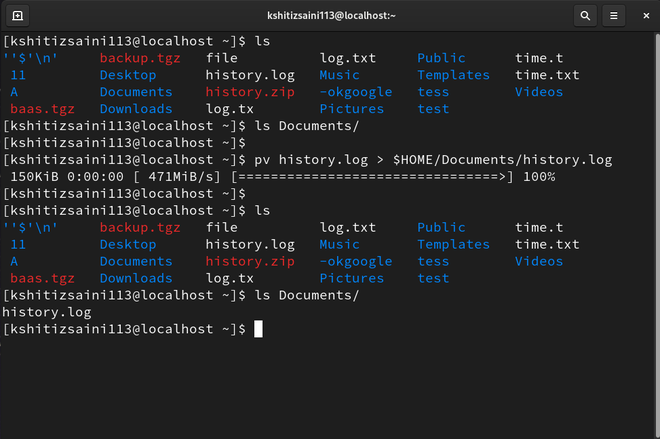
1. Creating a progress bar with the copy command
$ pv history.log > $HOME/Documents/history.log
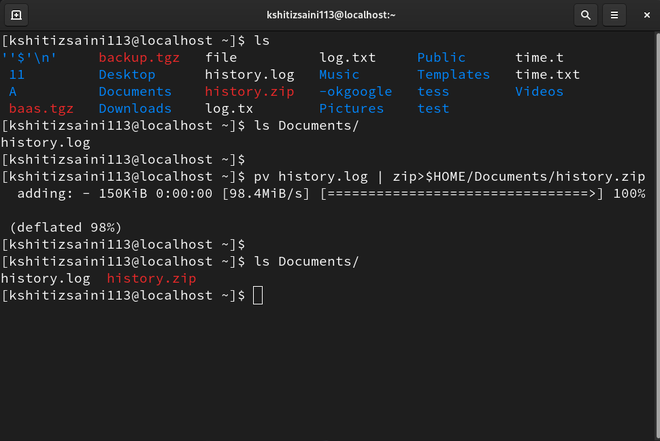
2. Making zip with the progress bar
$ pv history.log | zip>$HOME/Documents/history.zip
3. Count number of lines, words, bytes
$ pv -p history.log | wc

4. Monitor tar progress
$ tar -czf - ./Documents/ | (pv -p --timer --rate --bytes > backup.tgz)

Like Article
Suggest improvement
Share your thoughts in the comments
Please Login to comment...