Every day in business or any other field lots of information is there that is required to store for future use. For anyone, it is very difficult to remember that information for a long time. Earlier data and information are stored in a form of a register, file, or paperwork but finding it may be difficult for us. It takes our lot of time. To resolve this issue Microsoft brings a software called MS Excel.
Microsoft Excel is a software that allows users to store or analyze the data in a proper systematic manner. It uses spreadsheets to organize numbers and data with formulas and functions. MS Excel has a collection of columns and rows that form a table. Generally, alphabetical letters are assigned to columns and numbers are usually assigned to rows. The point where a column and a row meet is called a cell. Generally, it is used to keep records, data in various fields of business.

Some features of MS Excel:
- Auto calculate – This helps you to calculate a group of data, and it automatically shows the result in the status area. You can also create your own formulas.
- Shared – You can share your data file over a network.
- Templates – It gives us a variety of elegantly designed templates for your home or business purpose.
- Excel Charts – Excel charts help to convey your information in a very easy way. If you choose charts wisely and formatting them cleanly, you can deliver a lot of information to them.
- Conditional Formatting – It helps users to focus quickly on important topics of data or to highlighted errors and to identify important patterns in data.
- Sorting and Filtering – It is used to sort or filter data according to your need. You can also reorder the data. It saves your time a lot.
- Toolbars – It has a Collection of buttons that provide one-click access to commonly used commands such as Save, undo, and many more.
- Ribbon – It has commands and controls organized tasks in Tabs and groups.
- Worksheet Window
- Title Bar
- Design
- Layouts
Uses of MS Excel:
- It helps us in data entry.
- It helps us in Data management or to keep employee records.
- Account management
- Business Analysis
- Calculations of data
- For making collection and verifications of business data
- Anything that you need to store or organize.
Benefits of MS Excel:
- It is easy to store data systematically.
- It is a very convenient way
- We can recover data whenever required
- We can use mathematical formulas for calculating data.
- It gives us features like password protection to keep our data secure from unauthorized access.
- Presentation of data in a form of charts, graph bars, and many more.
- Online access – users can access data from anywhere.

Protecting a Worksheet
Protecting your datasheet helps to prevent other users from accidentally adding, changing, moving, deleting, or modifying data or information in a worksheet, MS Excel can lock the cells on your Excel worksheet and then protect it with a password so that other users can’t open and access it. By doing this you can save your data from tampering. Whosoever has a valid password can access it.
When you’re sending your worksheet/data file you should use the password protect option.
Protection Options:
There are two ways to protecting your worksheet –
- Prevent data entry for select cells
- Restrict or prevent access to the file
- File protection
Prevent data entry for selected cells
This feature helps the users to access the worksheet and view the information but making changes is restricted only for locked cells. User can access those cells which are unlocked (cells).
- Locking Cells
- Unlocking Cells
How to Lock the Cells?
Suppose If you want to share your worksheet with other users, and you’ve probably found that there are some specific cells that you don’t want them to modify. This is especially for the cells that contain formulas and special formatting cells.
Step 1: Select the cell that you want to lock.
Step 2: Under the Home menu, click on the arrow down option under the alignment section as shown:

Step 3: Click on Protection and check the locked option.

Step 4: Then click on OK.
Step 5: You must have to protect your worksheet.
How to Unlock Cells?
Note: In order to unlock the cells, sheet protection must first be turned off first, then only you will be able to unlock the cells.
Step 1: Select the cell which you want to lock.
Step 2: Under Home, click on the arrow down option under the alignment section.
Step 3: Click on the Protection tab and deselect the locked.

Step 4: Then click on OK. Now cells are unlocked.
Restrict or prevent access to the file
This feature helps the users to prevent from viewing the worksheet, or users can view the workbook but unable to make changes to it.
Protecting a Sheet
- Protect Sheet
- Protect Workbook
1. Protect sheet:
You can protect your worksheet from being modified by another user. This prevents unwanted changes from others by limiting their ability to edit. For example, you can prevent people from editing locked cells, making formatting changes to delete columns or rows. Password protection prevents other users from removing the worksheet protection, it needs to be entered to unprotect the worksheet.
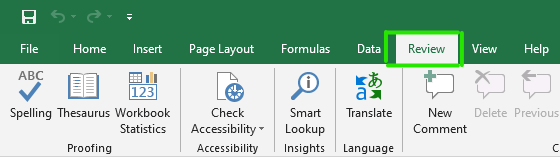
Step 1: On the toolbar select the review option.
Step 2: A protect sheet dialog box will open. Select the appropriate option.
Step 3: Checked the box that you want the user to access the particular cells.

- Password to unprotected cells – Allows only those users who know the valid password to unprotect the worksheet and can make changes.
- Allow all users of this worksheet to – Checked boxes are aspects that any user can access and make changes.
Step 4: Create a strong password for your worksheet. Then click on OK as shown:

Step 5: Reenter the password in the confirmed password dialog box. Then click on Ok.

Finally, your sheet is protected.
How to Unprotect the Sheet?
Step 1: On the toolbar select the review option.
Step 2: Select unprotect sheet option as shown:

Step 3: Enter the password in Unprotect sheet dialog box.

Step 4: Then click on Ok.
Finally, your sheet is unprotected.
2. Protect Workbook
This feature prevents other users from viewing hidden worksheets details, adding, moving, deleting, worksheets. You can protect the structure of your Excel workbook with a password. By using workbook protection other users unable to change its structure, order of sheets of our workbook, and many more.
Step 1: On the toolbar select the review option.
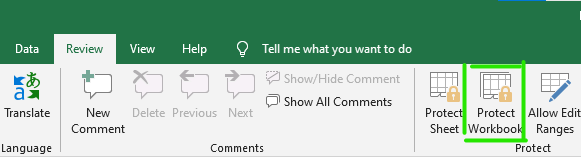
Step 2: Click on protect workbook option as shown above.
Step 3: Click on the structure on protect structure and window dialog box.

Step 4: Create a password for your workbook.

Step 5: Then click on ok.
Step 6: Reenter the password and click on ok.
Finally, your workbook is protected.
How to Unprotect the Workbook?
When the workbook is unprotected, Users can now change the structure and windows of your workbook.
Step 1: On the toolbar select the review option.
Step 2: Click on protect workbook.
Step 3: Enter your password.

Now your workbook is unprotected it means anyone can change its structure of your workbook.
File protections
This prevents other users from accessing data in your Excel files. Users can able to open the file if he/ she has a valid password. Users cannot even view the file without a password.
Step 1: Click on the file option.
Step 2: Select on info option on the left side menu bar.
Step 3: Click on protect workbook option.

Step 4: Now select the option Encrypt with password as shown:

Step 5: Create a password and enter it on encrypt document dialog box.
Step 6: Reenter password

Step 7: Then click on ok.
Now your file is protected with a password. Whenever other users want to open it, it will ask for a password first then only it will open.
These are some ways you can protect your sheet from other users.
Like Article
Suggest improvement
Share your thoughts in the comments
Please Login to comment...