Progressive Enhancement
Last Updated :
17 Nov, 2022
In web development, accessibility is a key aspect of web design. If your application leads to inaccessibility, the user cannot interact with your application, other than the result. Developers want to create accessible, progressive applications for users. The concept of progressive enhancement is simple and every developer must use this concept. In this article, we will discuss progressive enhancement principles and their benefits.
What is Progressive enhancement?
Progressive enhancement is the concept of a web design that ensures that the content of the web application arrives at all users first, no matter what their browser’s advantage, style of representation, or interpreted internet connection.
In “graceful degradation,” provides the best experience to the user who uses the latest browser versions first, then degrades to work well with older browser versions. But Progressive enhancement starts with the older browser and keeps enhancing the high-level products.
In progressive enhancement, the rule of separation is applied to the content and style.
Content is the priority in progressive enhancement. Style and browser features are secondary. Progressive enhancement leads basically to a high level.
Principles of progressive enhancement:
- End-user web browser preferences should be taken into consideration. Users should be able to use whichever browser they have, and should not be forced to use a certain browser in order to access website content. Design content is from low-level functionality to high functionality.
- Use global web standards designed format. Each browser has its functionalities and capabilities. Therefore we cannot design web applications for each and every browser. So it is simple to use the global web standard format.
- Keep in mind that the basic functions and standard events should be available in all web browsers when designing. Before implementing custom functions or events to advance the web application, use all of the normal DOM events to manage user experience while designing websites.
- The content of the website should be followed by a structure of standard semantic HTML format. For example., if visitors are not able to view videos or pictures then show the text using Typography in HTML.
- Developers must use external JavaScript that provides enhanced functionality. Some browsers have their own JavaScript libraries to provide expanded functionalities. But some web browsers do not enable JavaScript. In that case, if external JavaScript is not available then the result is that users cannot access information.
- As we connect the JavaScript library externally, the external can be CSS used in web development. It provides a basic layout and makes content presentable for users.
Why use Progressive enhancement?
In real-time when you deliver the content online, there are a variety of challenges that arise like internet interpretation, browser support, browser versions, etc. But Progressive enhancement starts with the basics and keeps enhancing the high-level products.
The following are the reasons for using progressive enhancement.
- Improved SEO of that website because the information will be more accessible.
- Improved compatibility and accessibility because content should be able to load on a variety of devices.
- No maintenance for websites.
- Improved speed and user experience.
How to implement progressive enhancement:
We already know Progressive enhancement starts from basic to a high level. HTML is the base of Web design. That is why we start writing HTML in markdown format. HTML is the first layer of any web application.
Example: In the following example, we write the code for the navigation menu.
HTML
<!DOCTYPE html>
<html lang="en">
<head>
<meta charset="UTF-8">
<meta http-equiv="X-UA-Compatible"
content="IE=edge">
<meta name="viewport"
content="width=device-width, initial-scale=1.0">
<title>Dropdown</title>
</head>
<body>
<h1 style="color:green">GeeksforGeeks</h1>
<button id="dropbtn">Navigation Menu</button>
<ul id="ul">
<li><a href="/home"></a>Home</li>
<li><a href="/about"></a>About</li>
<li><a href="/contact"></a>Contact</li>
<li><a href="/signin"></a>Signin</li>
</ul>
</body>
</html>
|
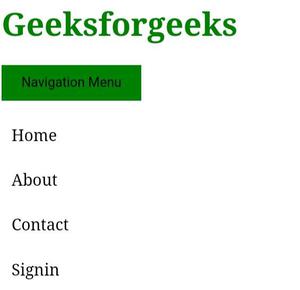
Output:

Html code output
CSS code: We write CSS for styling purposes. This is the second layer of web design. Add CSS in the HTML code.
CSS
button {
border: none;
padding: 10px 20px;
cursor: pointer;
background: green;
transition: all ease 0.2s;
}
button:hover {
box-shadow: 2px 2px 4px rgb(90, 90, 90);
filter: invert(1);
}
ul {
list-style: none;
padding: 0px;
width: 250px;
}
.active {
height: 0px;
overflow-y: auto;
}
li {
height: 25px;
padding: 10px;
background-color: none;
}
li:hover {
filter: invert(1);
}
li a {
height: 100%;
width: 100%;
color: black;
text-decoration: none;
}
|
Output:
CSS code output
JS code: We add JavaScript to our web pages to make it more responsive and functional. It is the third layer of web design.
Javascript
window.addEventListener('load', () => {
dropDownMenu = document.querySelector('#ul')
btn = document.querySelector('#dropbtn')
dropDownMenu.classList.add('closed')
btn.addEventListener('click', (e) => {
e.preventDefault()
dropDownMenu.classList.toggle('closed')
})
})
|
Final code: The final code is the combination of all three sections of the above.
HTML
<!DOCTYPE html>
<html lang="en">
<head>
<meta charset="UTF-8">
<meta http-equiv="X-UA-Compatible" content="IE=edge">
<meta name="viewport" content=
"width=device-width, initial-scale=1.0">
<title>Dropdown</title>
<style>
button {
border: none;
padding: 10px 20px;
cursor: pointer;
background: green;
transition: all ease 0.2s;
}
button:hover {
box-shadow: 2px 2px 4px rgb(90, 90, 90);
filter: invert(1);
}
ul {
list-style: none;
padding: 0px;
width: 250px;
}
.active {
height: 0px;
overflow-y: auto;
}
li {
height: 25px;
padding: 10px;
background-color: none;
}
li:hover {
filter: invert(1);
}
li a {
height: 100%;
width: 100%;
color: black;
text-decoration: none;
}
</style>
</head>
<body>
<h1 style="color:green">GeeksforGeeks</h1>
<button id="dropbtn">Navigation Menu</button>
<ul id="ul">
<li><a href="/home"></a>Home</li>
<li><a href="/about"></a>About</li>
<li><a href="/contact"></a>Contact</li>
<li><a href="/signin"></a>Signin</li>
</ul>
<script>
window.addEventListener('load', () => {
dropDownMenu = document.querySelector('#ul')
btn = document.querySelector('#dropbtn')
dropDownMenu.classList.add('closed')
btn.addEventListener('click', (e) => {
e.preventDefault()
dropDownMenu.classList.toggle('closed')
})
})
</script>
</body>
</html>
|
Output:
Example of Progressive enhancement: Some browsers have not enabled JavaScript extensions. In this case, we cannot use Angular, React, Vue js, etc. frameworks. To avoid this problem you should provide alternative options or content like “JavaScript is not enabled in your browser”.
<body>
    <div id="root">
        <p>You need to enable JavaScript to run this app.</p>
    </div>
</body>
If developers use customize fonts that may not be compatible with all browsers. In that case, you can use an alternative font family that is compatible with all browsers.
@import url(https://fonts.googleapis.com/css?family=Open+Sans);
body{
    font-family: 'Open Sans', sans-serif;
}
Conclusion: We discuss the progressive enhancement briefly. The summary is that the progressive enhancement starts from basic to high, which means old versions should be considered.
Like Article
Suggest improvement
Share your thoughts in the comments
Please Login to comment...