Plotting Various Sounds on Graphs using Python and Matplotlib
Last Updated :
08 Mar, 2024
In this article, we will explore the way of visualizing sounds waves using Python and Matplotlib.
Modules Needed
1. Matplotlib: Install Matplotlib using the below command:
pip install matplotlib
2. Numpy: Numpy gets installed automatically installed with Matplotlib. Although, if you face any import error, use the below command to install Numpy
pip install numpy
Note: If you are on Linux like me, then you might need to use pip3 instead of pip or you might create a virtual environment and run the above command.
Approach
- Import matplotlib, Numpy, wave, and sys module.
- Open the audio file using the wave.open() method.
- Read all frames of the opened sound wave using readframes() function.
- Store the frame rate in a variable using the getframrate() function.
- Finally, plot the x-axis in seconds using frame rate.
- Use the matplotlib.figure() function to plot the derived graph
- Use labels as per the requirement.
Below is the implementation.
Python3
import matplotlib.pyplot as plt
import numpy as np
import wave, sys
def visualize(path: str):
raw = wave.open(path)
signal = raw.readframes(-1)
signal = np.frombuffer(signal, dtype ="int16")
f_rate = raw.getframerate()
time = np.linspace(
0,
len(signal) / f_rate,
num = len(signal)
)
plt.figure(1)
plt.title("Sound Wave")
plt.xlabel("Time")
plt.plot(time, signal)
plt.show()
if __name__ == "__main__":
path = sys.argv[1]
visualize(path)
|
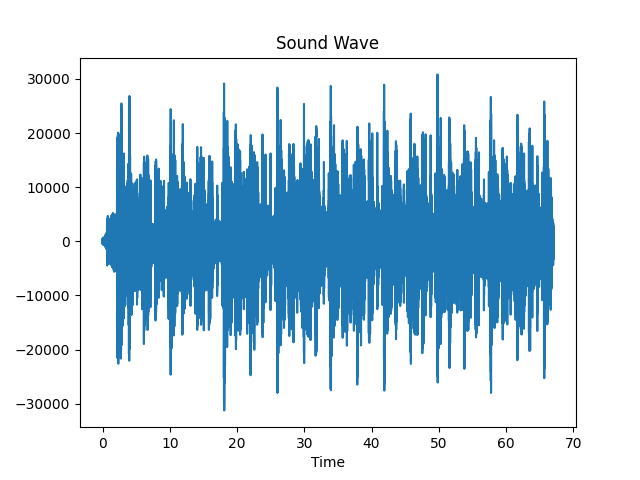
Output:
So, we are done with coding, now it’s the moment of truth. Let’s check if it actually works or not. You can try out any audio file but make sure that it has to be a wav file. If you have some other file type then you can use ffmpeg to convert it to wav file. If you want then feel free to download the audio file we will be using. You can download it using the link https://file-examples.com/wp-content/uploads/2017/11/file_example_WAV_1MG.wav”, but do try out other files too.
To run the code, you need to pass the path of the audio file in the command line. To do that type the following in your terminal:
python soundwave.py sample_audio.wav
It is important to note that name of the Python file is soundwave.py and the name of the audio file is sample_audio.wav. You need to change these according to your system. Now, a new window should have popped up and should be seeing a sound wave plot. If you have used my audio, then your plot should look something like this.
Share your thoughts in the comments
Please Login to comment...