Overflow Items in Android
Last Updated :
15 Feb, 2022
Overflow items are items of the overflow menu available in the ToolBar in the Android application. The elements present in the overflow menu can be accessed by clicking the three dots (3). These elements can be displayed outside the menu as well as (1) and (2).

In this article, we will show you how you could add Overflow items in Android. Follow the below steps once the IDE is ready.
Step by Step Implementation
Step 1: Create a New Project in Android Studio
To create a new project in Android Studio please refer to How to Create/Start a New Project in Android Studio. We demonstrated the application in Kotlin, so make sure you select Kotlin as the primary language while creating a New Project.
Step 2: Create vector assets for various menu items
Refer to How to Add Vector Assets in Android Studio? to understand how to create vector assets.


Step 3: Create a menu file (menu.xml)
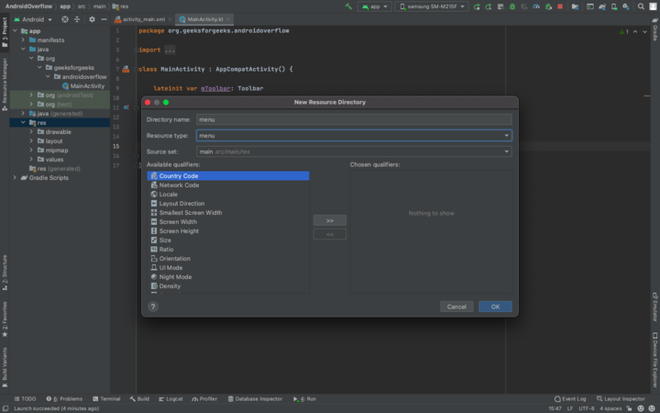
To create a menu file, Right-click on the res folder, go to New, and click on Android Resource Directory. Select resource type as menu and click on OK. The below pictures can be referred to for creating the menu file.


Step 4: Add items in the menu.xml file
Once the menu.xml file is created, items can be added in the fashion shown below. You can observe multiple attributes in the below items but order and action are most important. Order means the index at which the item is placed in the menu and action means to display it if space is available.
XML
<?xml version="1.0" encoding="utf-8"?>
<item
android:id="@+id/option1"
android:orderInCategory="1"
android:title="Bluetooth"
android:icon="@drawable/ic_bluetooth"
app:showAsAction="ifRoom"/>
<item
android:id="@+id/option2"
android:orderInCategory="2"
android:title="Chat"
android:icon="@drawable/ic_chat"
app:showAsAction="ifRoom"/>
<item
android:id="@+id/option3"
android:orderInCategory="3"
android:title="Airplane"
android:icon="@drawable/ic_bluetooth"
app:showAsAction="ifRoom"/>
<item
android:id="@+id/option4"
android:orderInCategory="4"
android:title="Autorenew"
android:icon="@drawable/ic_chat"
app:showAsAction="ifRoom"/>
<item
android:id="@+id/option5"
android:orderInCategory="5"
android:title="Photo"
android:icon="@drawable/ic_bluetooth"
app:showAsAction="ifRoom"/>
</menu>
|
Step 5: Working with the MainActivity.kt file
Go to the MainActivity.kt file and refer to the following code. Below is the code for the MainActivity.kt file. In the main code, we primarily try to inflate the menu created. Comments are added inside the code to understand the code in more detail.
Kotlin
package org.geeksforgeeks.androidoverflow
import android.os.Build
import androidx.appcompat.app.AppCompatActivity
import android.os.Bundle
import android.view.Menu
import android.view.MenuItem
import android.widget.Toast
import android.widget.Toolbar
import androidx.annotation.RequiresApi
import androidx.core.graphics.toColor
class MainActivity : AppCompatActivity() {
override fun onCreate(savedInstanceState: Bundle?) {
super.onCreate(savedInstanceState)
setContentView(R.layout.activity_main)
}
override fun onCreateOptionsMenu(menu: Menu?): Boolean {
val inflater = menuInflater
inflater.inflate(R.menu.menu, menu)
return true
}
@RequiresApi(Build.VERSION_CODES.O)
override fun onOptionsItemSelected(item: MenuItem): Boolean {
return when (item.itemId) {
R.id.option1 -> {
Toast.makeText(applicationContext, "Bluetooth Option Selected", Toast.LENGTH_SHORT).show()
true
}
R.id.option2 -> {
Toast.makeText(applicationContext, "Chat Option Selected", Toast.LENGTH_SHORT).show()
true
}
else -> super.onOptionsItemSelected(item)
}
}
override fun onPrepareOptionsMenu(menu: Menu): Boolean {
invalidateOptionsMenu()
menu.findItem(R.id.option1).isVisible = true
menu.findItem(R.id.option2).isVisible = true
return super.onPrepareOptionsMenu(menu)
}
}
|
Output:
You can see that Bluetooth and Chat are created and displayed outside the menu. In the menu, all remaining items are available. All the items are sequenced as the orderInCategory attribute.

Share your thoughts in the comments
Please Login to comment...