Oracle DataBase – Grant Privileges to a User in SQL Command Line
Last Updated :
12 Jan, 2022
As we create a new user in the Oracle database, we first need to grant it the required privileges. After that only we can use that user to perform any task, provided that task comes under the role of privileges provided to it. This is illustrated below. For this article, we will be using the SQL Command-Line.
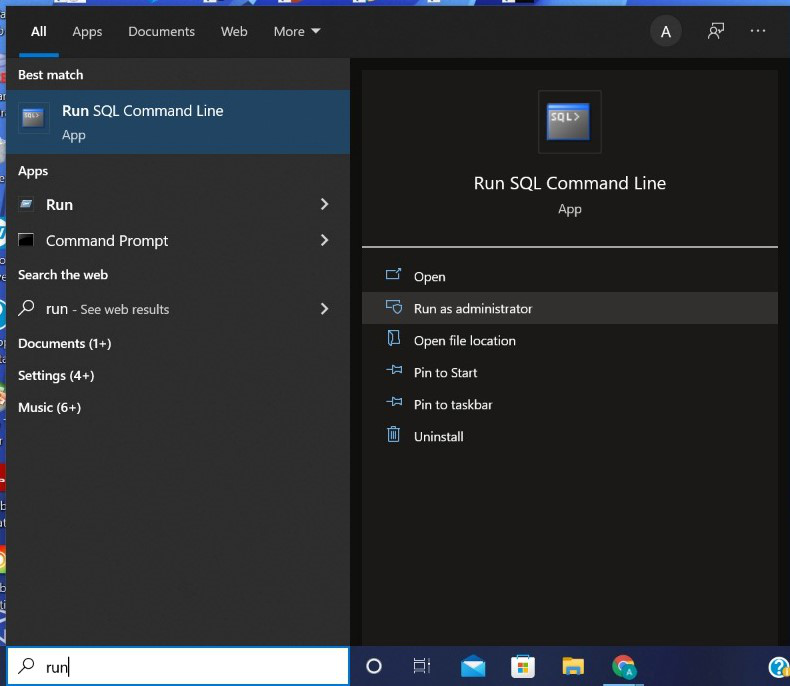
Step 1: Open the SQL Command Line by typing run in the Search toolbar and selecting the option of Run as administrator. The SQL Command Line opens.
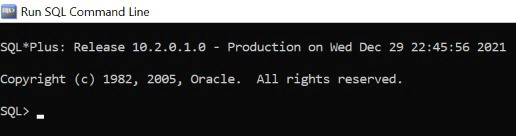
Step 2: The following screen appears after clicking “Yes” on the dialog box which appears after step 1.
Output:
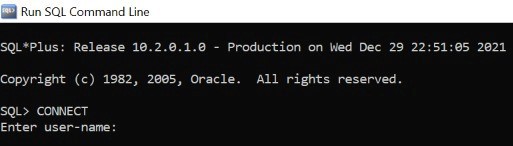
Step 3: Connect to the oracle database using CONNECT command.
Query:
CONNECT
Hit ENTER after typing the command.
Output:
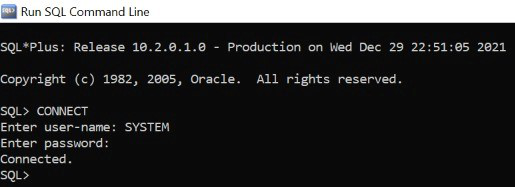
Step 4: Login using the default user i.e. the SYSTEM user. So type in the user-name as SYSTEM and then type in the correct password and hit Enter.
Note: The password for the SYSTEM user is set during Oracle installation.
Output:
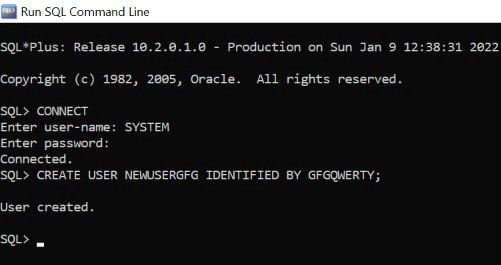
Step 5: Now, we create a new user named GFG.
Syntax:
CREATE USER NEW_USER_NAME INENTIFIED BY PASSWORD;
Query:
CREATE USER NEWUSERGFG INENTIFIED BY GFGQWERTY;
Note: Here, we set the password as GFGQWERTY.
Output:
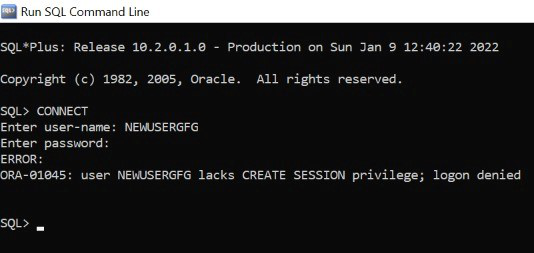
Step 6: Now, we close this session and reopen the SQL Command Line using Steps 1 and 2. We try to CONNECT to the session using NEWUSERGFG user-name. An error is thrown as the user NEWUSERGFG doesn’t have the privilege to start a session.
Query:
CONNECT
Output:
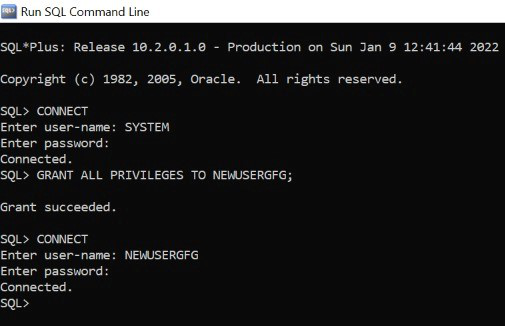
Step 7: Again connect using SYSTEM user-name. Now we shall enable all the privileges to NEWUSERGFG users.
Syntax:
GRANT ALL PRIVILEGES TO NEW_USER_NAME;
Query:
GRANT ALL PRIVILEGES TO NEWUSERGFG;

Step 8: We test the last step by re-attempting to connect using NEWUSERGFG user-name.
Query:
CONNECT
Note: The connection is successfully established this time and Connected is displayed.
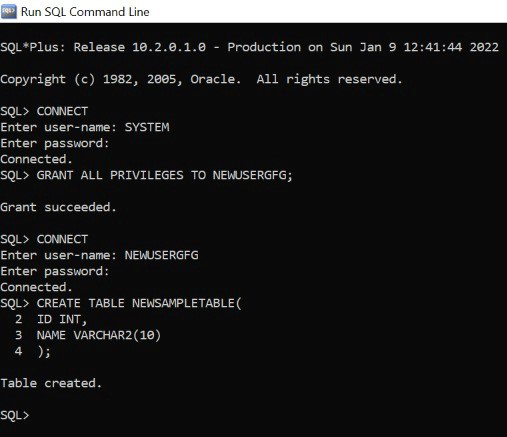
Step 9: Create a table named NEWSAMPLETABLE containing 2 columns i.e. ID and NAME. This further establishes a successful connection.
Query:
CREATE TABLE NEWSAMPLETABLE(
ID INT,
NAME VARCHAR2(10)
);
Like Article
Suggest improvement
Share your thoughts in the comments
Please Login to comment...