Next.js Nested Routes
Last Updated :
08 Feb, 2023
Next.js is a web-development framework that enhances the functionality of React library. This framework comes with default routing facilities that allow developers to create web pages easily without worrying about setting routes for them. This article will throw light on how to implement a specific type of route called nested route in a Next.js application.
Prerequisite: Next.js Routing
What are nested routes?
Just like creating multiple sub-domains for a single top-level domain, we can create multiple sub-routes inside the root directory. It is basically a route within another route. Nested routes help in the categorization of web pages.
Implementation of nested routes in Next.js: Next.js implements routing in the form of a file system where the ‘pages’ directory is the root directory which corresponds to the path ‘/’. Nested routes can be introduced in this file system by creating sub-directories inside the ‘pages’ directory. In the same way, multiple sub-directories can be created within a sub-directory. Thus, the nesting of multiple directories and their routes can be achieved in this way.
Steps to create a new Next.js application
Enter the following commands in the terminal to create a Next.js application.
npx create-next-app@latest <app_name>
The placeholder ‘<>’ specifies the name of the application to be created.
Change the directory to your application directory.
cd <app_name>
Install all the required npm dependencies.
npm install
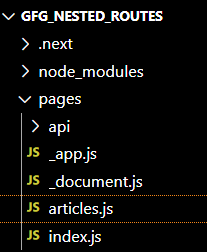
Initial Project Structure: The file structure of our project will look like the following image once the application has been created. Observation of project structure is crucial for our example since Next.js implements file structure-based routing.

initial file structure
Example 1: Let’s take a basic example to implement nested routing.
Step 1: Create a new directory called ‘nested’ inside the ‘pages’ directory.
Step 2: Create a new page called ‘index.js’ inside the newly created ‘nested’ directory which will be the root page for the ‘nested’ directory.
index.js
Javascript
export default function nested(){
return(
<div>
<h1 style={{color: "green"}}>
Geeks for Geeks
</h1>
<h1> Let's learn nested routing! </h1>
</div>
);
}
|
Step 3: Create a new page called ‘nested_page.js’ inside the ‘nested’ directory.
nested_page.js
Javascript
export default function nested(){
return(
<div>
<h1 style={{color: "green"}}>
Geeks for Geeks
</h1>
<h1> Nested routing is simple! </h1>
</div>
);
}
|
After creating nested routes, the project structure will look like this.

project structure after creating a nested route
Output:

NextJs Nested routes
The URL “http://localhost:3000/nested/” will load the root page of the ‘nested’ directory which is ‘index.js’.
The URL “http://localhost:3000/nested/nested_page” will load the page we have nested, inside the ‘nested’ directory, which is ‘nested_page.js’.
Example 2: To get a better understanding of the implementation of nested routing in Next.js, let us take another example of a primitive website of GeeksforGeeks which has a home page (index.js).
Step 1: Replace the content of index.js. For simplicity, let’s replace the default index page with a simple GeeksforGeeks home page.
index.js
Javascript
export default function home(){
return(
<div>
<h1 style={{color: "green"}}>
Geeks for Geeks
</h1>
<h1> Geeks for Geeks home page !!! </h1>
</div>
);
}
|
Step 2: Create a new page – articles.js (http://localhost:3000/articles)
Let’s now create a page for articles on our primitive GeeksforGeeks website. To achieve this, we don’t need to implement nested routing since we just need to create the required page under the root directory – ‘pages’. So, let’s create a page called ‘articles.js’ under the ‘pages’ directory.
articles.js
Javascript
export default function articles(){
return(
<div>
<h1 style={{color: "green"}}>
Geeks for Geeks
</h1>
<h1> Articles page of GeeksforGeeks </h1>
</div>
);
}
|
Now the file structure looks like this.
file structure after creating articles.js
Till this point, regular routing was able to satisfy our needs.
Step 3: First nested route (http://localhost:3000/articles/dsa). Articles do not come under a single category. Technical articles need to be categorized based on their topics. To achieve this, we need to implement nested routing. This can be done by creating a directory called ‘articles’ inside the root directory- ‘pages’ and creating different categories of articles such as ‘dsa.js‘ within the ‘articles’ directory. The nested route corresponding to the nested directory will be automatically generated by Next.js.
dsa.js
Javascript
export default function articles(){
return(
<div>
<h1 style={{color: "green"}}>
Geeks for Geeks
</h1>
<h1> Articles page of GeeksforGeeks </h1>
</div>
);
}
|
The file structure after the creation of our first nested route can be seen below.

first nested route
Step 4: Second nested route (http://localhost:3000/articles/dsa/post1)
Now that we have created a sample category in our project, It’s time to add sample posts to it. To do so, we need to create a directory called ‘dsa’ within the ‘articles’ directory. Inside the ‘DSA’ directory, we are going to create our sample post – ‘post1.js’.
post1.js
Javascript
export default function post1(){
return(
<div>
<h1 style={{color: "green"}}>
Geeks for Geeks
</h1>
<h1> Sample post of GeeksforGeeks </h1>
</div>
);
}
|
The file structure will now look like the one shown below.

NextJs Nested routes
Output:

NextJs Nested routes
Steps to run the application: Enter the following command in the terminal to start the development server.
npm run dev
Visit the below URL using a browser: http://localhost:3000/
Conclusion: Nested routes are essential for creating well-organized websites and web applications. The file-structure-based routing feature of Next.js has made the implementation of nested routes, a piece of cake. However, skills can only be acquired through practice. So feel free to nest multiple levels of routes by creating multiple sub-directories, based on the example provided.
Like Article
Suggest improvement
Share your thoughts in the comments
Please Login to comment...