Multi-template matching with OpenCV
Last Updated :
03 Jan, 2023
In this tutorial, we are going to see how to perform Multi-template matching with OpenCV.
We’ll walk you through the entire process of multi-template matching using OpenCV. For this tutorial, you’ll need a basic understanding of computer vision with OpenCV and have all the dependencies installed on your working environment.
What is template matching?
You could think of it as the most primitive/simple form of object detection. Basically, we try to find the given template in the input image that is provided to us.
How is it different from single template matching
In single template matching you use the cv2.matchTemplate method and then use the minMaxLoc to get the co-ordinate of the most probable point that matches our template and the create bounding box in image, but in multi-template matching, after we use the cv2.matchTemplate we’ll filter out all the points which are greater than a threshold(pass it as input or define it manually) and then use the non-maxima suppression(NMS) to smooth out multiple detections and create bounding boxes around the image.
Without NMS:
We would get multiple boxes being detected, like:
matchtemplate generates a number of bounding boxes for each object even with a low confidence
With NMS:
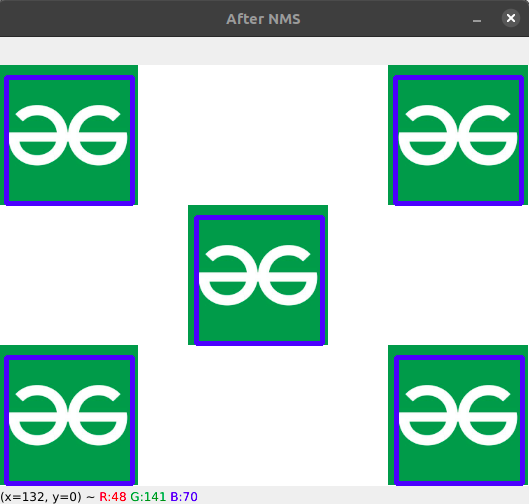
the bounding box are now smoothed out without any clutter
Stepwise Implementation
Step 1: Load the input and the template image
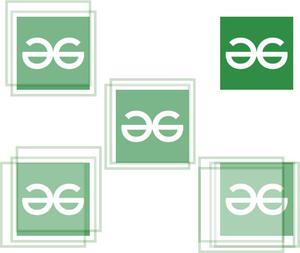
We’ll use the cv2.imread() function to first load the image and also the template to be matched. We have taken the following images:
Template:
Match images:
Python3
img = cv2.imread('Assets/img3.png')
temp = cv2.imread('Assets/logo_2.png')
|
Step 2: Convert them to Grayscale
We’ll convert both the images to grayscale because it makes the computation easier and algorithms are much more accurate on grayscale images.
Python3
img_gray=cv2.cvtColor(img,cv2.COLOR_BGR2GRAY)
temp_gray = cv2.cvtColor(temp,cv2.COLOR_BGR2GRAY)
|
Step 3: Use the cv2.matchTemplate method
We’ll be using the cv2.matchTemplate(), as mentioned previously, for matching the template with the image.
cv2.matchTemplate():
We pass in the image and the template and also the method we’ll be using. There are different methods available for template matching.
Python3
match = cv2.matchTemplate(image=img_gray,
templ=temp_gray,
method=cv2.TM_CCOEFF_NORMED)
|
Step 4: Filter out the most likely points by using a threshold value
Match template we’ll return all the bounding boxes even with low accuracies, so we’ll need to filter them out. Also, you need to remember that the cv2.matchTemplate method returns us the co-ordinates as a list of tuples, so we’ll store them separately in a list and then loop through each to create a new tuple with all four points required for the bounding box as shown below,
Python3
(y_points, x_points) = np.where(match >= thresh)
boxes = list()
for (x, y) in zip(x_points, y_points):
boxes.append((x, y, x + W, y + H))
|
Step 5: Use the non-maxima suppression -> this is used to suppress multiple bounding boxes for the same object
Now we’ll apply NMS on the bounding boxes to smooth out all the predictions and give us a definite bounding box for each object.
Python3
boxes = non_max_suppression(np.array(boxes))
|
Step 6: Show the detections on the image
Finally, show our predictions on the image by drawing the bounding box.
Python3
for (x1, y1, x2, y2) in boxes:
cv2.rectangle(img, (x1, y1), (x2, y2),
(255, 0, 0),3)
cv2.imshow("Template" ,temp)
cv2.imshow("After NMS", img)
cv2.waitKey(0)
|
Below is the complete Implementation:
Python3
import cv2
import numpy as np
from imutils.object_detection import non_max_suppression
img = cv2.imread('Assets/img3.png')
temp = cv2.imread('Assets/logo_2.png')
W, H = temp.shape[:2]
thresh = 0.4
img_gray = cv2.cvtColor(img,
cv2.COLOR_BGR2GRAY)
temp_gray = cv2.cvtColor(temp,
cv2.COLOR_BGR2GRAY)
match = cv2.matchTemplate(
image=img_gray, templ=temp_gray,
method=cv2.TM_CCOEFF_NORMED)
(y_points, x_points) = np.where(match >= thresh)
boxes = list()
for (x, y) in zip(x_points, y_points):
boxes.append((x, y, x + W, y + H))
boxes = non_max_suppression(np.array(boxes))
for (x1, y1, x2, y2) in boxes:
cv2.rectangle(img, (x1, y1), (x2, y2),
(255, 0, 0), 3)
cv2.imshow("Template", temp)
cv2.imshow("After NMS", img)
cv2.waitKey(0)
cv2.destroyAllWindows()
|
Output:
With no matching template image:
Note: Remember to use a small image for the template ~15-20 Kb (around 50K-60K pixels) because otherwise, the algorithm won’t be able to work it out, because then the computation will increase exponentially which our program isn’t meant for, which in turn makes our program less and less accurate.
Like Article
Suggest improvement
Share your thoughts in the comments
Please Login to comment...