Microsoft Azure – Working with PowerShell in Cosmos DB
Last Updated :
26 Jan, 2021
Azure Cosmos DB is a fully managed NoSQL database for build applications designed by Microsoft. It is highly responsive, scalable, and fully automated. Azure Cloud Shell is an in-browser terminal used to manage cloud instances in Azure. The PowerShell is an application used for the same purpose but is installed locally.
In this article, we will look into Azure Cosmos DB with PowerShell where we will create a new Cosmos DB account, a database, and a container with PowerShell. Here we’ll use the Azure Cloud Shell, and you can also use a local installation of PowerShell.Some of the operations that you can perform using PowerShell in Cosmos DB are listed below:
- Create a Cosmos DB database
- Update Cosmos DB database
- Delete Cosmos DB database
To create a Cosmos DB database with Powershell/ Cloud Shell follow the below steps:
- Step 1: Before we can start, we need to install the Cosmos DB PowerShell module like with the below command:
Install-Module -Name Az.CosmosDB
At the end of the installation you need to verify again if to install the same as shown below:

- Step 2: First, to see if it works, we will run the below command to list all Cosmos DB accounts in this resource group:
Get-AzCosmosDBAccount -ResourceGroupName "RESOURCE NAME"
This will list the accounts as shown below:
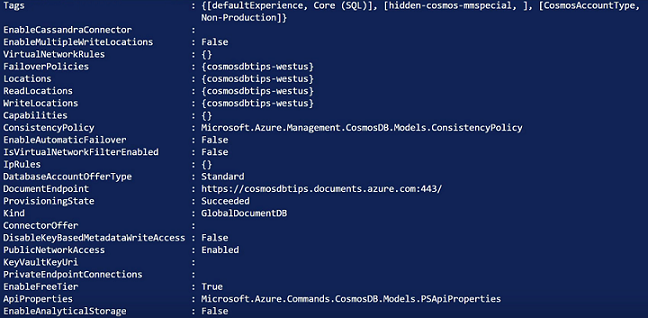
And we can see that there is one in this resource group.
- Step 3: Now, let’s create a new Azure Cosmos DB account. This will contain a database that will contain containers with documents in it. This will be an account that uses the SQL API to work with data. This can take a while. At this stage, the Cosmos DB account is created.
- Step 4: Now we need a database for the account. To do so use the below command:
New-AzCosmosDBSqlDatabase
It would result in something like below after completion:
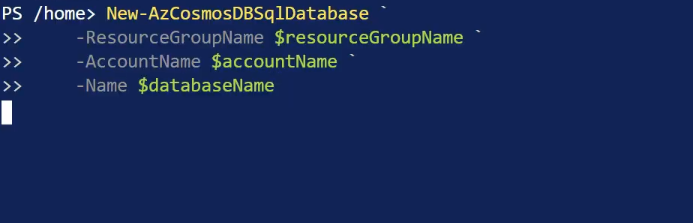
This creates a database, and it is done.
- Step 5: Now, we can add a container to the database with the below command:
New-AzCosmosDBSqlContainer
This will result in the following:
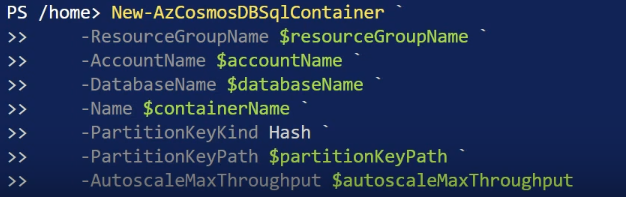
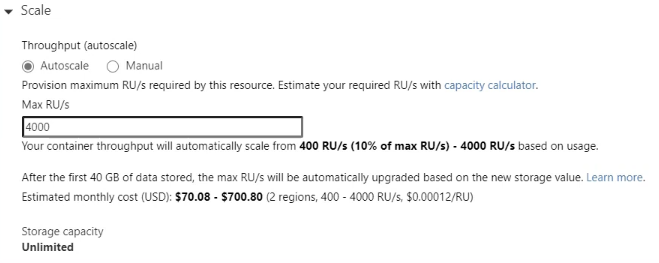
You can create multiple containers in a database, and this one would use the Autoscale feature as shown in the above image:
$ autoscaleMaxThroughput = 4000 #minimum = 4000
Now let’s go to the Azure portal to look at the result. We are in the Azure Cosmos DB account in the Data Explorer. Here is the database, and under that is the container.
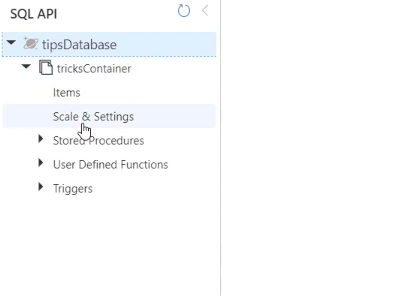
It also has autoscale enabled.
We’ve used PowerShell to list Azure Cosmos DB accounts and create a new one with a database and autoscale container.
Like Article
Suggest improvement
Share your thoughts in the comments
Please Login to comment...