Microsoft Azure – Introduction to Azure Database For MySQL
Last Updated :
31 Mar, 2023
This article aims to provide introductory knowledge of the Azure Database for MySQL. By the end of this read, users will be able to
- Understand the basic idea of Azure Database for MYSQL, and how it differs from traditional MYSQL databases.
- Understand business requirements and benefits of this service.
- Understand how to deploy the MYSQL server in the Azure portal.
Key Terminologies:
- PaaS: Platform as a Service
- SLA: Service Level Agreement
What is Azure Database for MySQL?
Azure Database for MySQL is a PaaS feature in Microsoft’s Azure Cloud. Basically, you get a fully functional, fully managed relational MySQL database server based on the latest MySQL Community edition (MYSQL version 8.0.28 at the time of writing). The only difference is that the server is hosted on the Azure cloud. Microsoft is responsible for managing the infrastructure of servers and providing high redundancy, high availability, and up to 99.99% uptime SLAs.
Business benefits of using Azure Database for MySQL:
- 99.99% availability – Azure provides a high availability SLA for all its services, ensuring that you face virtually zero downtime. Find a detailed region-wise SLA guide here.
- Fully managed service – No upfront cost of installations, no hassles of routine security, maintenance, updates, and patches.
- Easily set up and deploy your server within minutes. Azure Database for MYSQL provides two popular deployment models – Single server deployment for existing workloads and Flexible Server Deployment which gives you more granular control of the database.
- Get intelligent insights – Get customized recommendations to improve database performance.
- Pay-as-you-go – Pay only for servers that you use. You can easily provision servers, scale up, and change your pricing tier whenever needed. Check out detailed pricing here.
Now that you have a basic understanding of the Azure Database for MySQL, let’s check out how you can start deploying your own server on the Azure portal!
Deployment:
Follow the below steps to start deploying your own server on the Azure portal:
- Visit portal.azure.com. If you don’t have an account, here’s how you can create an account and get started with Azure’s free trial. If you do already have an account, log in.
- Azure portal home page.
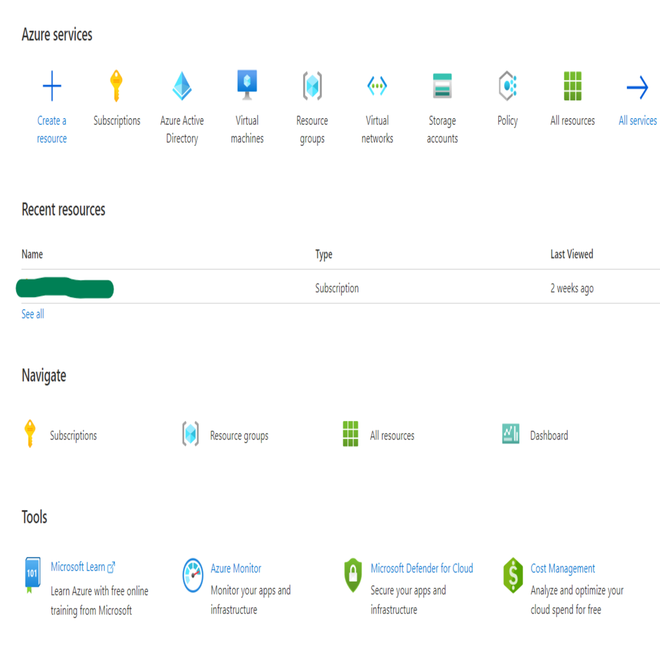
Azure portal home page
- Type Azure Database for MYSQL in the search bar and hit enter. On the page that opens, click “Create Azure Database for MYSQL Server”.
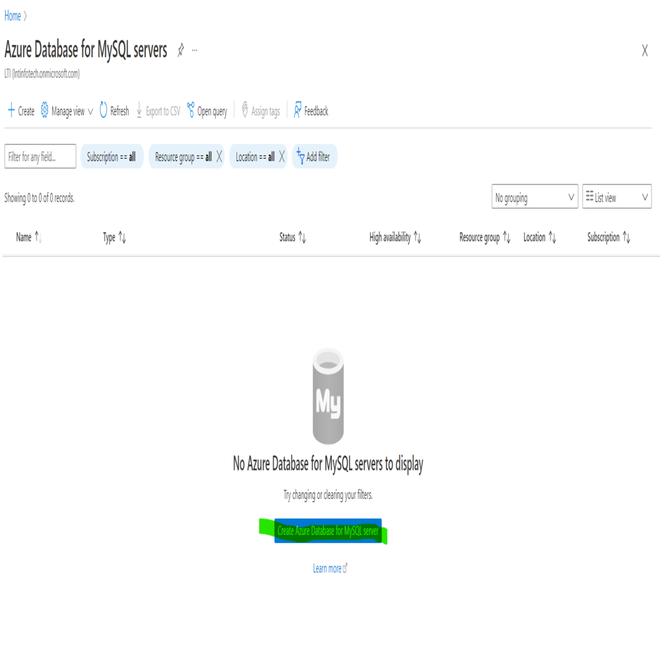
Azure Database for MYSQL
- Select a deployment option. In this case, we’re going with Flexible Server Deployment.
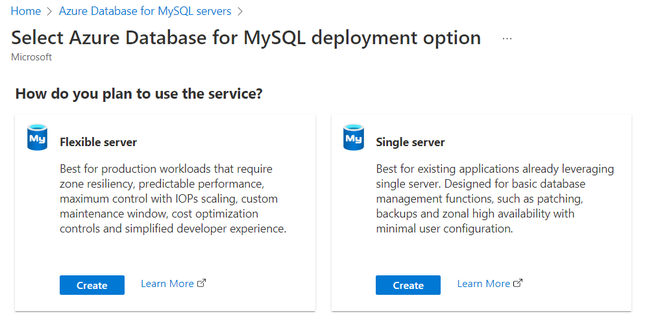
Flexible Server Deployment
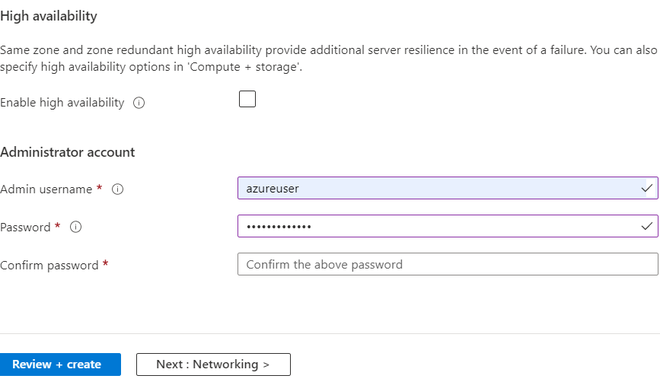
- On the following page, under the “Basics” tab, enter information like your subscription and resource group. Note that you can also create a new resource group at this stage. This is followed by your server details and account details. On the right pane, you’ll be able to see the approximate cost of resources as you toggle different options.
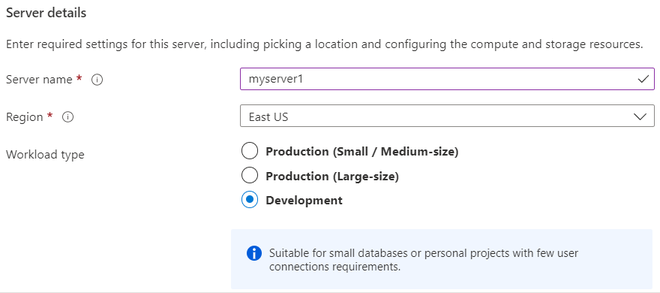
Basics tab
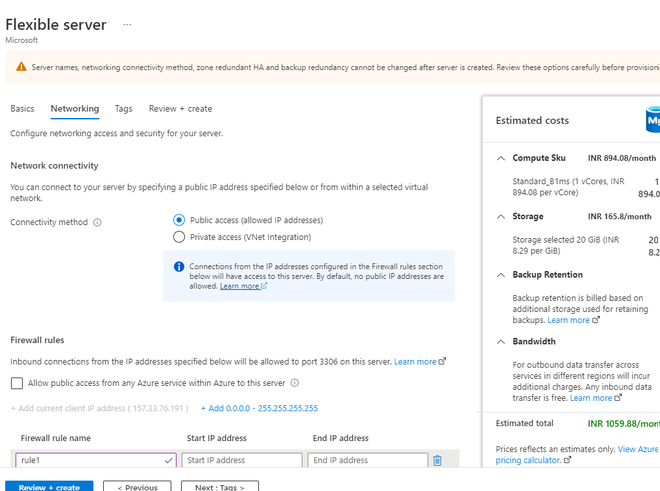
- Next, let’s move on to the “Networking” tab, define your IP connectivity and firewall rules. Note that you need at least one inbound and 1 outbound port to work with your database. For testing, you can use a public IP address and set your firewall rules “Open to all”. In a production environment, it is always recommended to restrict your firewall rules to allow for specific IP addresses to connect.
Network tab
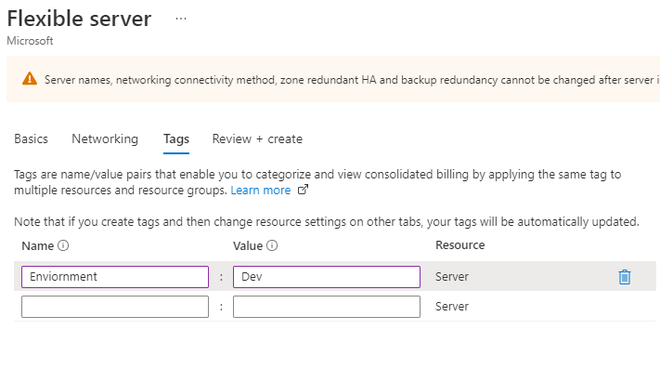
- The “tags” pane allows you to provide optional tagging. In commercial environments, tagging is crucial to define owners, pricing, environments and more.
Tagging resources
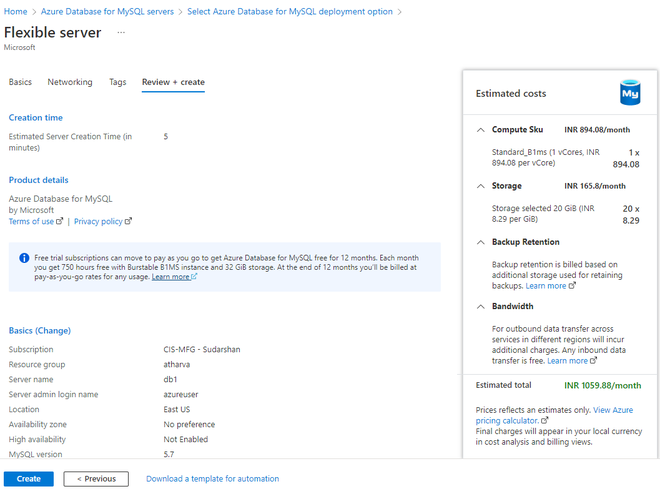
- Next, click on “Review+Create“. Here, you can see a summary of all selected options and the final estimated cost. Click “Create” to deploy your first Azure SQL server for Azure!
Review+Create
Like Article
Suggest improvement
Share your thoughts in the comments
Please Login to comment...