Machine Learning Workflow using Pycaret
Last Updated :
11 May, 2021
PyCaret is an open-source machine learning library which is simple and easy to use. It helps you right from the start of data preparation to till the end of model analysis and deployment. Moreover, it is essentially a python wrapper around several machine learning libraries and frameworks such as scikit-learn, spaCy etc, It also has the support of complex machine learning algorithms which are tedious to tune and implement.

So why to use Pycaret. Well, there are lots of reasons for this let me explain to you a few of them. The first Pycaret is a low-code library which makes you more productive while solving a business problem. Second Pycaret can do data preprocessing and feature engineering with a single line of code, where in reality, it is very time-consuming. Third Pycaret allows you to compare different machine learning models and finetune your model very easily. Well, there are many other advantages but for now, stick with them.
Installation
pip install pycaret
if you are using Azure Notebooks or Google Colab
!pip install pycaret
In this article we are going to use pycaret on Iris classification dataset, you can download the dataset here https://archive.ics.uci.edu/ml/datasets/iris
Let’s start by importing required libraries.
Python3
import numpy as np
import pandas as pd
|
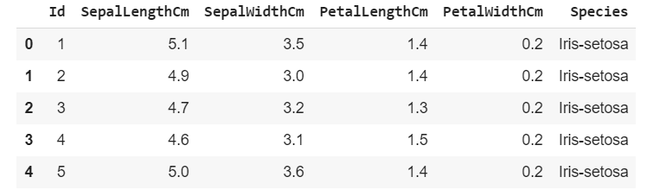
Reading the dataset using pandas library
Python3
iris_classification = pd.read_csv('Iris.csv')
iris_classification.head(5)
|
Output:
Starting with pycaret
Initializing the setup
Python3
from pycaret.classification import *
clf = setup(iris_classification, target = 'Species')
|
setup takes our data iris_classification and the target value(which needs to predicted) in our case it is Species
Output:
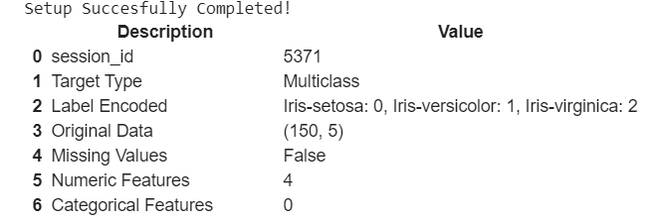
compressed output
It gives basic description of our dataset, you can see it automatically encoded the target variables into 0,1,2.
Now let’s compare various classification models that Pycaret built for us
Output:
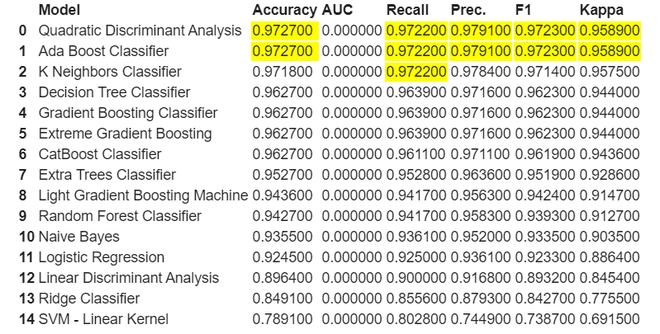
As we can see here it highlights the highest value in each respective column. Here for this classification both Quadratic Discriminant Analysis and Ada Boost Classifier both are performing well let’s take QDA for our further model creation and analysis.
Creation of model
Python3
model = create_model('qda')
|
Output:
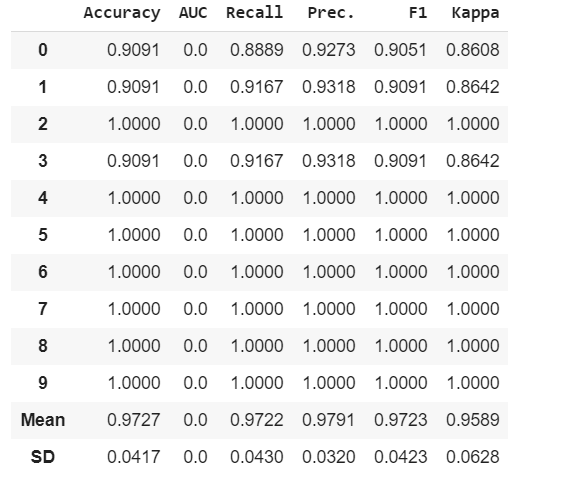
It shows various metrics used to evaluate model on different folds.
Let’s tune the model hyperparameters
Python3
tuned_model = tune_model('qda')
|
Output:
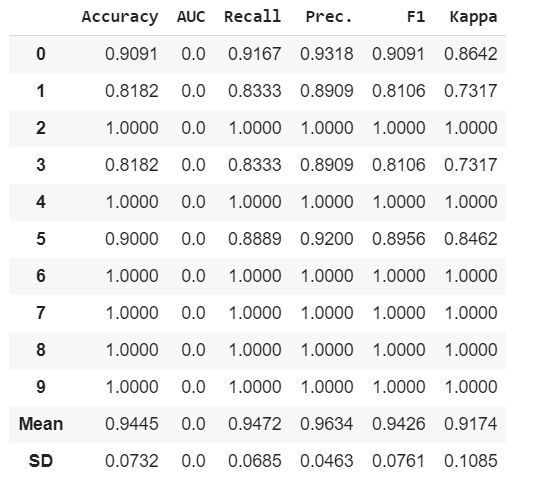
We can see here some Recall, Precision, F1 and Kappa has increased because of fine tuning of our model.
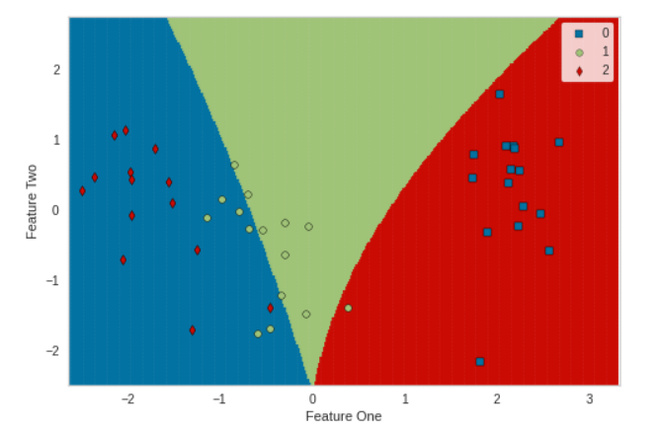
Now let’s do some model analysis
Python3
plot_model(tuned_model, plot = 'boundary')
|
Output:
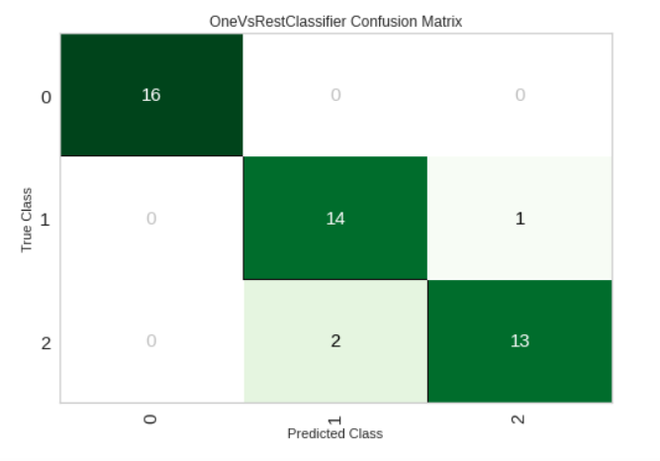
Python3
plot_model(tuned_model, plot = 'confusion_matrix')
|
Output:
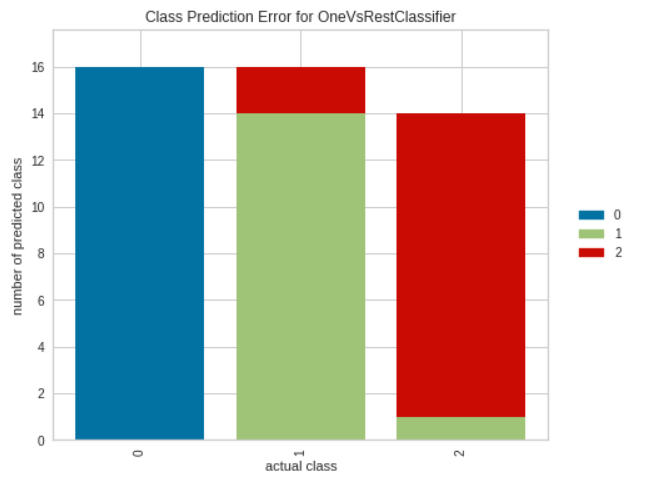
Python3
plot_model(tuned_model, plot = 'error')
|
Output:
Python3
plot_model(tuned_model, plot = 'class_report')
|
Output:

Finalize the model
Python3
finalize_model(tuned_model)
|
Output:

Saving the model
Python3
save_model(tuned_model, 'qda1')
|
Output:

Like Article
Suggest improvement
Share your thoughts in the comments
Please Login to comment...