L.A.M.P. Stack Setup in AWS
Last Updated :
01 Jul, 2022
Amazon Web Services (AWS) is one of the global leaders in IaaS (Infrastructure-as-a-Service) and PaaS (Platform-as-a-Service) for cloud ecosystems, that is used to create a scalable cloud application. So in this article, we are going to learn how to set up a web server (L.A.M.P. stack) by using AWS EC2 service.
Getting started (Creating instance)
Firstly you need to make an account on Amazon with a legitimate card and afterward actuate a 12 months free tier plan. If you are a student you can get a student starter pack on AWS educate by your college id.
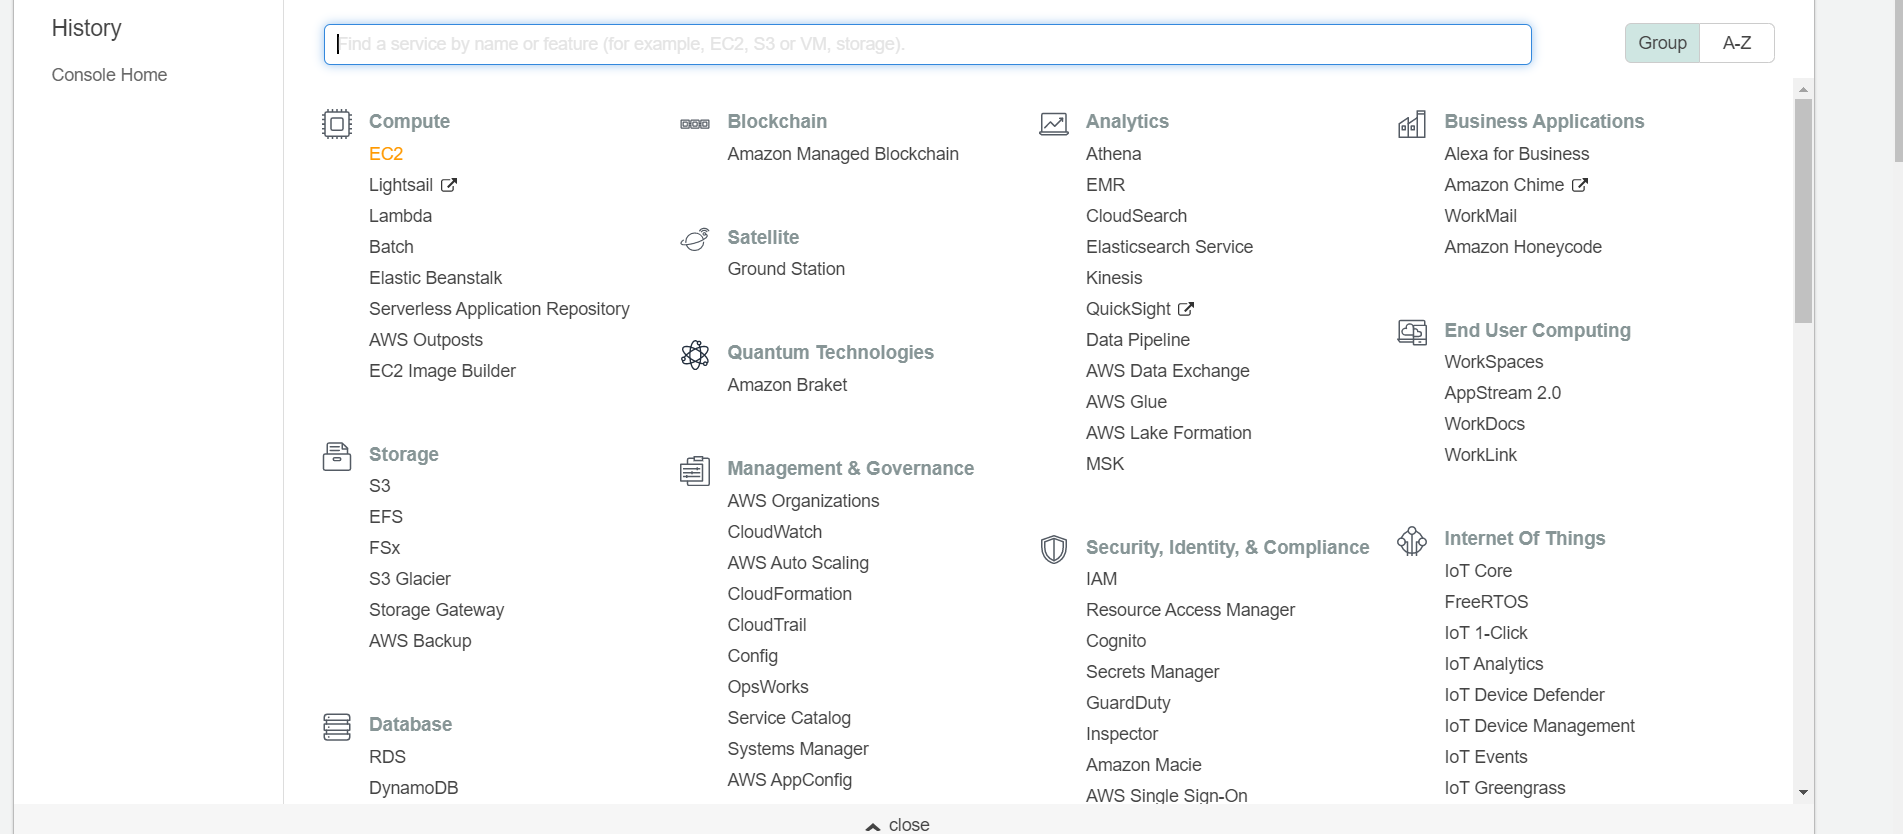
Step 1: In the AWS console panel go to services and search EC2 and select it.
Step 2: Go to the side panel menu and select instances.

Step 3: Click on the Launch Instances button.

Step 4: Select the operating system (A.M.I.) for your instance.

Step 5: Choose the type of the instance according to your need.

Step 6: Now configure your instance i.e you can choose the VPC or can create a new one, create the IAM roles, enable monitoring, etc.

Step 7: Now select the amount and type of storage.

Step 8: Configure the firewall for security. For web server usage, open HTTP and HTTPS ports and for accessing the instance open SSH port.

Step 9: Now review and launch the instance. Then create a key pair and download it.

Step 10: Your Instance has been created successfully.

Installing XAMPP for the webserver
In this section, we will Linux/mac terminal, for Windows 10 you can use power shell or can use putty.
Step 1: Go to the folder where the key(.pem) file is stored and connect to your instance through SSH with the following command.
ssh -i keyname.pem ubuntu@ip_address
Step 2: Use the following command and update your os package.
ubuntu@ip-159-73-16-319:~$ sudo su
sudo apt-get update
Step 3: Now stop the default apache (if any).
sudo /etc/inid.d/apache stop
Step 4: Now download XAMPP and install it.
wget https://www.apachefriends.org/xampp-files/7.2.2/xampp-linux-x64-7.2.2-0-installer.run   // Installer
sudo chmod +x xampp-linux-x64-7.0.23-0-installer.run                                         // Changing permission
sudo ./xampp-linux-x64-7.0.23-0-installer.run                                                // Running Installer
Note: The stack includes – Apache 2.4.29, MariaDB 10.1.30, PHP 7.2.2 + SQLite 2.8.17/3.7.17
For PHP 5 use: https://www.apachefriends.org/xampp-files/5.6.33/xampp-linux-x64-5.6.33-0-installer.run
Step 5: After installation, you have to check the following XAMPP instructions.
Select the components you want to install; clear the components you do not want to install. Click Next when you are ready to continue.
XAMPP Core Files : Y (Cannot be edited)
XAMPP Developer Files [Y/n] : Y
Is the selection above correct? [Y/n]: Y

Installation Directory
XAMPP will be installed to /opt/lampp
Press [Enter] to continue:
Do you want to continue? [Y/n]:Y
Step 6: Now start the services.
sudo /opt/lampp/lampp start
Step 7: Now you have to edit the XAMPP configuration file and then restart xampp.
vi /opt/lampp/etc/extra/httpd-xampp.conf
<LocationMatch "^/(?i:(?:xampp|security|licenses|phpmyadmin|webalizer|server-status|server-info))">
Require local
ErrorDocument 403 /error/XAMPP_FORBIDDEN.html.var
</LocationMatch>

to

<LocationMatch "^/(?i:(?:xampp|security|licenses|phpmyadmin|webalizer|server-status|server-info))">
Order deny,allow
Allow from all
Allow from ::1 127.0.0.0/8 \
fc00::/7 10.0.0.0/8 172.16.0.0/12 192.168.0.0/16 \
fe80::/10 169.254.0.0/16
ErrorDocument 403 /error/XAMPP_FORBIDDEN.html.var
</LocationMatch>
sudo /opt/lampp/lampp restart
Step 8: Now we have to set security settings to set a password for MySQL.
XAMPP: Your XAMPP pages are NOT secured by a password.
XAMPP: Do you want to set a password? [yes]
XAMPP: Your XAMPP pages are NOT secured by a password.
XAMPP: Do you want to set a password? [yes] no
XAMPP: MySQL is accessible via network.
XAMPP: Normally that's not recommended. Do you want me to turn it off? [yes] yes
XAMPP: Turned off.
XAMPP: Stopping MySQL...ok.
XAMPP: Starting MySQL...ok.
XAMPP: The MySQL/phpMyAdmin user pma has no password set!!!
XAMPP: Do you want to set a password? [yes] yes
XAMPP: Password:*********
XAMPP: Password (again):*********
XAMPP: Setting new MySQL pma password.
XAMPP: Setting phpMyAdmin's pma password to the new one.
XAMPP: MySQL has no root passwort set!!!
XAMPP: Do you want to set a password? [yes] yes
XAMPP: Write the password somewhere down to make sure you won't forget it!!!
XAMPP: Password:*********
XAMPP: Password (again):*********
XAMPP: Setting new MySQL root password.
XAMPP: Change phpMyAdmin's authentication method.
XAMPP: The FTP password for user 'daemon' is still set to 'xampp'.
XAMPP: Do you want to change the password? [yes] no
XAMPP: Done.
Everything is completely set. You can access the website: http://IP-ADDRESS/ and for the database:http://IPAddress/phpmyadmin/
The webserver directory is :
/opt/lampp/htdocs/
Like Article
Suggest improvement
Share your thoughts in the comments
Please Login to comment...