Jetpack Compose Navigation and Passing Data in Android
Last Updated :
23 Jul, 2021
Almost every app uses some kind of navigation, allows users to move from one screen to another. In this article, we will learn to implement Navigation in Jetpack Compose using Compose way. We will build a simple app demonstrating Jetpack compose navigation, It will have three screens(Home, Profile, and Settings). It will navigate to Settings Screen with some data and to Profile Screen without any data. A sample video is given below to get an idea about what we are going to do in this article.
Prerequisites:
- Basic Knowledge of Kotlin.
- Knowledge of Jetpack Compose.
Step by Step Implementation
Step 1: Create a New Project (Or use it in the existing Compose project)
To create a new project in the Android Studio Canary version, refer to the article How to Create a new Project in the Android Studio Canary Version with Jetpack Compose.
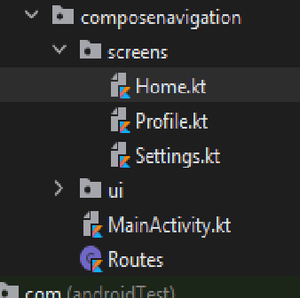
Project Structure
Step 2: Add dependencies:
Open build.gradle(app) and add this line inside dependencies.
implementation “androidx.navigation:navigation-compose:2.4.0-alpha04”
Step 3: Creating Routes
Create a file with the name Routes. Add the following code. It will contain the route names of all screens.
Kotlin
sealed class Routes(val route: String) {
object Home : Routes("home")
object Profile : Routes("profile")
object Settings : Routes("setting")
}
|
Step 4: Working with the screens
It will have three screens, so we need to create three composable. Create a package with name screens and create three files (Home.kt, Profile.kt, Settings.kt). Working With Home Screen:
Kotlin
@Composable
fun Home(navController: NavHostController) {
var counter by remember {
mutableStateOf(0)
}
Box(
modifier = Modifier
.fillMaxSize()
.background(Color.White), contentAlignment = Alignment.Center
) {
Column {
Text(text = "Home, Counter is $counter", color = Color.Black)
Spacer(modifier = Modifier.height(20.dp))
Button(onClick = { counter++ }) {
Text(text = "Increment Counter", color = Color.White)
}
Spacer(modifier = Modifier.height(20.dp))
Button(onClick = {
navController.navigate(Routes.Profile.route)
}) {
Text(text = "Navigate to Profile", color = Color.White)
}
Spacer(modifier = Modifier.height(20.dp))
Button(onClick = {
navController.navigate(Routes.Settings.route + "/$counter")
}) {
Text(text = "Navigate to Settings", color = Color.White)
}
}
}
}
|
Working with Profile Screen:
Kotlin
@Composable
fun Profile() {
Box(
modifier = Modifier
.fillMaxSize()
.background(Color.White), contentAlignment = Alignment.Center
) {
Column {
Text(
text = "Navigation without arguments",
Modifier.padding(10.dp),
color = Color.Black
)
Text(text = "Profile Screen", Modifier.padding(10.dp), color = Color.Black)
}
}
}
|
Working with Settings Screen:
Kotlin
@Composable
fun Setting(counter: String?) {
Box(
modifier = Modifier
.fillMaxSize()
.background(Color.White), contentAlignment = Alignment.Center
) {
Column {
Text(text = "Navigation with arguments", Modifier.padding(10.dp), color = Color.Black)
Text(
text = "Settings Screen, passed data is $counter",
Modifier.padding(10.dp),
color = Color.Black
)
}
}
}
|
Step 5: Working with the MainActivity and Navigation Components
Create a function with the name ScreenMain in MainActivity.kt which will contain NavHost and the Composable for navigation. Refer to the comments in the code for better understanding.
Kotlin
@Composable
fun ScreenMain() {
val navController = rememberNavController()
NavHost(navController = navController, startDestination = Routes.Home.route) {
composable(Routes.Home.route) {
Home(navController = navController)
}
composable(Routes.Profile.route) {
Profile()
}
composable(Routes.Settings.route + "/{id}") { navBackStack ->
val counter = navBackStack.arguments?.getString("id")
Setting(counter = counter)
}
}
}
|
And finally, call this Composable from setContent in onCreate of MainActivity.
Kotlin
class MainActivity : ComponentActivity() {
override fun onCreate(savedInstanceState: Bundle?) {
super.onCreate(savedInstanceState)
setContent {
Surface(color = MaterialTheme.colors.background) {
ScreenMain()
}
}
}
}
|
Further, you can add animations when opening the screens using Compose Animation APIs.
Output:
Get the complete project from Github.
Share your thoughts in the comments
Please Login to comment...