JEP Package Tool in Java
Last Updated :
29 Dec, 2021
J package tool was introduced as an incubation tool in java 14. It remained an incubation tool till java 15. It packages java applications into platform-specific features. Basically, this tool converts our java source file into an executable file. In Windows, the executable file is of two types .exe and .msi. In ubuntu its of type .rpm and .deb. J package tool converts java source files into these files.
Procedure:
- Create a maven project into your IDE and create and new java class(pre-requisite step)
- Insert fragment of code in java file. (pre-requisite step)
- Define the JAR file name in which we are going to wrap the .class file and associated configuration. (pre-requisite step)
- Open terminal in IDE
- Enter command ‘mvn clean install‘
- Enter the following command to package and the JavaEx14.exe file will get created after this command.
- Locate this file.
- Click and install them
- Click on JavaEx14 to run the application and a running pop-up will be displayed.
Implementation:
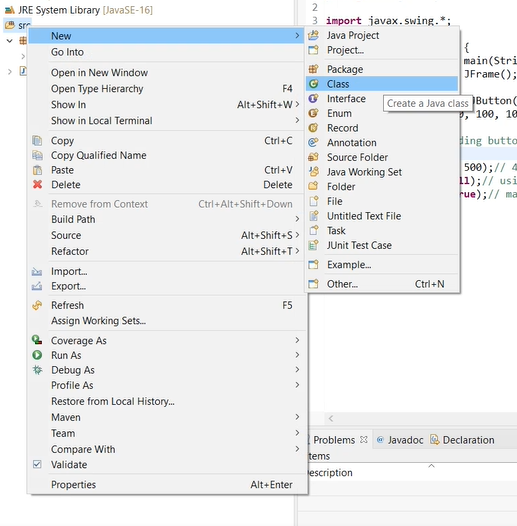
Step 1: Create a maven project into your IDE and create and new java class which as we all know.
Step 2: Insert the following code into that java file provided below.
Example 1: Java application program
Java
import javax.swing.*;
public class GFG {
public static void main(String args[])
{
JFrame f = new JFrame();
JButton b = new JButton("click");
b.setBounds(130, 100, 100, 40);
f.add(b);
f.setSize(400, 300);
f.setLayout(null);
f.setVisible(true);
}
}
|
Step 3: Now we need to define JAR file name in which we are going to wrap the .class file and associated configuration. It’s enclosed into a build path which is as shown below:
Example 2: JAR file
<?xml version="1.0" encoding="UTF-8"?>
<project xmlns="http://maven.apache.org/POM/4.0.0"
         xmlns:xsi="http://www.w3.org/2001/XMLSchema-instance"
         xsi:schemaLocation="http://maven.apache.org/POM/4.0.0 http://maven.apache.org/xsd/maven-4.0.0.xsd">
    <modelVersion>4.0.0</modelVersion>

    <groupId>org.example</groupId>
    <artifactId>G2</artifactId>
    <version>1.0-SNAPSHOT</version>

    <properties>
        <maven.compiler.source>16</maven.compiler.source>
        <maven.compiler.target>16</maven.compiler.target>
    </properties>
    <build>
        <finalName>java16ex</finalName>
    </build>
</project>
Let us now come up with the primary steps with visual aids in a sequential manner.
Step 4: Open terminal in the IDE

Step 5: Enter the following command to create jar dependency

After executing the command following jar will get created as pictorially shown below

Step 6: Enter the following command to package as shown in below visual aid:

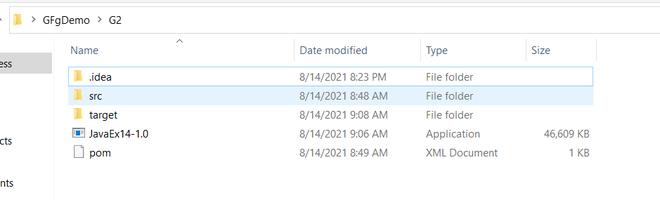
After executing this command JavaEx14.exe file will get created as follows

Step 7: Locate the file
Step 8: Click and install them

Step 9: Click on JavaEx14 to run the application

Running application pop-up will be displayed on the console

Like Article
Suggest improvement
Share your thoughts in the comments
Please Login to comment...