Introduction to pygame
Last Updated :
08 Oct, 2020
Game programming is very rewarding nowadays and it can also be used in advertising and as a teaching tool too. Game development includes mathematics, logic, physics, AI, and much more and it can be amazingly fun. In python, game programming is done in pygame and it is one of the best modules for doing so.
Installing pygame:
Pygame requires Python; if you don’t already have it, you can download it from python.org. Use python 3.6.1 or greater, because it is much friendlier to newbies, and additionally runs faster.
The best way to install pygame is with the pip tool (which python uses to install packages). Note, this comes with python in recent versions. We use the –user flag to tell it to install into the home directory, rather than globally.
python3 -m pip install -U pygame --user
To see if it works, run one of the included examples:
python3 -m pygame.examples.aliens
If it works, we are ready to go!
Once you have installed pygame, you’re ready to create your very first pygame instance.
Python3
import pygame

from pygame.locals import *
class Square(pygame.sprite.Sprite):
def __init__(self):
super(Square, self).__init__()
self.surf = pygame.Surface((25, 25))
self.surf.fill((0, 200, 255))
self.rect = self.surf.get_rect()
pygame.init()
screen = pygame.display.set_mode((800, 600))
square1 = Square()
square2 = Square()
square3 = Square()
square4 = Square()
gameOn = True
while gameOn:
for event in pygame.event.get():
if event.type == KEYDOWN:
if event.key == K_BACKSPACE:
gameOn = False
elif event.type == QUIT:
gameOn = False
screen.blit(square1.surf, (40, 40))
screen.blit(square2.surf, (40, 530))
screen.blit(square3.surf, (730, 40))
screen.blit(square4.surf, (730, 530))
pygame.display.flip()
|
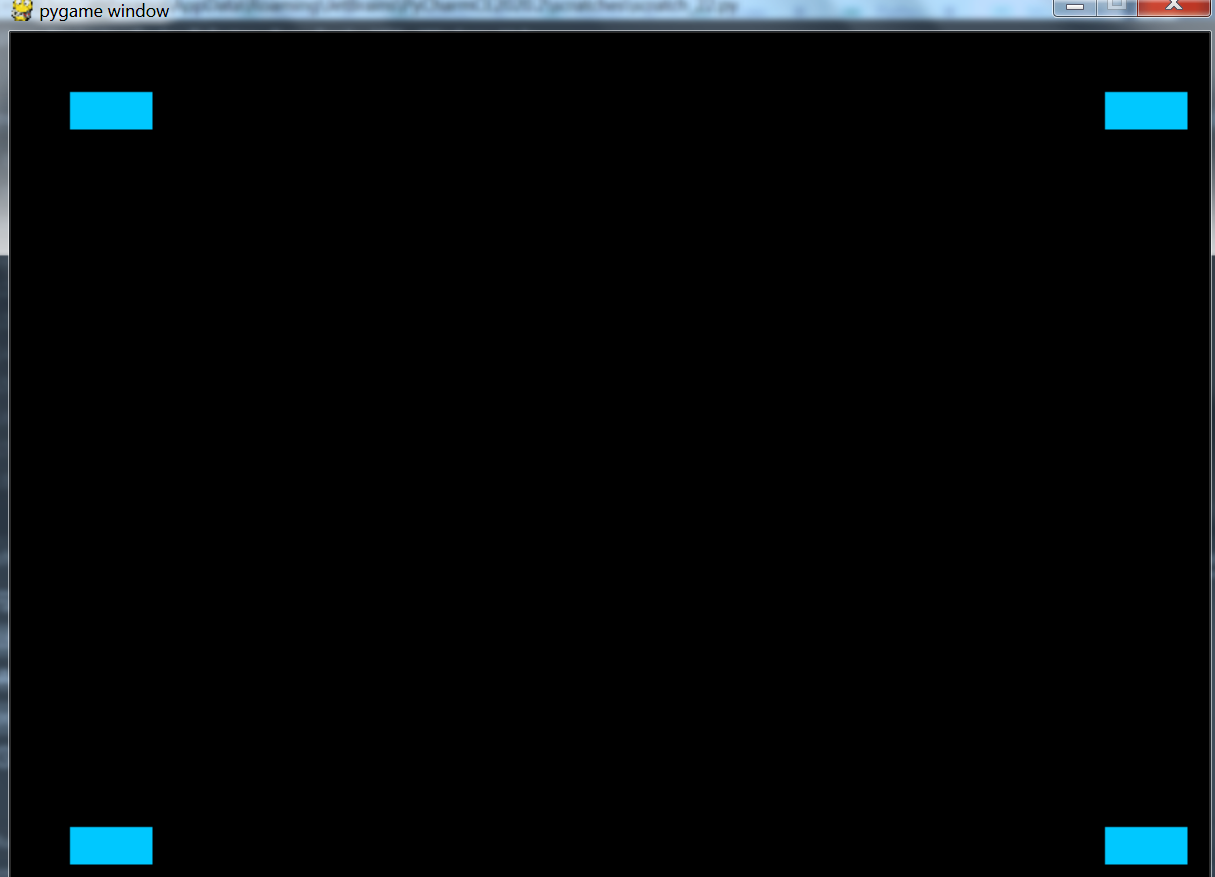
The above Python code is a simple pygame script to draw four cyan color squares.
Output:
Don’t worry! We will learn a lot more about how to make an object move, how to add animation effects, buttons, music and much more in the next few articles but for now let’s understand this basic code which contains all the necessary pygame elements.
import pygame
from pygame.locals import *
In the first few lines, we import pygame and pygame.locals which is necessary to do before using any module in python.
Sprite, Surf, and Rect:
Sprite: Sprite is just a 2d object that we draw on the screen. We can use them by extending the sprite class.
Surf: Surfaces are like blank sheets of paper on which we draw. Our screen object is also a Surface. They can hold images as well.
Rects: Rectangular area that we define on a surface.
Python3
class Square(pygame.sprite.Sprite):
def __init__(self):
super(Square, self).__init__()
self.surf = pygame.Surface((25, 25))
self.surf.fill((0, 200, 255))
self.rect = self.surf.get_rect()
|
Note: We are using RGB format of color coding in which we can form different colors by giving Red, Blue, and Green color values in the range of 0-255. A tuple of (0, 0, 0) is the color black as there is no color present and a tuple of (255, 255, 255) is the color white.
In our code, we are extending the sprite class so that we can use surfs and rects to draw our squares. We have made a surface of dimension 25x25px and filled it will a color: (0, 200, 255)
pygame.init() :
Python3
pygame.init()
screen = pygame.display.set_mode((800, 600))
square1 = Square()
square2 = Square()
square3 = Square()
square4 = Square()
|
The above lines of code initialize pygame using the command pygame.init() which is necessary to use the pygame module commands. After that, we define our screen object and its dimensions in pixels. Then in the next lines, we initialize our four squares.
Game Loop
Python3
while running:
for event in pygame.event.get():
if event.type == KEYDOWN:
if event.key == K_BACKSPACE:
running = False
elif event.type == QUIT:
running = False
|
The most important part of the game development code is the game loop. This loop continuously runs in the background until the user ends the game or the game is over. Right now our game loop is not much to look forward to. It only tracks two basic events. We can add more events according to the game state, user inputs, and much more but the point to remember here is that the game loop must end after some condition else the user will be stuck in the game loop forever.
Blit and Flip –
Blit: Blit keyword is used to draw a surface on another surface. In simple words when we draw a surface we just blit it onto some other surface.
Flip: It is used to update the entire screen after everything is drawn. Remember that the flip only works after drawing all the necessary surfaces otherwise, it will update nothing.
Python3
screen.blit(square1.surf, (40, 40))
screen.blit(square2.surf, (40, 530))
screen.blit(square3.surf, (730, 40))
screen.blit(square4.surf, (730, 530))
pygame.display.flip()
|
In the above lines of code first, we blit four squares on the screen, and then we flip to make them appear.
Like Article
Suggest improvement
Share your thoughts in the comments
Please Login to comment...