This article will help you build a web application in Flask that analyzes images, and returns the top 10 colours used in the image. The article aims to develop skills in Python programming used as a backend technology and the best way to practice programming skills is by building projects using Python concepts.
Image Colour Palette Generator in Python
The user uploads an image file to the website, through a simple form. The Python program reads this file, converts it to a NumPy matrix, filters out unique colours, count the occurrences of these unique values and then returns the RGB values of the top 10 most occurring colours.
Development Procedure
File structure
First, create a main.py and templates folder. Put your index.html file inside the templates folder. This is mandatory because the Flask framework looks for HTML files to render in a folder named templates.
Step 1: Setup a Frontend
In order for the backend to work on an image, it needs a frontend that sends it. For that, we set up a basic HTML page with a simple form, that only has one field that takes user data, a file, and a submit field.
In order to make HTML form capable of sending files to the server, the attribute, enctype must be set to the value, multipart/form-data. If we do not set this, the form will be capable of sending only text data. The input tag that lets the user upload files is of type, file. The method attribute is set to “POST” which means the user will send data to the server. The action attribute holds the URL to which the data is sent. We also want to make sure that the user does not send an empty form, thus we put the required keyword in the input tag which is of type, file.
HTML
<!DOCTYPE html>
<html lang="en">
<head>
<meta charset="UTF-8">
<title>Top Colors Finder</title>
</head>
<body>
<header>
<h1>Welcome to Image Analyzer</h1>
<p>
Upload an image and this site will tell you the top 10 most used colors along with their hex codes.
If two colors appear same number of times, both will be shown here.
</p>
</header>
<form action = "/" method = "POST" enctype = "multipart/form-data">
<input type = "file" name = "file" required />
<input type = "submit"/>
</form>
</body>
</html>
|
Step 2: Improving User Interface
Since our main concern here is the backend logic and not the frontend skills, we will be adding only a small amount of CSS code that we will write in the HTML file itself, under the style tag. The following CSS code centres our title and paragraph, with a cleaner font style and a simple background.
HTML
<!DOCTYPE html>
<html lang="en">
<head>
<meta charset="UTF-8">
<title>Top Colors Finder</title>
<style>
*{
box-sizing: border-box;
margin: 0%;
padding: 0%;
}
header, form, main{
margin: auto;
width: 70%;
font-family: Helvetica;
padding: 1.1rem 1.2rem;
}
header > h1{
font-size: 2.5rem;
margin-bottom: 20px;
}
header > p{
color: gray;
font-size: 1.2rem;
}
form{
background-color: skyblue;
}
input{
margin: 10px 0;
}
input[type='submit'], input[type='file']{
font-size: 1.2rem;
}
input:hover{
cursor: pointer;
}
input[type='submit']{
padding: 0.5rem 0.8rem;
border: 2px solid #003333;
background-color: #003333;
color: white;
border-radius: 4px;
}
</style>
</head>
</html>
|
Step 3: Convert to Hex Codes.
Some people prefer to use hex codes of colours rather than the RGB values, for that we create another function, which converts the RGB codes into hex codes. Run a loop on the list of colours, get each colour one by one and pass it to a helper function, that returns hex codes. Append this returned hex code to a new list. We add one more input to the form. We put two radio buttons, one for selecting hex format and one for selecting RGB format. Both the input fields should have the same name, otherwise, HTML will allow both to be selected at the same time. The values of these input tags should correspond to the text right after them.
HTML
<!DOCTYPE html>
<html lang="en">
<head>
<meta charset="UTF-8">
<title>Top Colors Finder</title>
<style>
*{
box-sizing: border-box;
margin: 0%;
padding: 0%;
}
header, form, main{
margin: auto;
width: 70%;
font-family: Helvetica;
padding: 1.1rem 1.2rem;
}
header > h1{
font-size: 2.5rem;
margin-bottom: 20px;
}
header > p{
color: gray;
font-size: 1.2rem;
}
form{
background-color: skyblue;
}
input{
margin: 10px 0;
}
input[type='submit'], input[type='file']{
font-size: 1.2rem;
}
input:hover{
cursor: pointer;
}
input[type='submit']{
padding: 0.5rem 0.8rem;
border: 2px solid #003333;
background-color: #003333;
color: white;
border-radius: 4px;
}
main{
padding: 0;
}
.pair{
width: 100%;
display: flex;
margin: auto;
align-items: center;
}
.pair > .color-box{
width: 50%;
height: 50px;
border: 1px solid black;
text-align: center;
padding: 1.1%;
margin: 0;
}
.pair > .color-box-value{
width: 50%;
height: 50px;
border: 1px solid black;
text-align: center;
padding: 1.1%;
margin: 0;
}
</style>
</head>
<body>
<header>
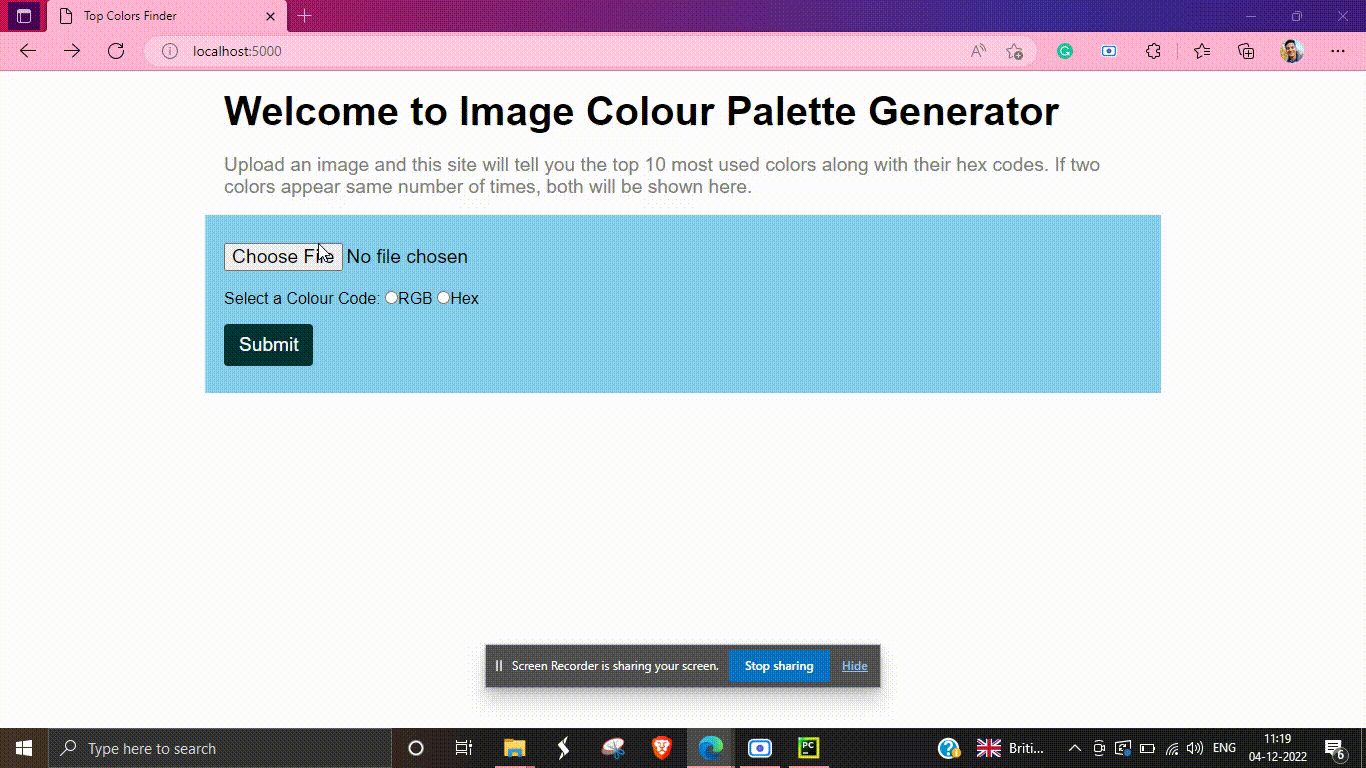
<h1>Welcome to Image Colour Palette Generator</h1>
<p>
Upload an image and this site will tell you the top 10 most used colors along with their hex codes.
If two colors appear same number of times, both will be shown here.
</p>
</header>
<form action = "/" method = "POST" enctype = "multipart/form-data">
<input type = "file" name = "file" required />
<br>
Select a Colour Code:
<input type="radio" name="colour_code" value="rgb">RGB
<input type="radio" name="colour_code" value="hex">Hex
<br>
<input type = "submit"/>
</form>
<main>
{% for i in range(colors_list|length) %}
<div class="pair">
{% if code != 'hex': %}
<div class="color-box" style="background-color: rgb{{ colors_list[i] }};"></div>
<div class="color-box-value"> {{i+1}}: rgb{{colors_list[i]}}</div>
{% else: %}
<div class="color-box" style="background-color: #{{ colors_list[i] }};"></div>
<div class="color-box-value"> {{i+1}}: #{{colors_list[i]}}</div>
{% endif %}
</div>
{% endfor %}
</main>
</body>
</html>
|
Step 4: Reading the User-Sent File
The request object import from the Flask is used to check what is the method for the route. We simply access its method property. GET is the default method, available on a route, but to make other methods available on the route, we must set the method’s argument of the decorator function. We give it an array of methods that we want to make available. Here, GET and POST. If the method is not POST, then simply render the frontend, if the method is POST, we pass our image file to a function that evaluates it.
We access files sent from the user, using request.files[‘_name_of_input_tag’]. We pass the file to the function by using its stream property. The file is not sent wholely over the internet, it is sent in chunks of data, and we read these chunks using this stream property. Once the function has done its evaluation and returned us a list of colour codes of the top 10 occurring colours, we update the front end with this list of colours. Dynamic data is provided to the flask rendered frontend by giving data as an argument in the render_template method. The name of this argument will be used on the front end to access the data it holds.
Python3
from flask import Flask, render_template, request
app = Flask(__name__)
def give_most_hex(file):
pass
@app.route('/', methods=['GET', 'POST'])
def index():
if request.method == 'POST':
f = request.files['file']
hexes = give_most_hex(f.stream)
return render_template('index.html',
colors_list=hexes)
return render_template('index.html')
if __name__ == '__main__':
app.run(debug=True)
|
Step 6: Adjust the Image before Analysing
The image that is uploaded by the user, might be big in size, which means it will have more pixels, thus the matrix will be big. The bigger the matrix, the more time it will take to analyze it. Thus, the first thing we do with the image file is to reduce its size, without losing any colour. We also average out the colours of the adjacent pixels. If you zoom in on a good-quality image, you will find that there are lots of pixels with approximately the same shades on the boundary of an object in the image, to provide it with good sharpness. We don’t want those colours, our main focus is the primary colours.
Python3
def give_most_hex(file_path):
my_image = Image.open(file_path).convert('RGB')
size = my_image.size
if size[0] >= 400 or size[1] >= 400:
my_image = ImageOps.scale(image=my_image, factor=0.2)
elif size[0] >= 600 or size[1] >= 600:
my_image = ImageOps.scale(image=my_image, factor=0.4)
elif size[0] >= 800 or size[1] >= 800:
my_image = ImageOps.scale(image=my_image, factor=0.5)
elif size[0] >= 1200 or size[1] >= 1200:
my_image = ImageOps.scale(image=my_image, factor=0.6)
my_image = ImageOps.posterize(my_image, 2)
|
Step 7: Find the Top 10 Unique Colours
The first step we take is to create our matrix. We do that using the array method of NumPy and pass it to the image object as the argument. Then, we create a dictionary, in this, we want the keys to be the colour codes, and the values of these keys to be the number of times they occur in the image. First, create an empty dictionary. Traverse the image matrix, as you would traverse a 2D list. For each item found in the matrix, if that value already exists in the dictionary as a key, simply increment its value by 1, if it doesn’t exist, add this item as a key of the dictionary, and assign its value as 1, as this is the first time we are seeing this colour.
We use the sorted method of Python, which returns a view object that looks like a list. We use it by giving it the dictionary of unique_colors while calling the items method of the dictionary, which returns the keys and their values as tuples. The second argument is key, which is provided with a lambda function that simply returns keys and their values, comma separated. The reverse argument put to true means that we want the sorting to happen in descending order. Since sorted does not return a dictionary, we use the dict method to convert it into a dictionary. We can use the print function to see the dictionary, but later, comment it out.
The third step here is to extract the keys of the dictionary using the keys method, which again returns a view object, thus we use the list method to convert the returned result into a list. Then use slicing to extract only the first 10 values, and return them. Since the values were in descending order, we know that the top 10 values were returned.
Python3
def give_most_hex(file_path):
my_image = Image.open(file_path).convert('RGB')
size = my_image.size
if size[0] >= 400 or size[1] >= 400:
my_image = ImageOps.scale(image=my_image, factor=0.2)
elif size[0] >= 600 or size[1] >= 600:
my_image = ImageOps.scale(image=my_image, factor=0.4)
elif size[0] >= 800 or size[1] >= 800:
my_image = ImageOps.scale(image=my_image, factor=0.5)
elif size[0] >= 1200 or size[1] >= 1200:
my_image = ImageOps.scale(image=my_image, factor=0.6)
my_image = ImageOps.posterize(my_image, 2)
image_array = np.array(my_image)
unique_colors = {}
for column in image_array:
for rgb in column:
t_rgb = tuple(rgb)
if t_rgb not in unique_colors:
unique_colors[t_rgb] = 1
if t_rgb in unique_colors:
unique_colors[t_rgb] += 1
sorted_unique_colors = sorted(
unique_colors.items(), key=lambda x: x[1], reverse=True)
converted_dict = dict(sorted_unique_colors)
values = list(converted_dict.keys())
top_10 = values[0:10]
if code == 'hex':
hex_list = []
for key in top_10:
hex = rgb_to_hex(key)
hex_list.append(hex)
return hex_list
else:
return top_10
|
Complete Code
Any input field data is accessed through the request.form, which is a dictionary, where keys are names of input fields holding the data that the user entered for that input key. We pass this colour code to our function, which returns a list of colour codes. Now we change the function definition a little, now the function takes two parameters, the first is the file and the other is the code format. Once the list of colour codes in RGB format is prepared, we put a condition check. If the value of the code parameter is equal to hex, we run a loop through the list and pass each of its items to a helper function, which returns the hex code for the passed RGB code. We append this code to a new list. Once the loop is finished, we return this list of hex codes. If the value of that parameter is anything else, we simply return the list of colour codes in RGB format.
The helper function is easy to build, we create the hex values using the %02x%02x%02x formatted and format operator % that converts decimal values to hex values. This returns us a string value.
Python3
import numpy as np
from PIL import Image, ImageOps
from flask import Flask, render_template, request
def rgb_to_hex(rgb):
return '%02x%02x%02x' % rgb
def give_most_hex(file_path, code):
my_image = Image.open(file_path).convert('RGB')
size = my_image.size
if size[0] >= 400 or size[1] >= 400:
my_image = ImageOps.scale(image=my_image, factor=0.2)
elif size[0] >= 600 or size[1] >= 600:
my_image = ImageOps.scale(image=my_image, factor=0.4)
elif size[0] >= 800 or size[1] >= 800:
my_image = ImageOps.scale(image=my_image, factor=0.5)
elif size[0] >= 1200 or size[1] >= 1200:
my_image = ImageOps.scale(image=my_image, factor=0.6)
my_image = ImageOps.posterize(my_image, 2)
image_array = np.array(my_image)
unique_colors = {}
for column in image_array:
for rgb in column:
t_rgb = tuple(rgb)
if t_rgb not in unique_colors:
unique_colors[t_rgb] = 0
if t_rgb in unique_colors:
unique_colors[t_rgb] += 1
sorted_unique_colors = sorted(
unique_colors.items(), key=lambda x: x[1],
reverse=True)
converted_dict = dict(sorted_unique_colors)
values = list(converted_dict.keys())
top_10 = values[0:10]
if code == 'hex':
hex_list = []
for key in top_10:
hex = rgb_to_hex(key)
hex_list.append(hex)
return hex_list
else:
return top_10
app = Flask(__name__)
@app.route('/', methods=['GET', 'POST'])
def index():
if request.method == 'POST':
f = request.files['file']
colour_code = request.form['colour_code']
colours = give_most_hex(f.stream, colour_code)
return render_template('index.html',
colors_list=colours,
code=colour_code)
return render_template('index.html')
if __name__ == '__main__':
app.run(debug=True)
|
Output:
http://127.0.0.1:5000/
Code Output
Like Article
Suggest improvement
Share your thoughts in the comments
Please Login to comment...