How to Use Waterfall Toolbar Library in Android App?
Last Updated :
22 Feb, 2022
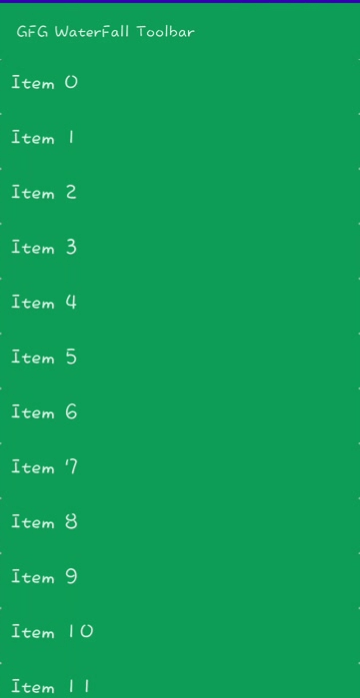
The Waterfall Toolbar Library is an android library that is designed to provide some dynamic effects to the toolbar to make an application look better. So what this library actually does is dynamizes an ordinary toolbar, increasing and decreasing its shadow when an associated view is scrolled. The view can be a RecyclerView or ScrollView. A sample GIF is given below to get an idea about what we are going to do in this article. Note that we are going to implement this project using the Java language.
Now let’s see how can you use the WaterFallToolbar library in your android application.
Step by Step Implementation
Step 1: Create a New Project
So the first step is to create a new project on the Welcome screen of Android Studio, click on Create New Project and If you have a project already opened, Go to File > New > New Project. Then select a Project Template window, select Empty Activity and click Next. Enter your App Name in the Name field and select Java from the Language drop-down menu.
Step 2: Add dependency and JitPack Repository
To add the library dependencies Go to app > Gradle Scripts > gradle.build(Module: app) and add the following dependencies.
dependencies {
    // library required to add the waterfall effect
    implementation 'com.github.hugocastelani:waterfall-toolbar:0.5.0'

    // for adding recyclerview
    implementation 'androidx.recyclerview:recyclerview:1.2.0'

    // for adding cardview
    implementation 'androidx.cardview:cardview:1.0.0'
}
Add the JitPack repository to your build file. Add it to your root build.gradle at the end of repositories inside the allprojects{ } section.
allprojects {
repositories {
…
maven { url “https://jitpack.io” }
}
}
After adding this dependency sync your project and now we will move towards its implementation.
Step 3: Go to activity_main.xml and add the following code
In the activity_main.xml add waterfall toolbar and recyclerview to it or you can also use ScrollView instead of RecyclerView. If you don’t know about RecyclerViewyou can refer recyclerview using Java or recyclerview using kotlin. Navigate to the app > res > layout > activity_main.xml and add the below code to that file. Below is the code for the activity_main.xml file.
XML
<?xml version="1.0" encoding="utf-8"?>
<LinearLayout
android:layout_width="match_parent"
android:layout_height="match_parent"
android:orientation="vertical"
tools:context=".MainActivity">
<com.hugocastelani.waterfalltoolbar.WaterfallToolbar
android:id="@+id/waterfall_toolbar"
android:layout_width="match_parent"
android:layout_height="wrap_content">
<androidx.appcompat.widget.Toolbar
android:id="@+id/toolbar"
android:layout_width="match_parent"
android:layout_height="?actionBarSize"
android:background="#0F9D58" />
</com.hugocastelani.waterfalltoolbar.WaterfallToolbar>
<androidx.recyclerview.widget.RecyclerView
android:id="@+id/recyclerview"
android:layout_width="match_parent"
android:layout_height="match_parent"
tools:itemCount="5"
tools:listitem="@layout/recyclerview_items" />
</LinearLayout>
|
Step 4: Implementing the RecyclerView
After adding the RecyclerView into the activity_main.xml create a new Layout Resource File which will be used to design our CardView layout. Go to app > res > layout > right-click on layout > New > Layout Resource File and add the code provided below. In this file, you can design the layout to show it into the RecyclerView. Below is the code for the recyclerview_items.xml file.
XML
<?xml version="1.0" encoding="utf-8"?>
<androidx.cardview.widget.CardView
android:layout_width="match_parent"
android:layout_height="55dp"
android:orientation="vertical"
app:cardBackgroundColor="#0f9d58">
<TextView
android:id="@+id/recyclerview_txt"
android:layout_width="wrap_content"
android:layout_height="wrap_content"
android:padding="10dp"
android:textColor="@color/cardview_light_background"
android:textSize="25sp" />
</androidx.cardview.widget.CardView>
|
Then, Go to app > java > package name > right-click > New > Java class. Name that file as ItemsModel and then click on OK. This file will hold the information of every item which you want to show in your RecyclerView. Below is the code for the ItemsModel.java file.
Java
class ItemsModel {
private String data;
public ItemsModel(String data) {
this.data = data;
}
public String getData() {
return data;
}
public void setData(String data) {
this.data = data;
}
}
|
After creating ItemsModel.java create another class Go to app > java > package name > right-click > New > Java class and name that file as CustomAdapter and then click on OK. After this add the code provided below. Comments are added inside the code to understand the code in detail. Below is the code for the CustomAdapter.java file.
Java
package com.example.waterfalltoolbar;
import android.content.Context;
import android.view.LayoutInflater;
import android.view.View;
import android.view.ViewGroup;
import android.widget.TextView;
import androidx.annotation.NonNull;
import androidx.recyclerview.widget.RecyclerView;
import java.util.List;
class CustomAdapter extends RecyclerView.Adapter<Adapter.ViewHolder> {
Context context;
List<ItemsModel> list;
public Adapter(Context context, List<ItemsModel> list) {
this.context = context;
this.list = list;
}
@NonNull
@Override
public ViewHolder onCreateViewHolder(@NonNull ViewGroup parent, int viewType) {
View view = LayoutInflater.from(context).inflate(R.layout.recyclerview_items, parent, false);
return new ViewHolder(view);
}
@Override
public void onBindViewHolder(@NonNull ViewHolder holder, int position) {
ItemsModel model = list.get(position);
holder.item.setText(model.getData());
}
@Override
public int getItemCount() {
return list.size();
}
public static class ViewHolder extends RecyclerView.ViewHolder {
private TextView item;
public ViewHolder(@NonNull View itemView) {
super(itemView);
item = itemView.findViewById(R.id.recyclerview_txt);
}
}
}
|
Step 5: Working with MainActivity
Go to the MainActivity.java file and refer to the following code. Below is the code for the MainActivity.java file. Comments are added inside the code to understand the code in more detail.
Java
import android.graphics.Color;
import android.os.Bundle;
import androidx.appcompat.app.AppCompatActivity;
import androidx.appcompat.widget.Toolbar;
import androidx.recyclerview.widget.LinearLayoutManager;
import androidx.recyclerview.widget.RecyclerView;
import com.hugocastelani.waterfalltoolbar.Dp;
import com.hugocastelani.waterfalltoolbar.WaterfallToolbar;
import java.util.ArrayList;
public class MainActivity extends AppCompatActivity {
RecyclerView recyclerView;
ArrayList<ItemsModel> items;
Toolbar toolbar;
@Override
protected void onCreate(Bundle savedInstanceState) {
super.onCreate(savedInstanceState);
setContentView(R.layout.activity_main);
recyclerView = findViewById(R.id.recyclerview);
toolbar = findViewById(R.id.toolbar);
setSupportActionBar(toolbar);
toolbar.setTitleTextColor(Color.WHITE);
items = new ArrayList<>();
for (int i = 0; i <= 20; i++) {
items.add(new ItemsModel("Item " + i));
}
Adapter adapter = new Adapter(this, items);
recyclerView.setLayoutManager(new LinearLayoutManager(this));
recyclerView.setAdapter(adapter);
WaterfallToolbar waterfallToolbar = findViewById(R.id.waterfall_toolbar);
waterfallToolbar.setRecyclerView(recyclerView);
waterfallToolbar.setInitialElevation(new Dp(0).toPx());
waterfallToolbar.setFinalElevation(new Dp(30).toPx());
}
}
|
Step 6: Working with the themes.xml file
Go to the themes.xml file and change the parent attribute to NoActionBar like this.
<style name="Theme.WaterfallToolbar" parent="Theme.MaterialComponents.DayNight.NoActionBar">
Customization
You can also customize the toolbar according to you by changing some parameters. You can customize the elevation and the scroll position of the waterfall toolbar according to your choice.
Initial Elevation
By Default the elevation value of the waterfall toolbar is 0dp. You can customize it by calling the setInitialElevation() method and provide an integer value as a parameter.
Example:
Java
waterfallToolbar.setInitialElevation(new Dp(1).toPx());
XML
app:initial_elevation="1dp"
Final Elevation
By Default the final elevation value of the toolbar is 4dp. You can customize it by calling the setFinalElevation() method and provide an integer value as a parameter. It will make the shadow of the toolbar much bigger or according to the value passed as a parameter to setFinalElevation().
Example:
Java
waterfallToolbar.setFinalElevation(new Dp(10).toPx());
XML
app:final_elevation="10dp"
Scroll Final position
In the scroll final position, you can set the elevation according to the screen’s height percentage when the view is scrolled. The default percentage is 12%.
Example:
It will provide the elevation when the screen is scrolled 20% of the total screen’s height.
Java
waterfallToolbar.setScrollFinalPosition(20);
XML
app:scroll_final_elevation="20"
Output:
Like Article
Suggest improvement
Share your thoughts in the comments
Please Login to comment...