How to use MongoDB atlas to save data ?
Last Updated :
25 Dec, 2020
As modern applications require a database for storing data, MongoDB is a great choice. MongoDB Atlas is the global cloud database service for modern applications. We can use it for storing our application data on its server.
Follows these steps for how to use MongoDB Atlas for saving data:
Step 1: Visit the URL https://www.mongodb.com/cloud/atlas You will be shown the page given below.

Step 2: Click on the Sign In button present in the top right corner of the page. You will get the following page.

Step 3: Now if you haven’t signed up already click on the Sign Up hyperlink. You will be taken to a new page as shown below.

Step 4: Fill in all the details and click on the Sign Up button. You will see a new page as shown below.

Step 5: Now click on the Continue button and you will see a new page as shown below.

Step 6: Now click on the Create a cluster button present in the Shared Clusters div if you want to use the service for free (You can choose plans as per your need), then the following will be the next page.

Step 7: By default, the selected Cloud Provider & Region will be AWS. Now click on Create Cluster and you are all set to create and use an online database.

Step 8: Now click on the Create your first database user checkbox from the dialog box shown in the bottom-left corner.

Step 9: Click on the Add New Database User button. And now you will see the following dialog box.
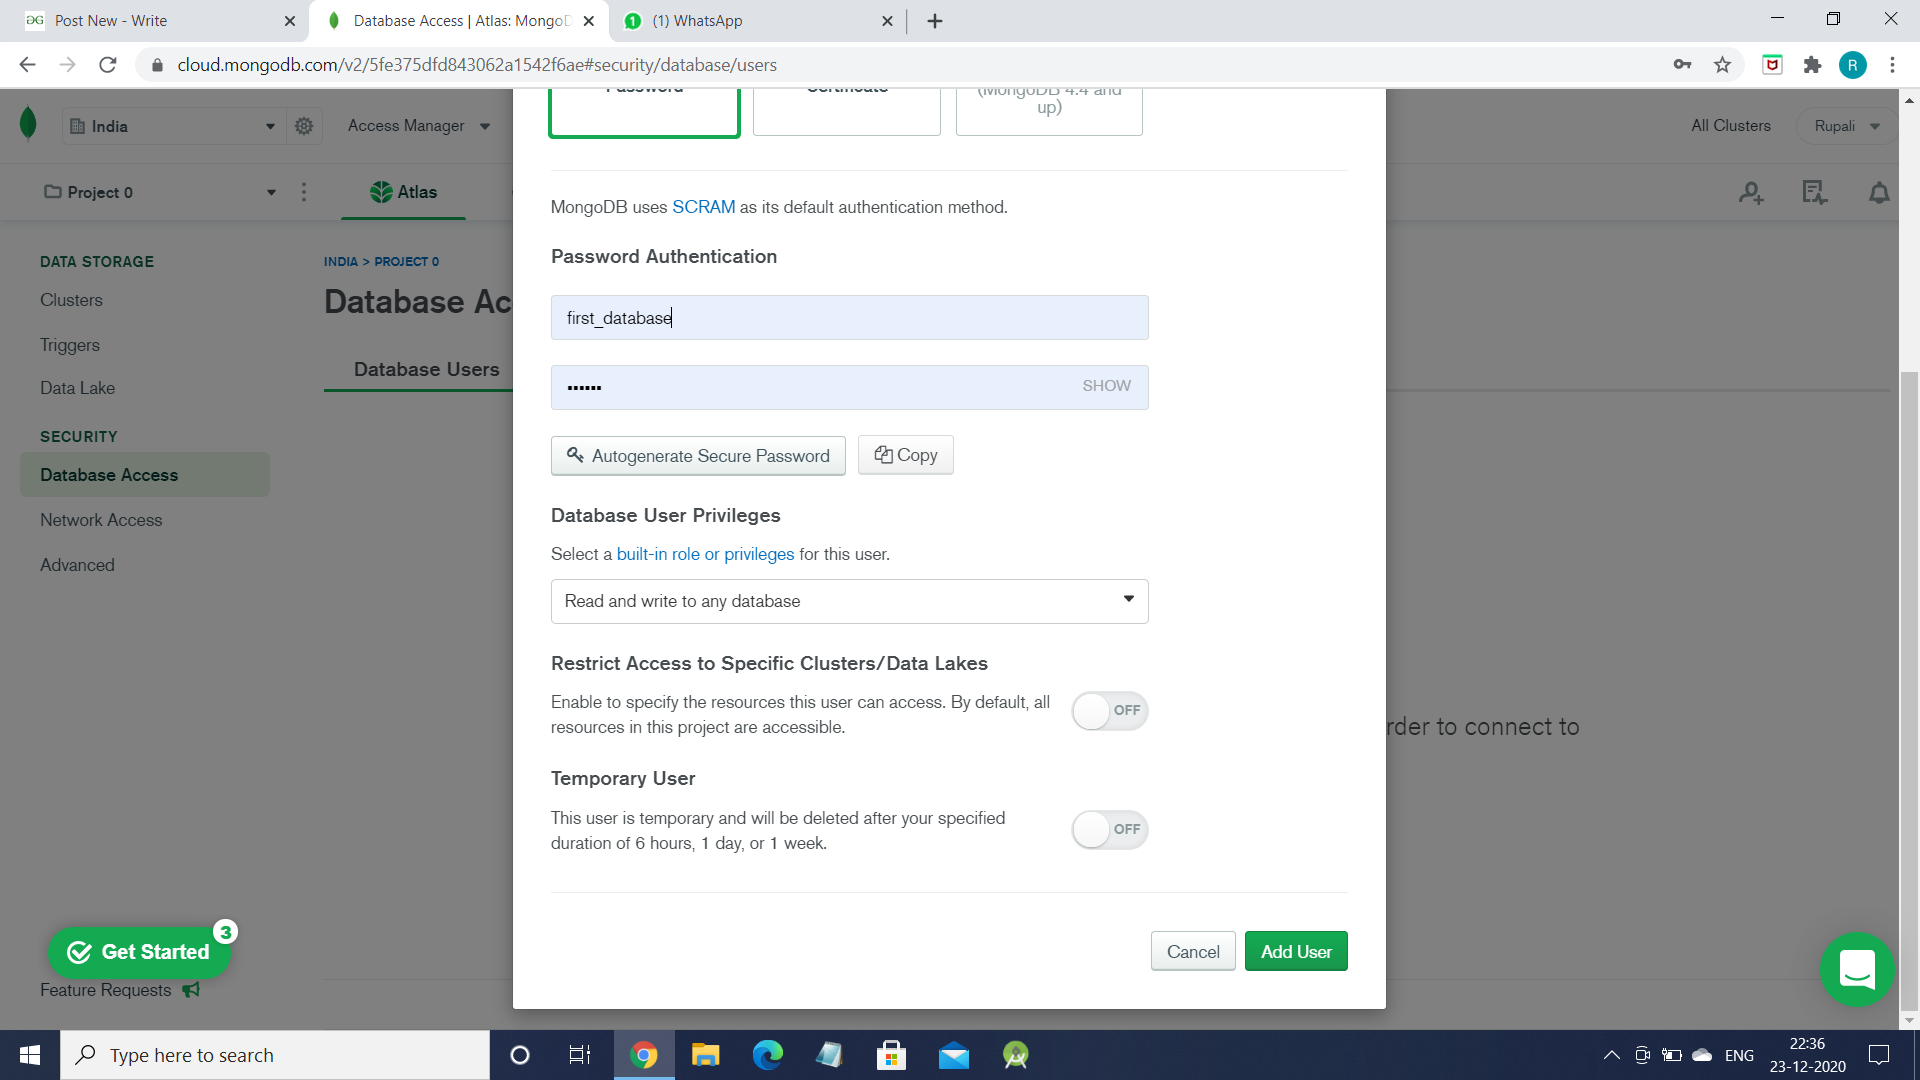
Step 10: Enter the name and password for the new database user and create on the Add User button and the dialog box will disappear.
Now click on the Network Access hyperlink present in the Data Storage section. You will see the following page.

Step 11: Click on the Add IP Address button and you will see the following page.

Step 12: Now just click on Allow Access From Anywhere and then click on the Confirm button. Now go to Clusters hyperlink and you will see the following page.

Step 13: Click on the Connect button as marked in the above picture and the following dialog box will appear.

Step 14: Click on the Connect your application part and then you will see the following dialog box.

Step 15: At last, now choose the appropriate driver and version then copy the link and paste in your code. Replace <password> with the password you entered while creating the new database user and <dbname> with the name of Database (Remember Database, not Database user).
This is how we can create our own storage space for our application using MongoDB Atlas.
Like Article
Suggest improvement
Share your thoughts in the comments
Please Login to comment...