Firebase is a comprehensive backend solution offered by Google that simplifies the process of building, managing, and growing applications. When developing mobile or web apps, handling the database, hosting, and authentication can be challenging tasks. Firebase addresses these challenges by providing a range of features.
Firebase Firestore, the database service provided by Firebase, helps manage and store app data efficiently. It eliminates the need to worry about designing and managing a database, as well as reduces bandwidth usage between the frontend and the database.
In addition to the database, Firebase offers authentication services, including popular methods such as username and password, email and password, and social media logins like Facebook, Twitter, and Google. With Firebase, implementing a secure and customizable authentication system becomes much easier, saving time and effort.
Firebase also provides hosting services, allowing you to deploy and host your app with ease. Whether you have a web application or need to store and serve static assets for mobile apps, Firebase Hosting ensures fast and reliable hosting, taking the hassle out of managing your own infrastructure.
Overall, Firebase offers a comprehensive solution for backend development, addressing the complexities of database management, authentication, and hosting. By leveraging Firebase’s capabilities, developers can focus on building the core functionality of their applications without worrying about the backend infrastructure.

Also firebase solves a very good problem of database it gives you a real-time database and in this article, we will see how to use firebase for database.
Creating React Application And Installing Module:
Step 1: Create a React application using the following command:
npx create-react-app foldername
Step 2: After creating your project folder i.e. foldername, move to it using the following command:
cd foldername
Step 3: After creating the ReactJS application, Install the required module using the following command:
npm i firebase
Project Structure: It will look like the following.
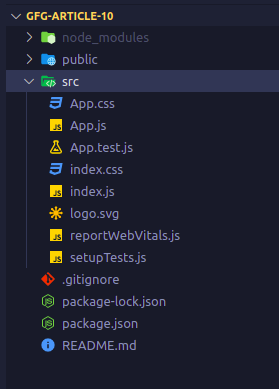
Project Structure
Step to Run Application: Run the application using the following command from the root directory of the project:
npm start
Let’s first create two input fields namely Name and Password and with a Submit Button.
App.js
Javascript
import React, { useState } from "react";
import "./App.css";
function App() {
const [customerName, setCustomerName] = useState("");
const [customerPassword, setCustomerPassword] = useState("");
return (
<div className="App">
<div className="App__form">
<input
type="text"
placeholder="Name"
value={customerName}
onChange={(e) => setCustomerName(e.target.value)}
/>
<input
type="text"
placeholder="Password"
value={customerPassword}
onChange={(e) => setCustomerPassword(e.target.value)}
/>
<button>Submit</button>
</div>
</div>
);
}
export default App;
|
App.css
CSS
.App {
text-align: center;
height: 100vh;
display: grid;
place-items: center;
}
.App__form {
display: flex;
flex-direction: column;
}
input {
padding: 7px 11px;
border-radius: 3px;
border: none;
border-bottom: 1px solid gray;
margin: 20px;
outline: none;
}
button {
display: inline-block;
margin-right: auto;
margin-left: auto;
padding: 7px 12px;
border: none;
border-radius: 4px;
}
|
Now we will create the firebase project and create the firebase config file.
Steps to create a firebase project:
Step 1: Login in the firebase dashboard and Click on Add Project Card.
Step 2: Enter your project name click on continue.
Step 3: In Configure Google Analytics select Default Account for Firebase and click on Create Project.

Step 4: Wait for firebase to create your project.

Step 5: Once the project is created go to the web icon as shown.

Step 6: Give the app nick name and select the firebase hosting checkbox if you want to host your app using firebase, register your app.
Step 7: Just install Firebase CLI if not installed yet using command given below on your VScode’s terminal
npm install -g firebase-tools

Step 8: Once done, just login into your firebase using the command given below using your command line or the terminal in VSCode.
firebase login
Step 9: Click on Continue to Console.
Step 10: Next go to your app click on the settings icon and at the bottom select the config option copy the config data. Go to your local project and create a file named firebase.js in the src folder and paste the config data along with few more lines in it as shown below.

firebase.js
Javascript
import firebase from "firebase";
const firebaseConfig = {
apiKey: "AIzaSyATKyTSJVN7-Zx60WQ66kkHo3nBhuMhYDs",
authDomain: "meteor-3fd94.firebaseapp.com",
projectId: "meteor-3fd94",
storageBucket: "meteor-3fd94.appspot.com",
messagingSenderId: "391620415322",
appId: "1:391620415322:web:6848292646d9e91e6e6d63",
measurementId: "G-69J20TCH7X",
};
const firebaseApp = firebase.initializeApp(firebaseConfig);
const db = firebase.firestore();
export default db;
|
Now we have the config file ready and we just need to add code for the CRUD operations :
1. Create collection: To create a collection we simply use the db object we created in the firebase.js above. We simply import it in our file and use the collection method to locate the collection in which our data is to be stored after creation. In case your collection is nested in other collection you’ll have to write it like, db.collection(<parent-collection>).doc(<doc-id>).collection(<child-collection>) and so on. Now once we are in our collection we just simply add our data as an object.
App.js
Javascript
import React, { useState } from "react";
import "./App.css";
import db from "./firebase";
function App() {
const [customerName, setCustomerName] = useState("");
const [customerPassword, setCustomerPassword] = useState("");
const submit = (e) => {
e.preventDefault();
db.collection("customersData").add({
name: customerName,
password: customerPassword,
});
setCustomerName("");
setCustomerPassword("");
};
return (
<div className="App">
<div className="App__form">
<input
type="text"
placeholder="Name"
value={customerName}
onChange={(e) => setCustomerName(e.target.value)}
/>
<input
type="text"
placeholder="Password"
value={customerPassword}
onChange={(e) => setCustomerPassword(e.target.value)}
/>
<button onClick={submit}>Submit</button>
</div>
</div>
);
}
export default App;
|
Now we will test if our code works.

Once we see this page then we are all set. Just go to the localhost and enter the details and press submit and then again open Firestore Database in Firebase and you’ll see something like shown below :

So we can see our data as shown above
2. Read Operation: Now to read data, initial process is same i.e., importing db object. No we go to the collection where our data is stored that we want to read and then we use the onSnapshot method, which as the name suggests simply takes the snapshot every time any changes happen in the database. This function is responsible for the realtime feel that we get when we use firebase.
App.js
Javascript
import React, { useState, useEffect } from "react";
import "./App.css";
import db from "./firebase";
function App() {
const [customerName, setCustomerName] = useState("");
const [customerPassword, setCustomerPassword] = useState("");
const [customersData, setCustomersData] = useState([]);
useEffect(() => {
db.collection("customersData").onSnapshot((snapshot) => {
setCustomersData(
snapshot.docs.map((doc) => ({
id: doc.id,
data: doc.data(),
}))
);
});
console.log({ customersData });
}, []);
const submit = (e) => {
e.preventDefault();
db.collection("customersData").add({
name: customerName,
password: customerPassword,
});
setCustomerName("");
setCustomerPassword("");
};
return (
<div className="App">
<div className="App__form">
<input
type="text"
placeholder="Name"
value={customerName}
onChange={(e) => setCustomerName(e.target.value)}
/>
<input
type="text"
placeholder="Password"
value={customerPassword}
onChange={(e) => setCustomerPassword(e.target.value)}
/>
<button onClick={submit}>Submit</button>
</div>
<div className="App__DataDisplay">
<table>
<tr>
<th>NAME</th>
<th>PASSWORD</th>
</tr>
{customersData?.map(({ id, data }) => (
<tr key={id}>
<td>{data.name}</td>
<td>{data.password}</td>
</tr>
))}
</table>
</div>
</div>
);
}
export default App;
|
Step to Run Application: Run the application using the following command from the root directory of the project:
npm start
Output: Now open your browser and go to http://localhost:3000/, you will see the following output:

3. Update Operation: Let’s first a button that should update and the fields that should appear.Now after we have imported the db object from firebase.js we simply go to the collection where our data is stored that is to be updated and then we specify the doc we need to update as one collection has many documents so we have to specify that what doc is to be updated and then we simply use the update method and pass the updated object.
App.js
Javascript
import React, { useState, useEffect } from "react";
import "./App.css";
import db from "./firebase";
function App() {
const [customerName, setCustomerName] = useState("");
const [customerPassword, setCustomerPassword] = useState("");
const [customersData, setCustomersData] = useState([]);
const [updatedCustomerName, setUpdatedCustomerName] = useState("");
const [updatedCustomerPassword, setUpdatedCustomerPassword] = useState("");
const [dataIdToBeUpdated, setDataIdToBeUpdated] = useState("");
useEffect(() => {
db.collection("customersData").onSnapshot((snapshot) => {
setCustomersData(
snapshot.docs.map((doc) => ({
id: doc.id,
data: doc.data(),
}))
);
});
}, []);
const submit = (e) => {
e.preventDefault();
db.collection("customersData").add({
name: customerName,
password: customerPassword,
});
setCustomerName("");
setCustomerPassword("");
};
const updateData = (e) => {
e.preventDefault();
db.collection("customersData").doc(dataIdToBeUpdated).update({
name: updatedCustomerName,
password: updatedCustomerPassword,
});
setUpdatedCustomerPassword("");
setUpdatedCustomerName("");
setDataIdToBeUpdated("");
};
return (
<div className="App">
{!dataIdToBeUpdated ? (
<div className="App__form">
<input
type="text"
placeholder="Name"
value={customerName}
onChange={(e) => setCustomerName(e.target.value)}
/>
<input
type="text"
placeholder="Password"
value={customerPassword}
onChange={(e) => setCustomerPassword(e.target.value)}
/>
<button onClick={submit}>Submit</button>
</div>
) : (
<div className="App__Updateform">
<input
type="text"
placeholder="Name"
value={updatedCustomerName}
onChange={(e) => setUpdatedCustomerName(e.target.value)}
/>
<input
type="text"
placeholder="Password"
value={updatedCustomerPassword}
onChange={(e) =>
setUpdatedCustomerPassword(e.target.value)}
/>
<button onClick={updateData}>Update</button>
</div>
)}
<div className="App__DataDisplay">
<table>
<tr>
<th>NAME</th>
<th>PASSWORD</th>
<th>Update</th>
</tr>
{customersData?.map(({ id, data }) => (
<tr key={id}>
<td>{data.name}</td>
<td>{data.password}</td>
<td>
<button
onClick={() => {
setDataIdToBeUpdated(id);
setUpdatedCustomerPassword(data.password);
setUpdatedCustomerName(data.name);
}}
>
Update
</button>
</td>
</tr>
))}
</table>
</div>
</div>
);
}
export default App;
|
Step to Run Application: Run the application using the following command from the root directory of the project:
npm start
Output: Now open your browser and go to http://localhost:3000/, you will see the following output. After updating the data you can check in your firebase dashboard if data get updated or not.

4. Delete Operation: Starting with the same thing, we import db object in our file then we simply go to the collection where our data is stored that is to be deleted and then we specify the doc we need to delete as one collection has many documents so we have to specify that what doc is to be deleted and then we simply call the delete method.
Javascript
import React, { useState, useEffect } from "react";
import "./App.css";
import db from "./firebase";
function App() {
const [customerName, setCustomerName] = useState("");
const [customerPassword, setCustomerPassword] = useState("");
const [customersData, setCustomersData] = useState([]);
const [updatedCustomerName, setUpdatedCustomerName] = useState("");
const [updatedCustomerPassword, setUpdatedCustomerPassword] = useState("");
const [dataIdToBeUpdated, setDataIdToBeUpdated] = useState("");
useEffect(() => {
db.collection("customersData").onSnapshot((snapshot) => {
setCustomersData(
snapshot.docs.map((doc) => ({
id: doc.id,
data: doc.data(),
}))
);
});
}, []);
const submit = (e) => {
e.preventDefault();
db.collection("customersData").add({
name: customerName,
password: customerPassword,
});
setCustomerName("");
setCustomerPassword("");
};
const updateData = (e) => {
e.preventDefault();
db.collection("customersData").doc(dataIdToBeUpdated).update({
name: updatedCustomerName,
password: updatedCustomerPassword,
});
setUpdatedCustomerPassword("");
setUpdatedCustomerName("");
setDataIdToBeUpdated("");
};
const deleteData = (id) => {
db.collection("customersData").doc(id).delete();
};
return (
<div className="App">
{!dataIdToBeUpdated ? (
<div className="App__form">
<input
type="text"
placeholder="Name"
value={customerName}
onChange={(e) => setCustomerName(e.target.value)}
/>
<input
type="text"
placeholder="Password"
value={customerPassword}
onChange={(e) => setCustomerPassword(e.target.value)}
/>
<button onClick={submit}>Submit</button>
</div>
) : (
<div className="App__Updateform">
<input
type="text"
placeholder="Name"
value={updatedCustomerName}
onChange={(e) => setUpdatedCustomerName(e.target.value)}
/>
<input
type="text"
placeholder="Password"
value={updatedCustomerPassword}
onChange={(e) =>
setUpdatedCustomerPassword(e.target.value)}
/>
<button onClick={updateData}>Update</button>
</div>
)}
<div className="App__DataDisplay">
<table>
<tr>
<th>NAME</th>
<th>PASSWORD</th>
<th>Update</th>
<th>Delete</th>
</tr>
{customersData?.map(({ id, data }) => (
<tr key={id}>
<td>{data.name}</td>
<td>{data.password}</td>
<td>
<button
onClick={() => {
setDataIdToBeUpdated(id);
setUpdatedCustomerPassword(data.password);
setUpdatedCustomerName(data.name);
}}
>
Update
</button>
</td>
<td>
<button
onClick={() => {
deleteData(id);
}}
>
Delete
</button>
</td>
</tr>
))}
</table>
</div>
</div>
);
}
export default App;
|
Step to Run Application: Run the application using the following command from the root directory of the project:
npm start
Output: Now open your browser and go to http://localhost:3000/, you will see the following output. After deleting the data you can check in your firebase dashboard if data get deleted or not.

Like Article
Suggest improvement
Share your thoughts in the comments
Please Login to comment...