How to setup Tailwind 3 in React with CRA 5 ?
Last Updated :
10 Nov, 2023
In this article, we will see how to set up Tailwind 3 in React with CRA 5, but before that, we need some basic ideas about these technologies.
- React JS: A free and open-source front-end JavaScript library for building user interfaces or UI components. It is maintained by Facebook.
- TailwindCSS: A highly customizable, low-level, and utility-first CSS framework for rapidly building custom user interfaces.
- Create React App: Helps us to create single-page React applications without configuring Webpack and Babel.
- PostCSS: Uses JavaScript-based plugins to automate routine CSS operations.
- Autoprefixer: A postCSS plugin that automatically does vendor prefixing.
Note: If you are planning to use tailwind in an existing project make sure that you are using CRA version 5.0.0 or above. If you are still using CRA v4, you will have to install CRACO (Create React App Configuration Override) to override the PostCSS configuration.
Prerequisites:
Steps to Create React Application And TailwindCSS:
Step 1: Create a React application using the following command.
npx create-react-app foldername
Step 2: After creating your project directory i.e. foldername, move to it using the following command.
cd foldername
Step 3: Install Tailwind, PostCSS, and Autoprefixer in your given directory.
npm i -D tailwindcss postcss autoprefixer
Note: If you are going to deploy this application on Heroku or any similar cloud platform, please make sure that the dev dependencies don’t get purged during the build. Or you can remove the -D flag from the above command, to install these packages as saved dependencies.
Step 4: Configuring and importing Tailwind in the project.
npx tailwindcss init -p
This command will automatically generate config files for tailwind and postcss.
Step 5: Now locate the tailwind.config.js in the root of the directory and add the following paths to the content object in order to purge unused CSS classes.
- ./src/**/*.{js,jsx,ts,tsx}
- ./public/index.html
In the end, the tailwind.config.js file should look like
Javascript
module.exports = {
content: [
"./src/**/*.{js,jsx,ts,tsx}",
"./public/index.html",
],
theme: {
extend: {},
},
plugins: [],
};
|
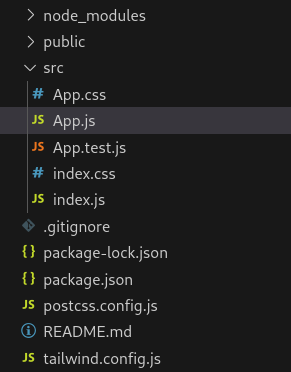
Project Structure:
The updated dependencies after installing required modules
{
    "devDependencies": {
        "autoprefixer": "^10.4.16",
        "postcss": "^8.4.31",
        "tailwindcss": "^3.3.5"
    }
}
Example: This example implements a h1 text in green color using tailwind css.
Javascript
import React from "react";
function App() {
return (
<div
style={{ textAlign: "center", margin: "auto" }}
>
<h1 className="text-green-600">
Geeks For Geeks
</h1>
</div>
);
}
export default App;
|
CSS
@import "tailwindcss/base";
@import "tailwindcss/components";
@import "tailwindcss/utilities";
|
Steps to Run the Application: Use this command in the terminal inside the project directory.
npm start
Output: This output will be visible on the http://localhost:3000/ on the browser window.

Like Article
Suggest improvement
Share your thoughts in the comments
Please Login to comment...