How to Setup a Subdomain on Your WordPress Website ?
Last Updated :
16 Mar, 2024
Subdomains are like branches of a tree, helping to organize and enhance the user experience on a website. They act as separate spaces, offering distinct functions and content. For instance, consider the website xyz.com. Alongside its primary purpose, it creates a subdomain called blog.xyz.com, forming a distinct online space. Both xyz.com and blog.xyz.com are independent entities, providing users with unique journeys.
Why bother with subdomains? Well, they are a game-changer in improving website management. Let’s break it down with some numbers: Studies show that businesses using subdomains for specialized purposes witness a 25% increase in user engagement. Imagine a website that shares information, offers educational resources, and runs an online store. Managing all these elements on a single platform can be overwhelming. Enter subdomains! They act as extensions to the main website, ensuring each aspect operates independently.
In this article, we will learn about how to set up a Subdomain on Your WordPress Website ? and what is used benefits of using a subdomain on your WordPress website.
Need for the Subdomain: The subdomain is completely different from the main domain, So if you want to provide different facilities to the users, then you are good to go with the subdomain. for example – write.geeksforgeeks.org, careers.geeksforgeeks.org, and learn.geeksforgeeks.org.
When Is a Subdomain Useful for WordPress?
A subdomain is beneficial for WordPress when diversifying website functions. For instance, creating a blog subdomain (blog.yourdomain.com) separates content and enhances the user experience. It’s ideal for businesses expanding into e-commerce, employing a dedicated subdomain (shop.yourdomain.com) for seamless integration. Subdomains facilitate specialized functionalities without clutter, aiding efficient site management. This organizational approach is particularly useful for diverse content types, improving site navigation and optimizing performance. In essence, leveraging subdomains in WordPress proves advantageous when tailoring distinct sections, ensuring a streamlined, user-friendly, and scalable website experience.
People Also View:
Step-wise guide to how to Setup a Subdomain on Your WordPress Website
To create the subdomain, you have to go to your hosting provider dashboard to create a subdomain, sometimes the steps for creating the subdomain for the different- different hosting providers are different, but usually, the steps are almost the same.
How to create a subdomain step by step:
Step 1: First login to your Hosting provider dashboard and look for the hosting section, then select the website for which you want to create the subdomain.
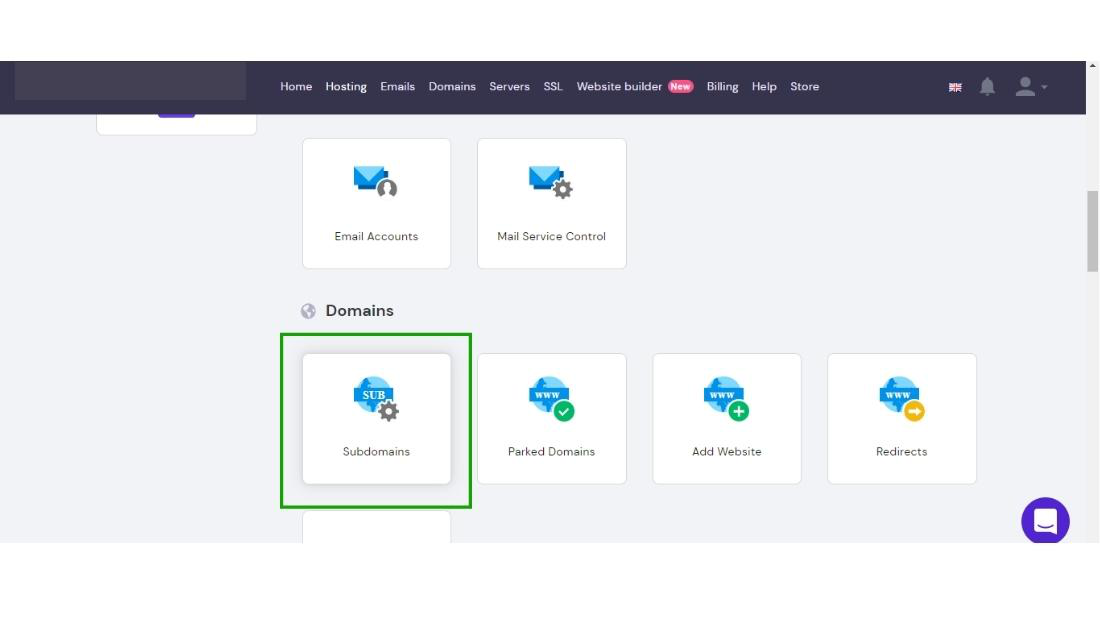
And, then click on a subdomain.
Step 2: Creating the subdomain panel will appear on the screen, and then type the subdomain in the subdomain creation box.
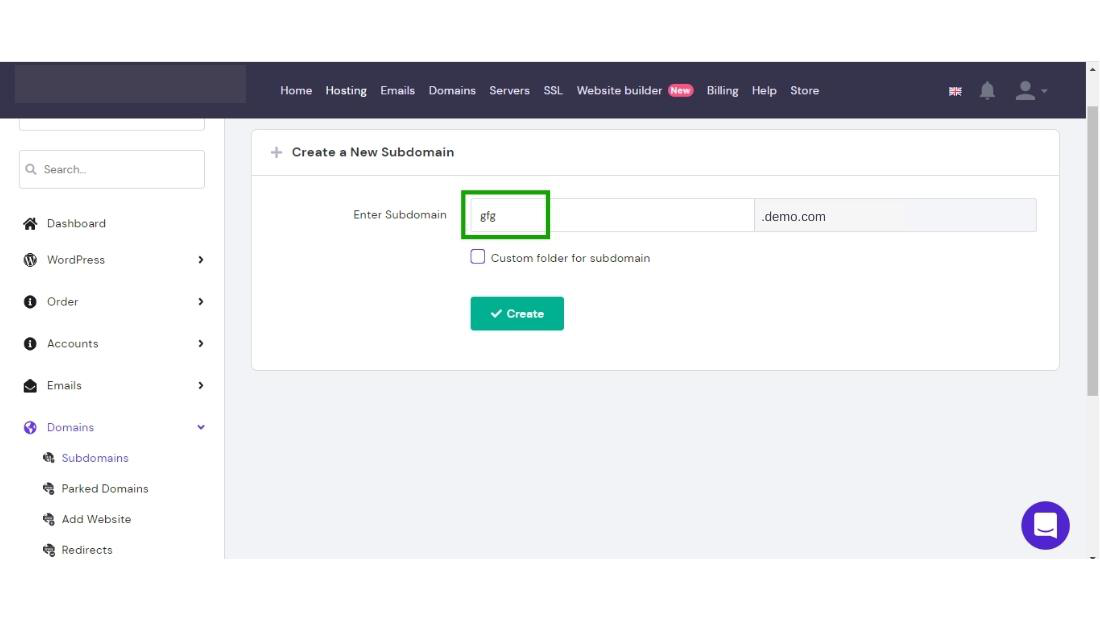
If you want a custom folder in the file manager for your subdomain website then check the checkout box.
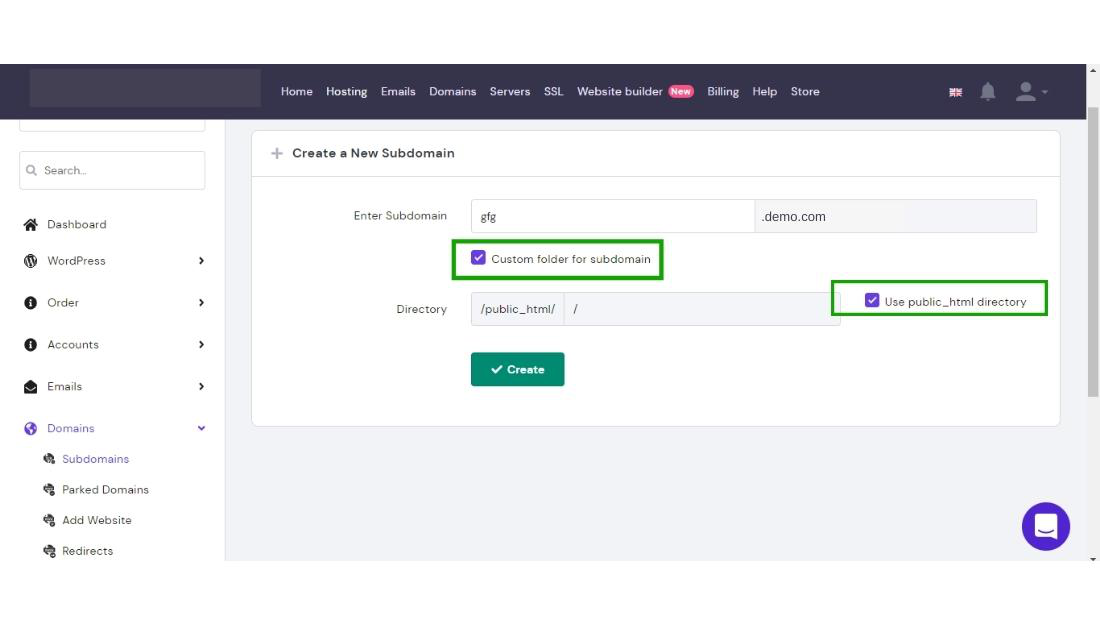
Step 3: Then click on Create button to create the subdomain.

Now, your subdomain is created successfully. you can look at your subdomain under the domain section where you have created it.
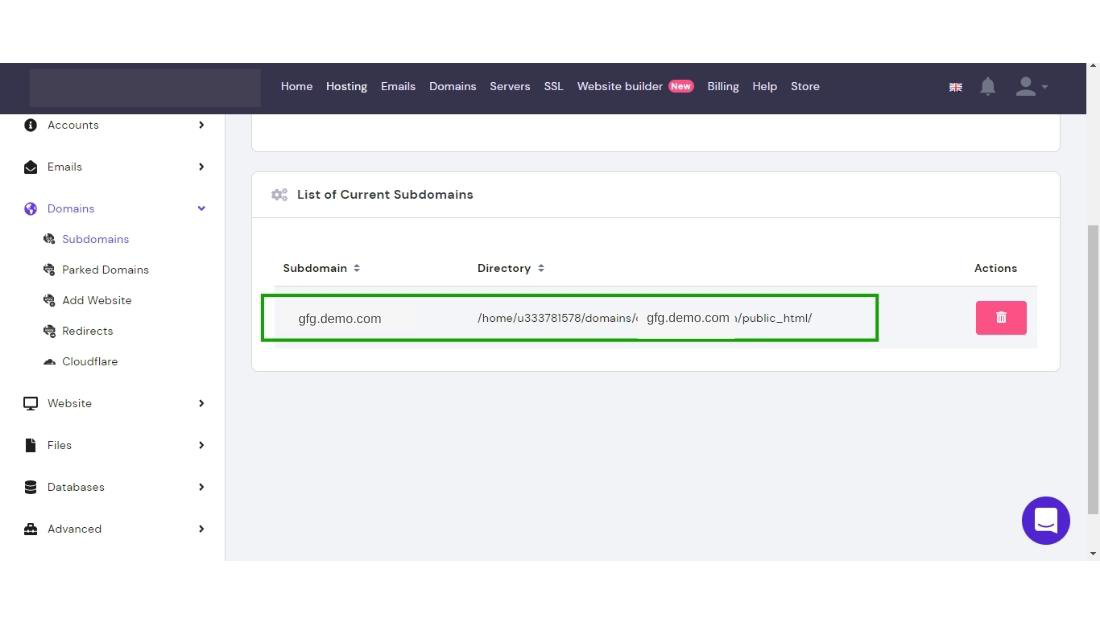
You have successfully done the creation of the subdomain.
How to install WordPress on the subdomain: To install WordPress you have to use the Auto installer of the hosting panel just like how you install WordPress on a normal website. where you have to select the subdomain.
Step-by-step guide on how to install WordPress to a subdomain:
Step 1: Go to the dashboard of the hosting provider and then select the hosting section, choose the main domain for which you have created the subdomain, and then go to the Auto Installer section.
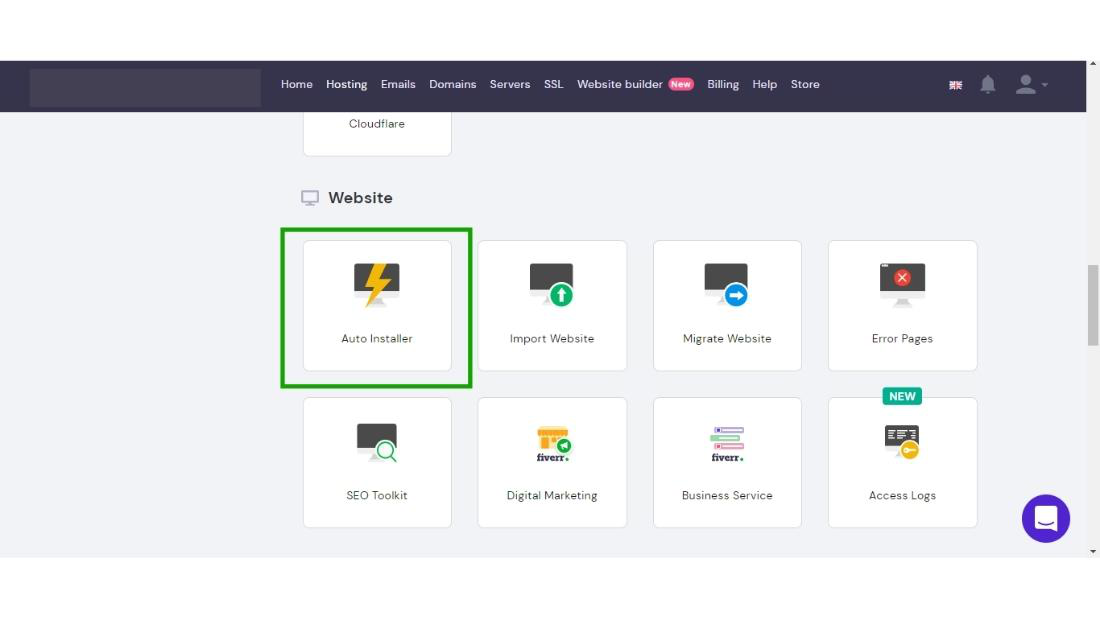
Step 2: Click on the Auto Installer and then choose WordPress.
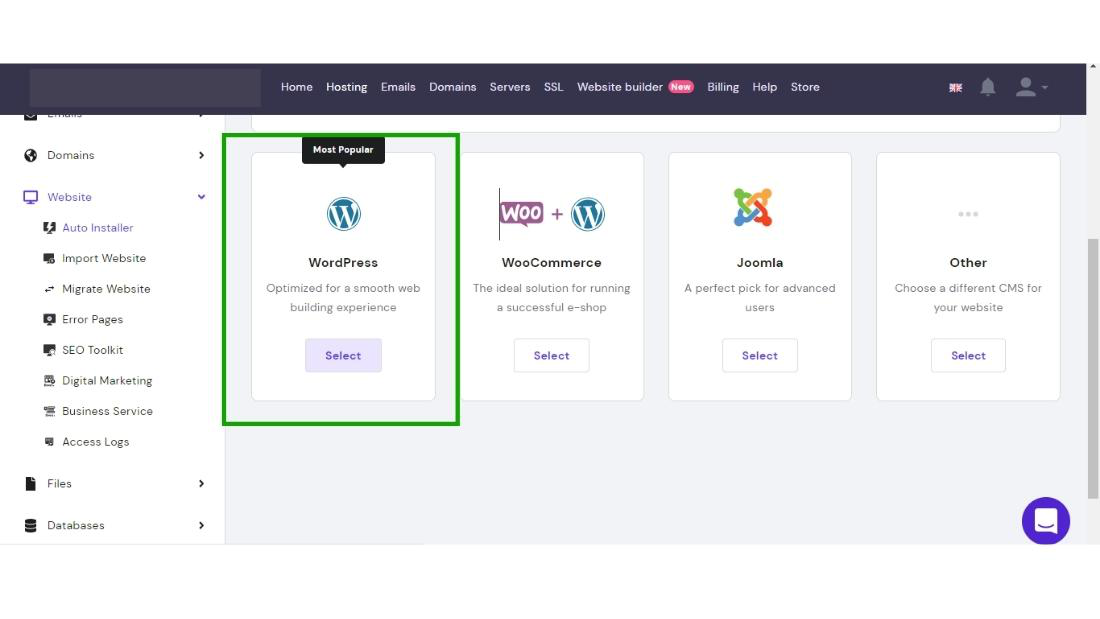
After choosing WordPress, click on the select button.
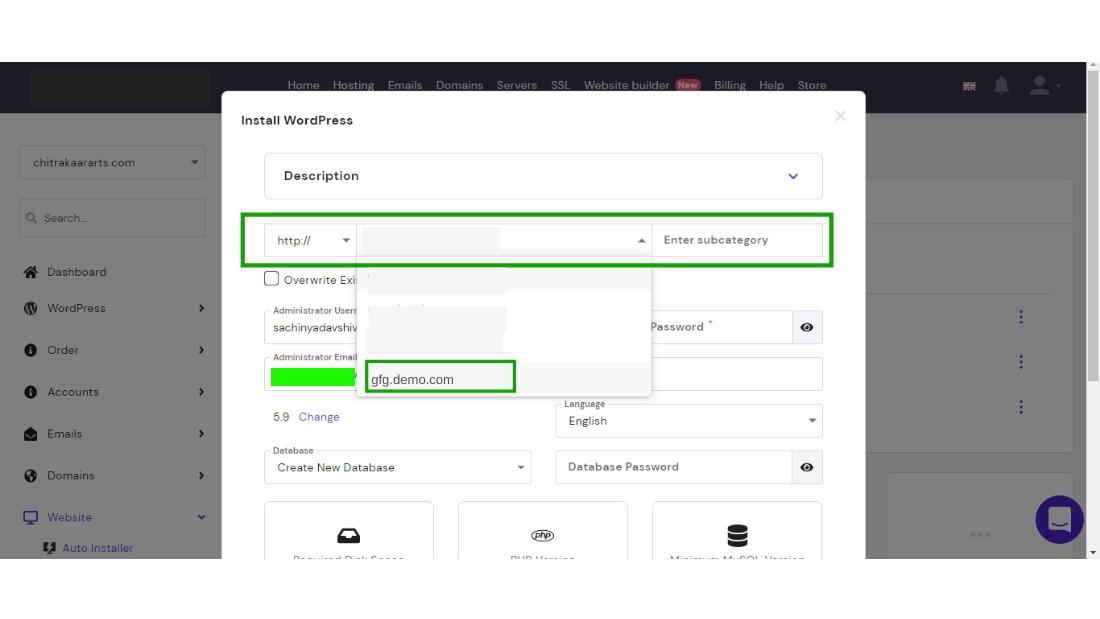
Step 3: After selecting WordPress the Installing WordPress setup wizard will appear on the screen.

Step 4: Choose the subdomain which you have created.
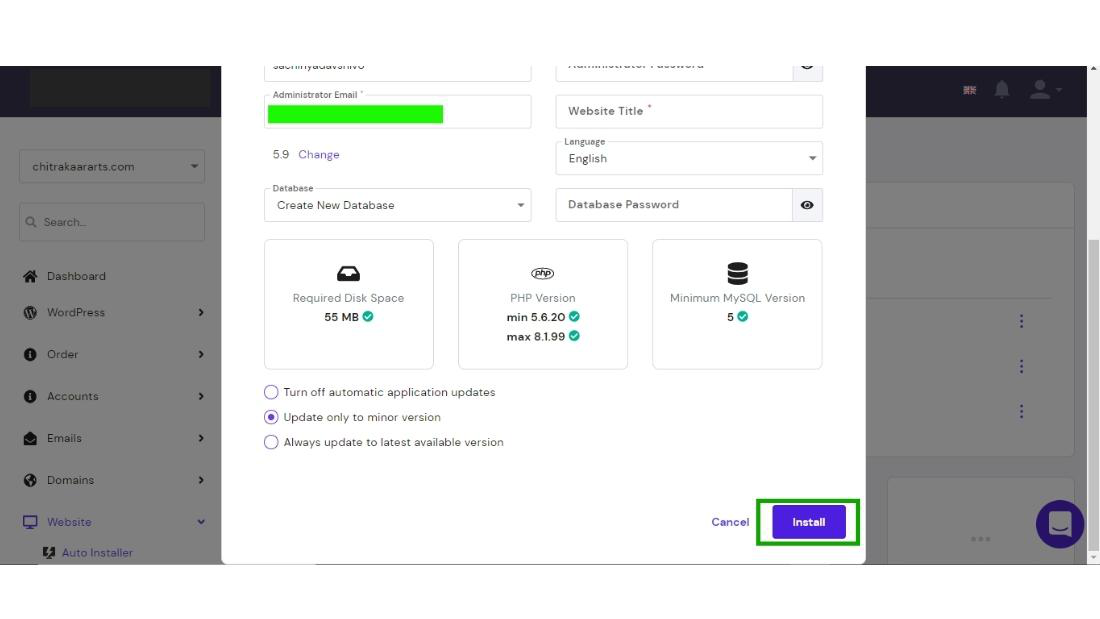
Step 5: After setting your user name, password, and website name, then click on install to install the WordPress on your subdomain.

And finally, click on install.
Now you have successfully installed WordPress on your subdomain website which is completely separate from the main website.
Conclusion:
How to Setup a Subdomain on Your WordPress Website is a strategic move for enhancing user experience and efficiently managing diverse content. As highlighted, subdomains act as independent entities, offering specialized functionalities. This guide simplifies the process into easy steps, emphasizing the need for subdomains in WordPress. From creating a subdomain to installing WordPress, the journey ensures a seamless and organized website structure. By leveraging subdomains, you tailor distinct sections, providing a streamlined, user-friendly, and scalable experience.
People Also View:
How to Setup a Subdomain on Your WordPress Website – FAQs
Why should I use a subdomain on my WordPress site?
Subdomains help organize content, enhance user experience, and efficiently manage different functions of your website.
Can I create multiple subdomains for various purposes?
Yes, you can create multiple subdomains, each serving a unique function or content type.
Do all hosting providers have the same steps for creating subdomains?
While steps may vary slightly, the process generally involves logging into your hosting provider’s dashboard, selecting your website, and creating a subdomain in the hosting section.
Is installing WordPress on a subdomain the same as on the main domain?
The process is similar, but during installation, you choose the specific subdomain where you want to install WordPress.
How does using subdomains improve website management?
Subdomains allow you to compartmentalize different functions, making it easier to manage and optimize each aspect independently for a more organized website structure.
Like Article
Suggest improvement
Share your thoughts in the comments
Please Login to comment...