How to Run Your First Spring Boot Application in IntelliJ IDEA?
Last Updated :
07 Dec, 2021
IntelliJ IDEA is an integrated development environment(IDE) written in Java. It is used for developing computer software. This IDE is developed by Jetbrains and is available as an Apache 2 Licensed community edition and a commercial edition. It is an intelligent, context-aware IDE for working with Java and other JVM languages like Kotlin, Scala, and Groovy on all sorts of applications. Additionally, IntelliJ IDEA Ultimate can help you develop full-stack web applications, thanks to its powerful integrated tools, support for JavaScript and related technologies, and advanced support for popular frameworks like Spring, Spring Boot, Jakarta EE, Micronaut, Quarkus, Helidon. So in this article, we are going to discuss how to run your first spring boot application in IntelliJ IDEA.
Prerequisite: Download and Install IntelliJ IDEA in your system. Please refer to this article Step by Step guide to install Intellij Idea to Install IntelliJ IDEA in Your System.
Step by Step Implementation
- Create and Setup Spring Boot Project in IntelliJ IDEA
- Create or import the Spring Boot project
- Run the Spring Boot Application
- Re-run the application again
Step 1: Create and Setup Spring Boot Project in IntelliJ IDEA
You may refer to this article How to Create and Setup Spring Boot Project in IntelliJ IDEA and create your first Spring Boot Application in IntelliJ IDEA.
Step 2: Create or import the Spring Boot project
After successfully creating or importing the spring boot project a file name Application.java (Herre DemoApplication) will be created automatically and this is your entry point. You can consider it as the main method of a Spring Boot application.

Step 3: Run the Spring Boot Application
There do exist two methods to run the Spring boot Application which are later discussed as follows:
- Using Project explorer
- Directly running demo application file by right-clicking
3.1: Method 1
To run this application now Right-click on the Application.java > Run “DemoApplication.main()” as shown in the below image. or you may type the shortcut key combination (Ctrl + Shift + F10) to run the application.

3.2: Method 2
It is more likely a direct method where we are directly clicking on the green color triangle button and lately choosing Run ‘DemoApplication.main()’.

After successfully running the application you can see the console as shown in the below image. Your Tomcat server started on port 8080, as shown in the below image.

Note: The default port of the Tomcat server is 8080 and can be changed in the application.properties file by using this following line of code.
server.port=8989
Step 4: Now re-run the application again and you can see Tomcat server started on the port that you have given like the below image.
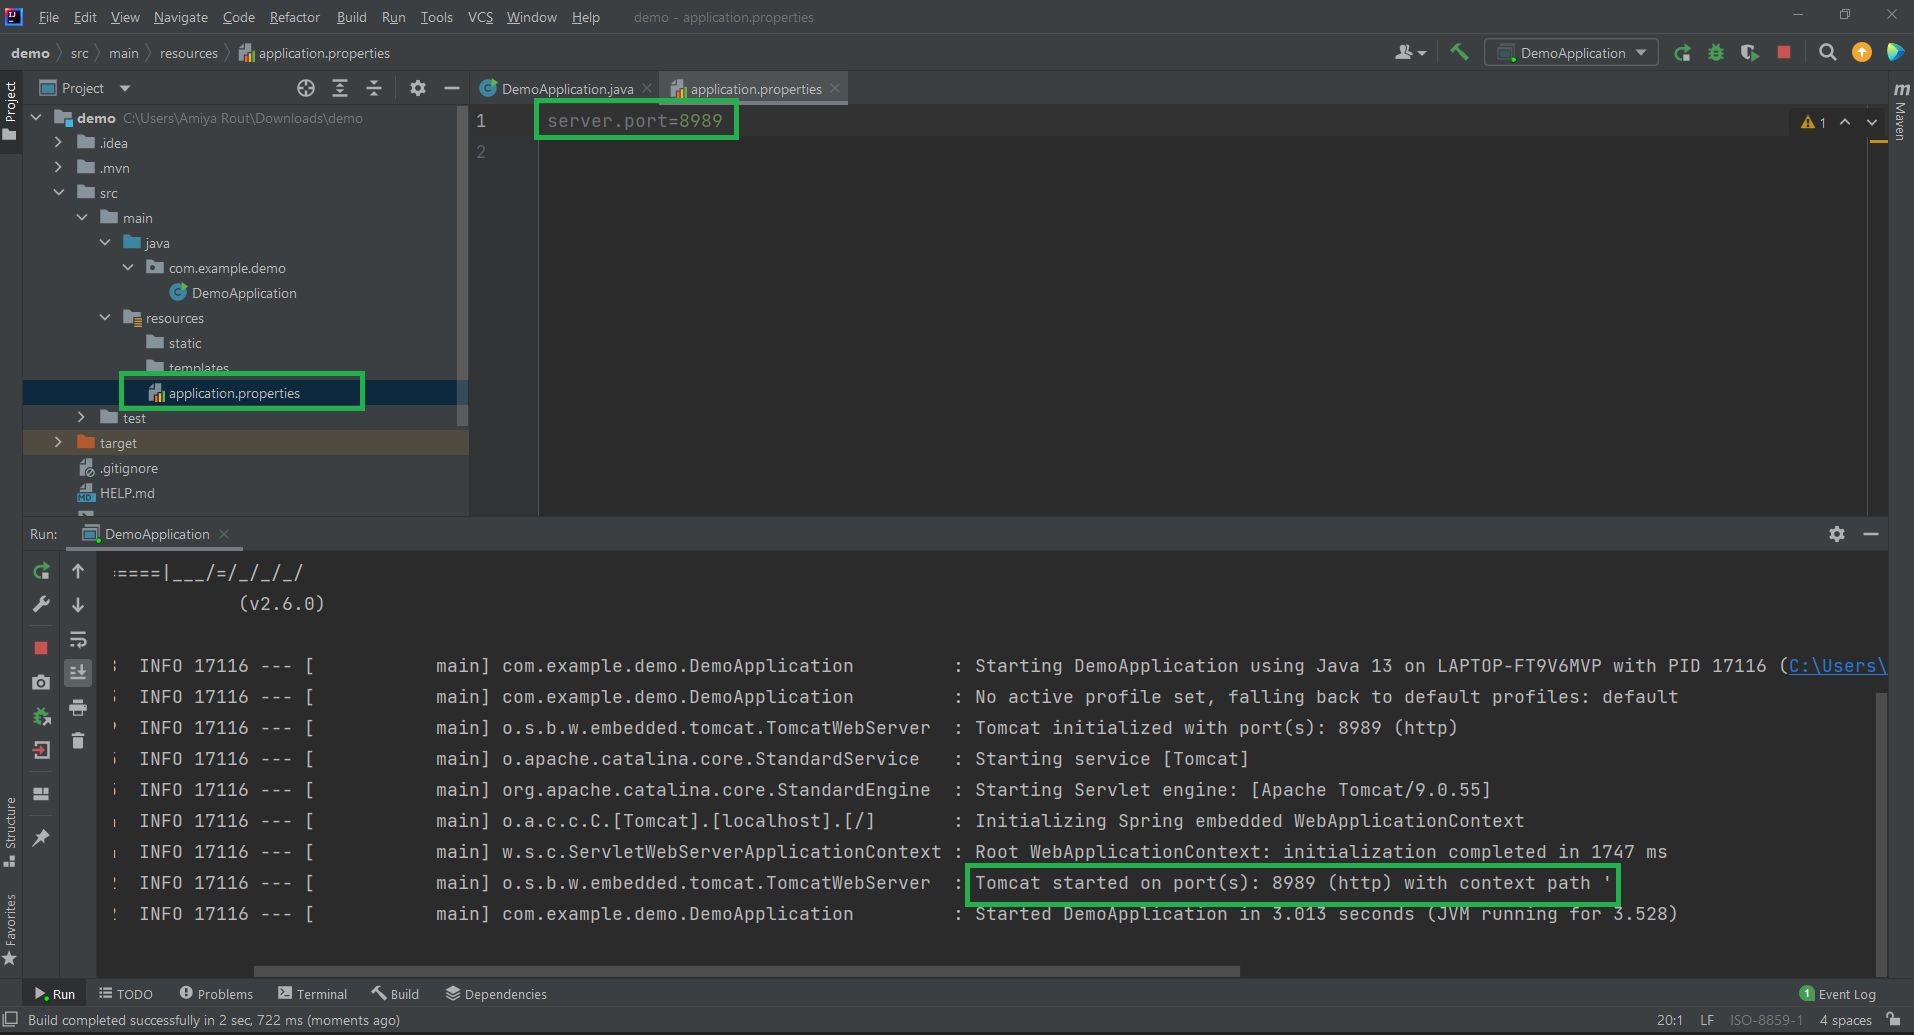
You can access the output screen in the following URL: http://localhost:8989/. Note that at last provide your port number.
Like Article
Suggest improvement
Share your thoughts in the comments
Please Login to comment...