How to Rename Package Name in Android Studio?
Last Updated :
18 Feb, 2021
A package is a namespace that combines a set of relevant classes and interfaces. Conceptually one can consider packages as being similar to various folders on your computer. One might have HTML pages in one folder, images in another, and scripts or applications in yet another. Because in android, software written in the Java/Kotlin programming language can be made of hundreds or thousands of different classes, it makes sense to keep things organized by placing related classes and interfaces into packages.
A package is basically the directory (folder) in which source code resides. Normally, this is a directory structure that uniquely distinguishes the android application; such as com.example.app. Then the developer can build packages within the application package that divides the code; such as com.example.app.ui or com.example.app.data. The package for each android application resides within the src/main/java directory of the application module. The developer could put a different package within the application package to separate each “layer” of the application architecture.
There might be many situations when the developer wants to change the package name of the App in Android Studio. The developer might have download source code from the internet and requires to rename the package name according to his/her Application details. Here in this article, we are going to discuss step by step how to rename/change package name in Android Studio:
Step by Step Implementation
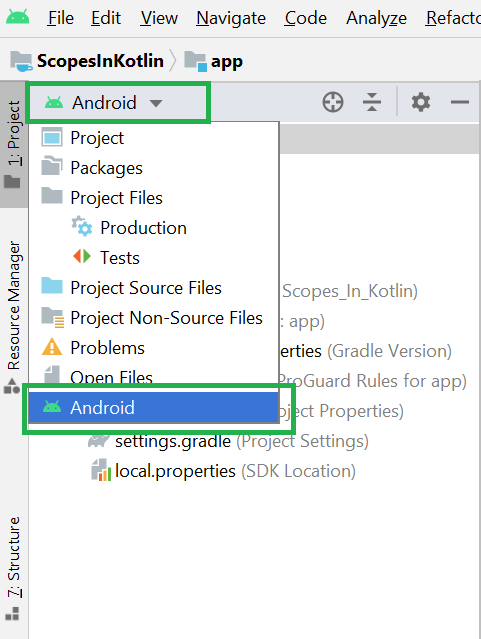
Step 1: To rename package name in Android studio open your project in Android mode first as shown in the below image.
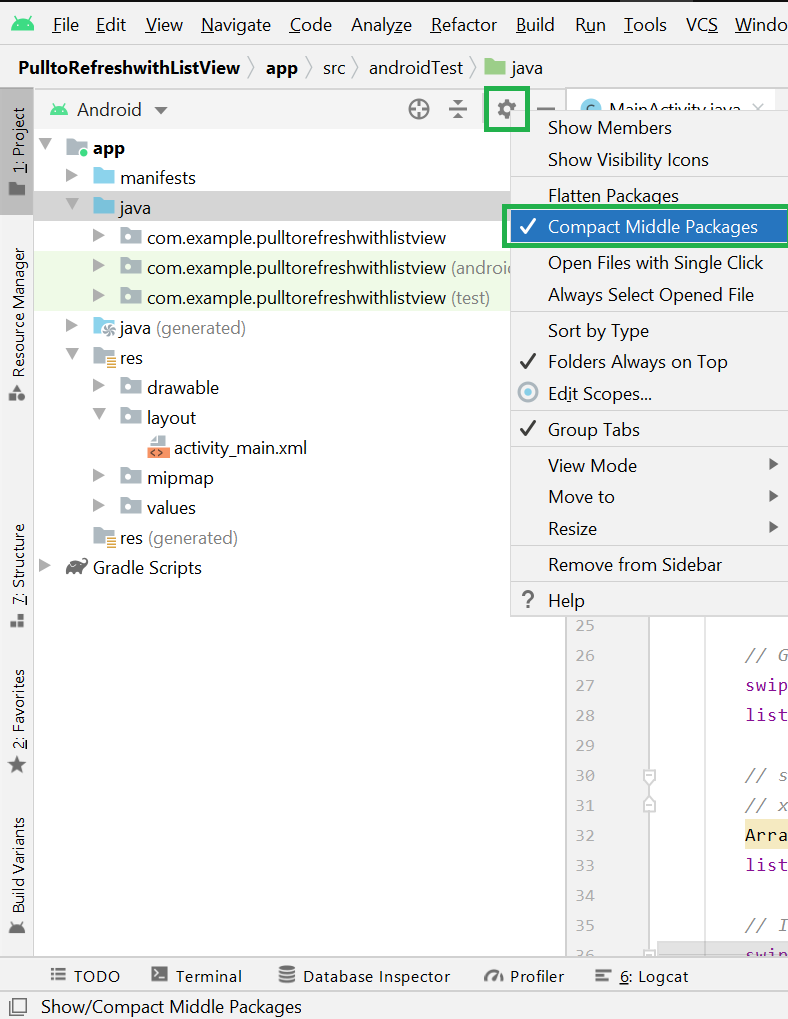
Step 2: Now click on the setting gear icon and deselect Compact Middle Packages.
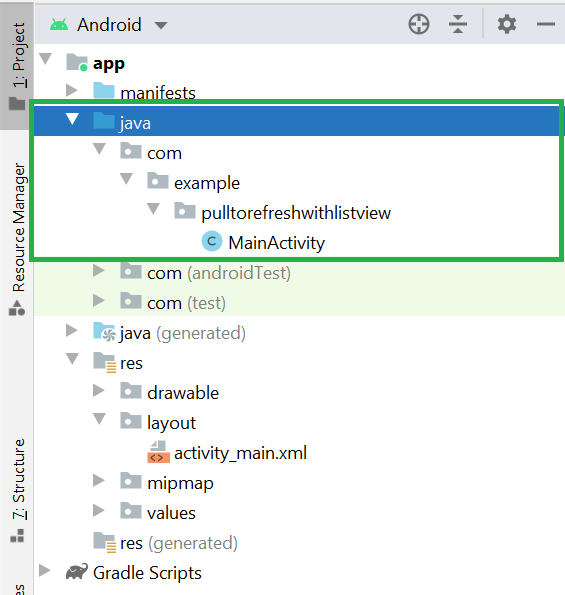
Step 3: Now the packages folder is broken into parts as shown in the below image.
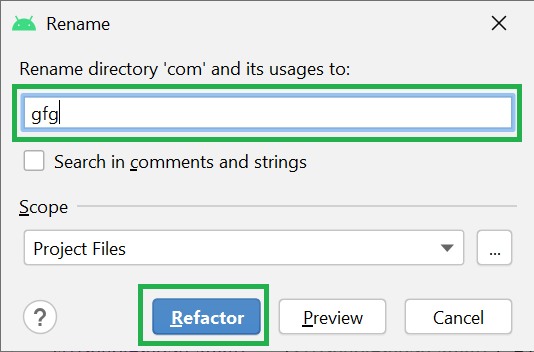
Step 4: Now right-click on the first package name (com) and Refactor > Rename. A warning message will be displayed but go ahead and click on the Rename current button.
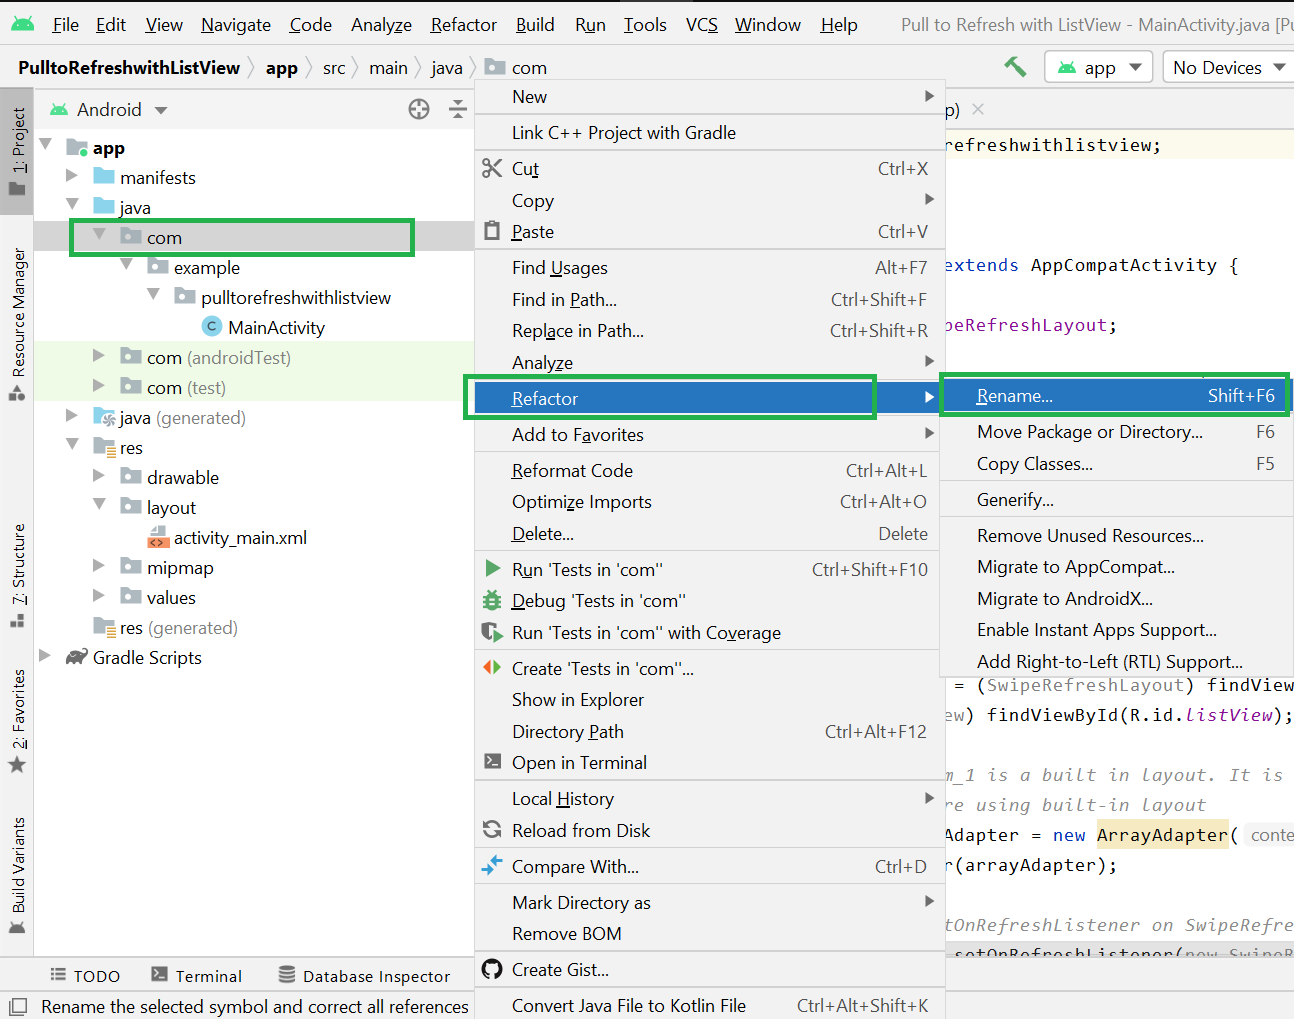
Step 5: Rename the directory name as your requirement and click on the Refactor button.
Note: Go to Build > Rebuild Project to display the updated name.
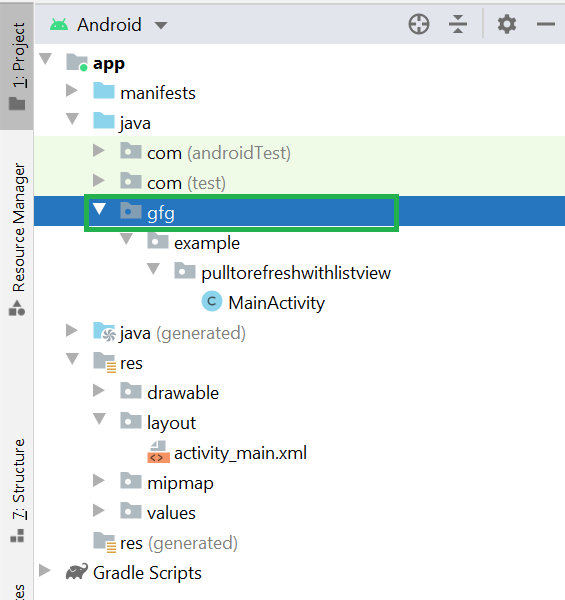
Now you can see your directory name changes from com -> gfg as shown in the below image.
Step 6: Do the same for the domain extension and App folder name according to your requirement.
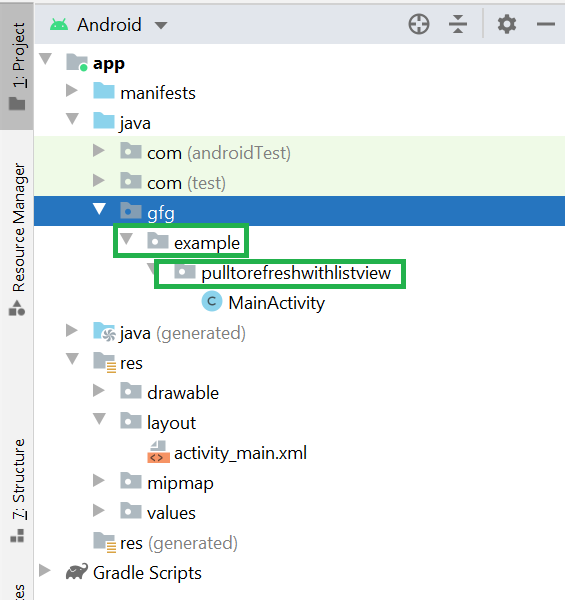
Now you can see the package name has been changed from com.example.pulltorefreshwithlistview to gfg.geeksforgeeks.listview as shown in the below image.

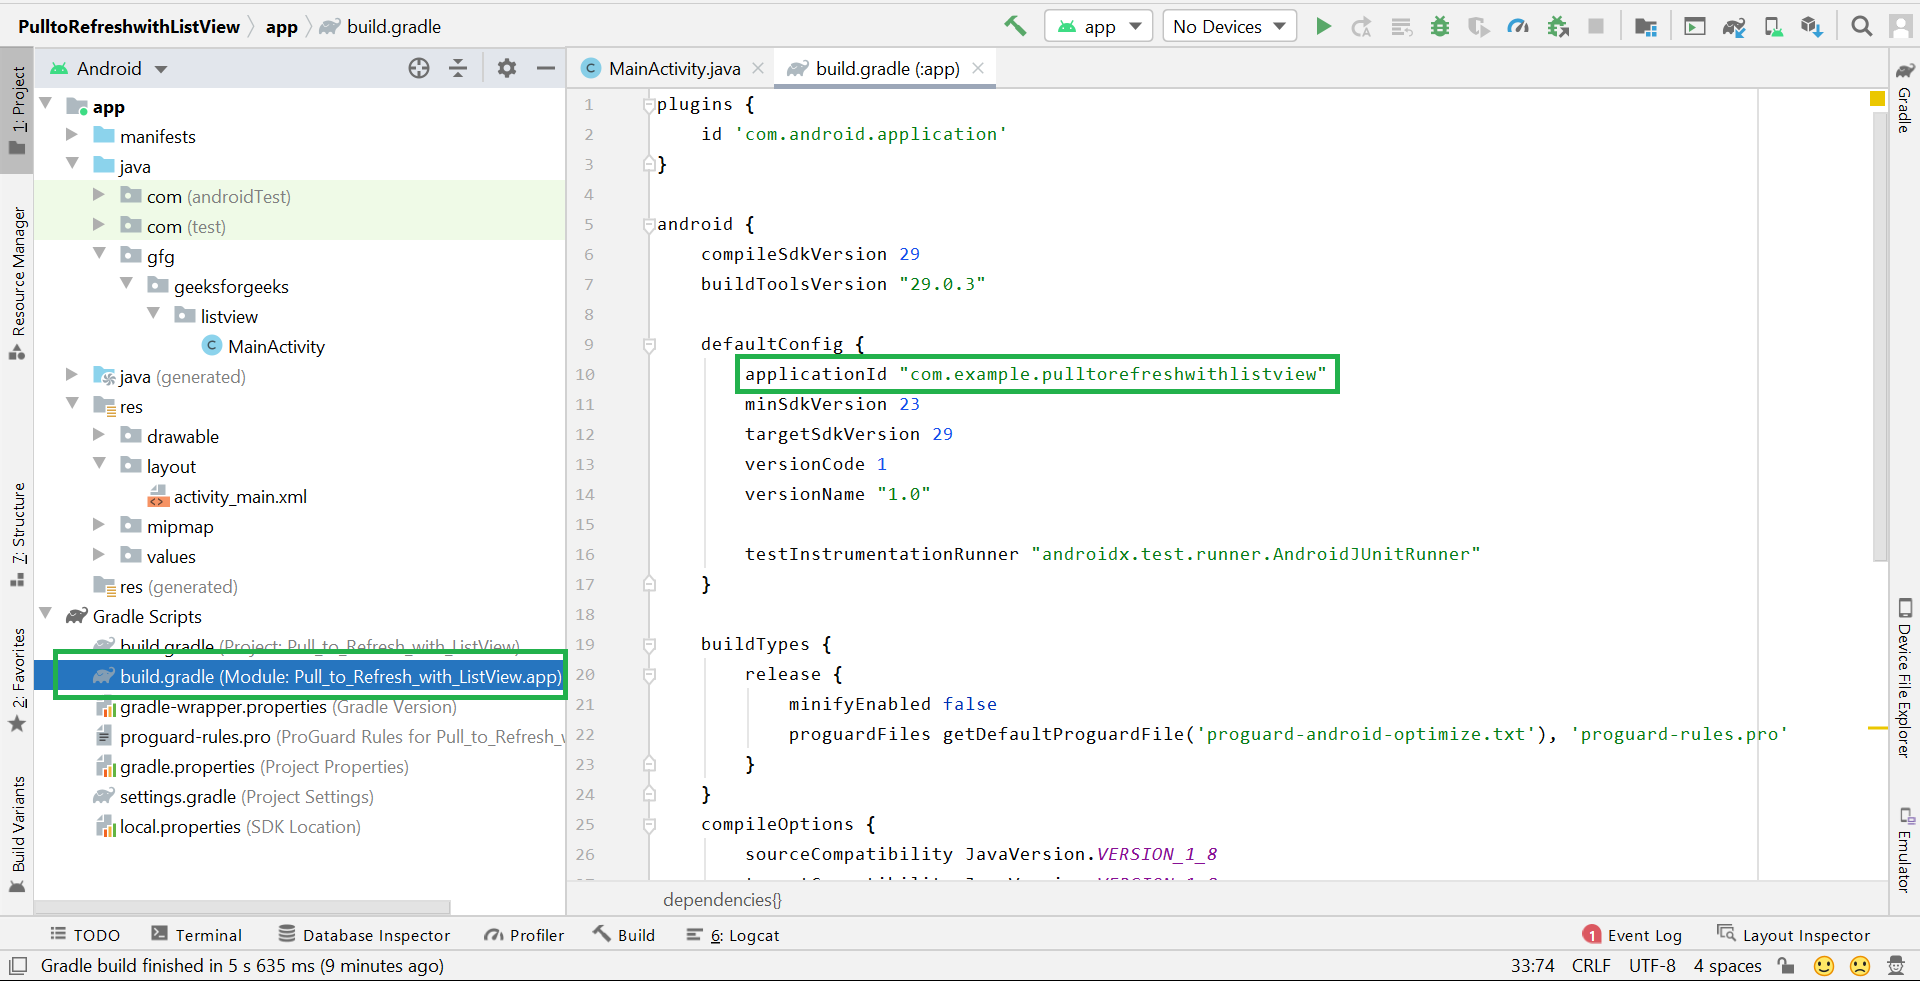
Step 7: Now go to the build.gradle (Module: app) in Gradle Scripts. Here change the applicationId and click on Sync Now. And you are successfully renamed your package name.
Like Article
Suggest improvement
Share your thoughts in the comments
Please Login to comment...