How to Normalize, Center, and Standardize Image Pixels in Keras?
Last Updated :
15 Feb, 2023
The most crucial part for a Deep learning neural network model is the ‘dataset’, or straightforwardly the Images in the dataset if the model is used for object/image detection, etc. The pixel values in the images must be scaled properly before the development of the neural network model.
Keras is a deep learning library in Python, used in neural networks to train the models. Keras supports scaling the images during the training of the model. In the coming examples ‘ImageDataGenerator’ will be used, which is a class in Keras library. It will provide a technique to scale image pixel values before modelling.
The Pixel scaling technique consists of three main types, supported by ImageDataGenerator class:
- Pixel Normalization– Scales values of the pixels in 0-1 range.
- Pixel Centering– Scales values of the pixels to have a 0 mean.
- Pixel Standardization– Scales values of the pixels to have 0 mean and unit (1) variance.
Pixel scaling is done by specifying some arguments to the ImageDataGenerator:
datagen = ImageDataGenerator(…)
Calculating the scaling statistics on the training dataset:
datagen.fit(trainX)
Fitting the neural network into the data generator:
train_iterator = datagen.flow(trainX, trainy)
model.fit_generator(train_iterator, …)
Creating a separate batch iterator for training and validating on the data generator which will perform the same pixel scaling:
train_iterator = datagen.flow(trainX, trainy)
val_iterator = datagen.flow(valX, valy)
model.fit_generator(train_iterator, validation_data=val_iterator, …)
Batch iterator for the test dataset after fitting the model:
test_iterator = datagen.flow(testX, testy)
loss = model.evaluate_generator(test_iterator, …)
Dataset used:
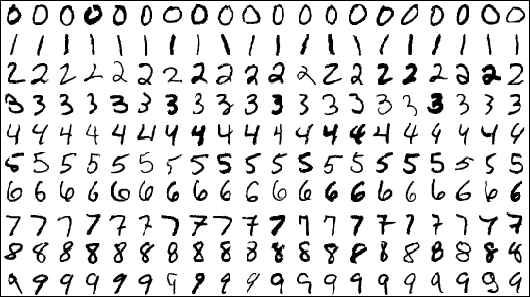
In the coming examples, for Normalizing, Centering, and Standardizing the Image pixels in the Keras library, the MSIST dataset will be used. It consists of 60,000 train set grayscale images and an additional 10,000 test set of grayscale images which consists of the digits from ‘0-9’ in different orientations. Link to the MNIST Dataset. Types of images used in the dataset:
Normalizing Image Pixels in Keras
In rescaling the pixel values from 0-255 range to 0-1 range, ImageDataGenerator class can be used. The range in 0-1 scaling is known as Normalization. The following steps need to be taken to normalize image pixels:
- Scaling pixels in the range 0-1 can be done by setting the rescale argument by dividing pixel’s max value by pixel’s min value: 1/255 = 0.0039
- Creating iterators using the generator for both test and train datasets. In this case, batch sizes of 64 will be used. It means 64 images will pass through the training process in each epoch.
- The pixel normalization can be confirmed by taking the first batch of scaled images and checking the pixel’s min and max values.
- To use the data generator for fitting and evaluating the model, a Convolution Neural Network (CNN) model is defined and we run five epochs with 60,000 images per batch, equivalent to 938 batches per epoch.
- Now, evaluating the model on the test dataset having 10,000 images distributed into batches of size 64, equivalent to 157 steps in an epoch.
Example:
Python3
from keras.datasets import mnist
from keras.utils import to_categorical
from keras.models import Sequential
from keras.layers import Conv2D
from keras.layers import MaxPooling2D
from keras.layers import Dense
from keras.layers import Flatten
from keras.preprocessing.image import ImageDataGenerator
(trainX, trainY), (testX, testY) = mnist.load_data()
width, height, channels = trainX.shape[1], trainX.shape[2], 1
trainX = trainX.reshape((trainX.shape[0], width, height, channels))
testX = testX.reshape((testX.shape[0], width, height, channels))
trainY = to_categorical(trainY)
testY = to_categorical(testY)
print('Train min=%.3f, max=%.3f' % (trainX.min(), trainX.max()))
print('Test min=%.3f, max=%.3f' % (testX.min(), testX.max()))
datagen = ImageDataGenerator(rescale=1.0/255.0)
train_iterator = datagen.flow(trainX, trainY, batch_size=64)
test_iterator = datagen.flow(testX, testY, batch_size=64)
print('Batches train=%d, test=%d' % (len(train_iterator),
len(test_iterator)))
batchX, batchy = train_iterator.next()
print('Batch shape=%s, min=%.3f, max=%.3f' % (batchX.shape, batchX.min(),
batchX.max()))
model = Sequential()
model.add(Conv2D(32, (3, 3), activation='relu', input_shape=(width, height,
channels)))
model.add(MaxPooling2D((2, 2)))
model.add(Conv2D(64, (3, 3), activation='relu'))
model.add(MaxPooling2D((2, 2)))
model.add(Flatten())
model.add(Dense(64, activation='relu'))
model.add(Dense(10, activation='softmax'))
model.compile(optimizer='adam', loss='categorical_crossentropy',
metrics=['accuracy'])
model.fit_generator(train_iterator, steps_per_epoch=len(train_iterator),
epochs=5)
_, acc = model.evaluate_generator(test_iterator, steps=len(test_iterator),
verbose=0)
print('Test Accuracy: %.3f' % (acc * 100))
|
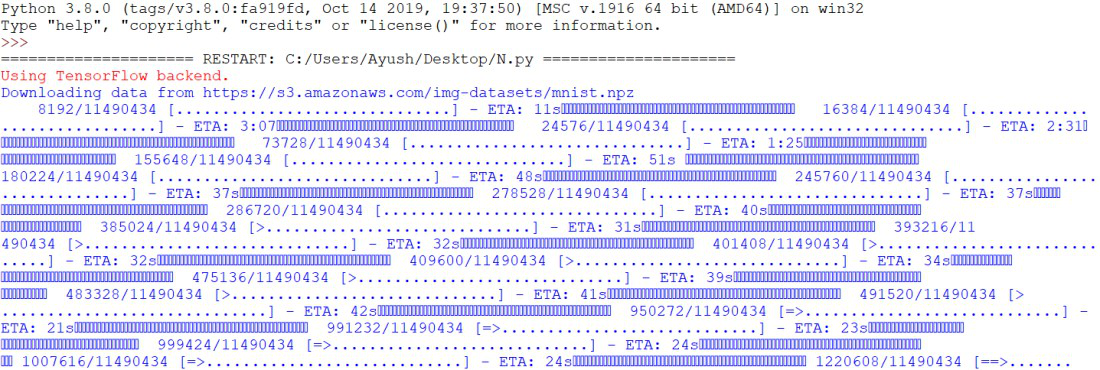
After running the above script, it will download the MNIST dataset from the amazon-AWS website. It’ll take some time to download the dataset.
On retrieving the first batch containing 64 images of 28*28 size and pixel values in the range 0-1.

The model is evaluated on the test dataset, applying the normalization technique.
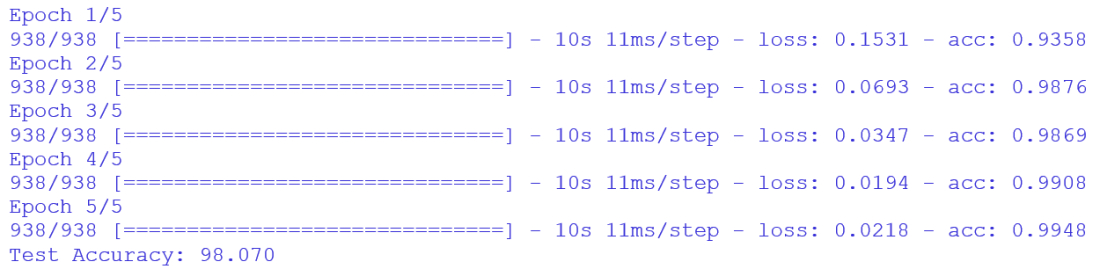
The accuracy of the neural network model comes out to be 98.07%.
Centering Image Pixels in Keras
Image pixels are centered by calculating the mean values of the pixels and then subtracting them from each image. This technique is known as Centering. This has the effect of centering the distribution values of pixels on zero, which means that the centered images will have ‘zero mean’ pixel values. The following steps need to be taken to center image pixels:
- Using the statistical methods to calculate the mean pixel values in the ImageDataGenerator class on the training dataset.
- Mean pixel values in Keras do not require any statistics. It is referred to as sample-wise centering in Keras.
- After statistics are calculated, feature-wise centering is done.
- The mean of a batch of images is calculated in the batch iterator. The mean has a value that is close to zero, not exactly zero.
- Setting the batch size on the training dataset. It can be any value close to zero.
Example:
Python3
from keras.datasets import mnist
from keras.utils import to_categorical
from keras.models import Sequential
from keras.layers import Conv2D
from keras.layers import MaxPooling2D
from keras.layers import Dense
from keras.layers import Flatten
from keras.preprocessing.image import ImageDataGenerator
(trainX, trainY), (testX, testY) = mnist.load_data()
width, height, channels = trainX.shape[1], trainX.shape[2], 1
trainX = trainX.reshape((trainX.shape[0], width, height, channels))
testX = testX.reshape((testX.shape[0], width, height, channels))
trainY = to_categorical(trainY)
testY = to_categorical(testY)
datagen = ImageDataGenerator(featurewise_center=True)
datagen.fit(trainX)
train_iterator = datagen.flow(trainX, trainY, batch_size=64)
test_iterator = datagen.flow(testX, testY, batch_size=64)
print('Batches train=%d, test=%d' % (len(train_iterator),
len(test_iterator)))
model = Sequential()
model.add(Conv2D(32, (3, 3), activation='relu', input_shape=(width, height,
channels)))
model.add(MaxPooling2D((2, 2)))
model.add(Conv2D(64, (3, 3), activation='relu'))
model.add(MaxPooling2D((2, 2)))
model.add(Flatten())
model.add(Dense(64, activation='relu'))
model.add(Dense(10, activation='softmax'))
model.compile(optimizer='adam', loss='categorical_crossentropy',
metrics=['accuracy'])
model.fit_generator(train_iterator, steps_per_epoch=len(train_iterator),
epochs=5)
_, acc = model.evaluate_generator(test_iterator, steps=len(test_iterator),
verbose=0)
print('Test Accuracy: %.3f' % (acc * 100))
|
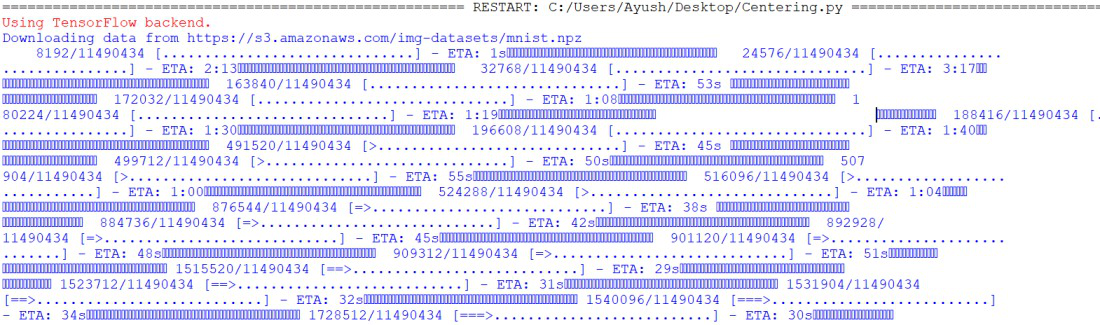
After running the above script, it will download the MNIST dataset from the amazon-AWS website. It’ll take some time to download the dataset.
Centered images of a single batch are retrieved, and we can clearly see the mean pixel value is very close to zero. Zero mean pixel value confirms the desired effect of centering.
The performance of the neural network starts poor and doesn’t improve. The centered value pixels have a range from -277 to 277. Neural networks generally train with more efficiency with smaller inputs. So Normalizing should be done before Centering to get better results.
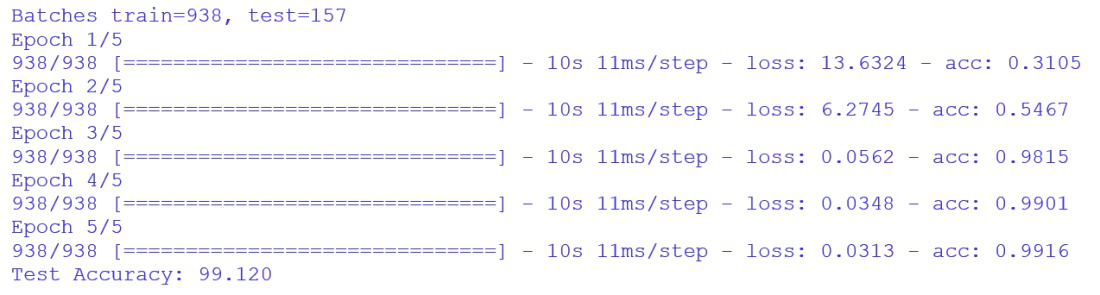
The accuracy of the neural network model comes out to be 99.12%.
Standardizing Image Pixels in Keras
Standardizing is a technique that scales the data and takes an assumption of the distribution of data is Gaussian and shifts the distribution of data to have a ‘zero mean’ and ‘unit (1) Standard deviation’. The data with this type of distribution is known as standard Gaussian. This technique is fruitful when the dataset of the neural network sums to zero and has smaller input values in the range of -3.0 to 3.0.
Standardized images are resulted by subtracting the mean pixel values from their individual pixel values and then dividing them by the standard deviation of the values of pixels. The following steps need to be taken to Standardize image pixels:
- Calculating the mean and standard deviation of the pixel values.
- Using statistics to standardize each image. In Keras, it is referred to as sample-wise standardization.
- Creating a batch of 64 images that have a zero mean unit standard deviation to have the sample close to the standard Gaussian.
- Running the test on the entire dataset to confirm that the mean is close to zero and the standard deviation is close to 1.
- Applying pixel scaling while fitting and evaluating the neural network.
Example:
Python3
from keras.datasets import mnist
from keras.utils import to_categorical
from keras.models import Sequential
from keras.layers import Conv2D
from keras.layers import MaxPooling2D
from keras.layers import Dense
from keras.layers import Flatten
from keras.preprocessing.image import ImageDataGenerator
(trainX, trainY), (testX, testY) = mnist.load_data()
width, height, channels = trainX.shape[1], trainX.shape[2], 1
trainX = trainX.reshape((trainX.shape[0], width, height, channels))
testX = testX.reshape((testX.shape[0], width, height, channels))
trainY = to_categorical(trainY)
testY = to_categorical(testY)
datagen = ImageDataGenerator(featurewise_center=True,
featurewise_std_normalization=True)
datagen.fit(trainX)
train_iterator = datagen.flow(trainX, trainY, batch_size=64)
test_iterator = datagen.flow(testX, testY, batch_size=64)
print('Batches train=%d, test=%d' % (len(train_iterator),
len(test_iterator)))
model = Sequential()
model.add(Conv2D(32, (3, 3), activation='relu',
input_shape=(width, height, channels)))
model.add(MaxPooling2D((2, 2)))
model.add(Conv2D(64, (3, 3), activation='relu'))
model.add(MaxPooling2D((2, 2)))
model.add(Flatten())
model.add(Dense(64, activation='relu'))
model.add(Dense(10, activation='softmax'))
model.compile(optimizer='adam', loss='categorical_crossentropy',
metrics=['accuracy'])
model.fit_generator(train_iterator, steps_per_epoch=len(train_iterator),
epochs=5)
_, acc = model.evaluate_generator(test_iterator, steps=len(test_iterator),
verbose=0)
print('Test Accuracy: %.3f' % (acc * 100))
|
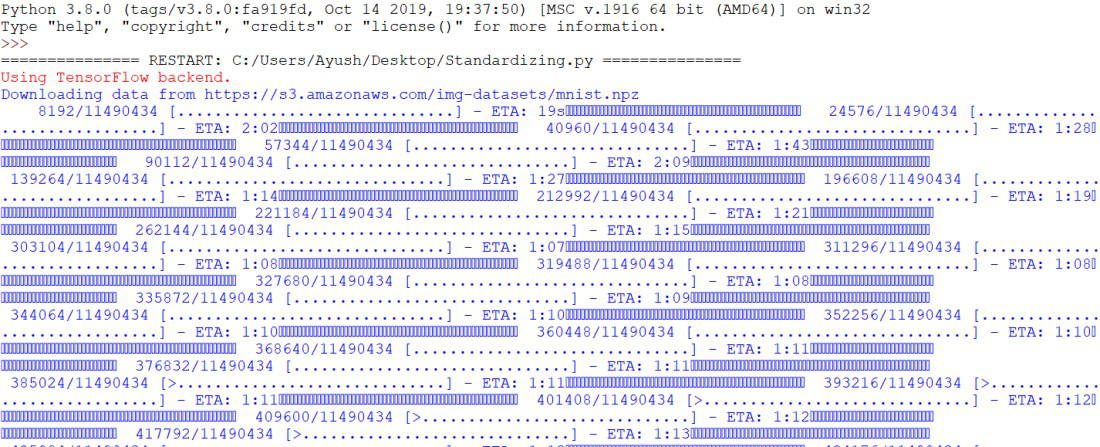
After running the above script, it will download the MNIST dataset from the amazon-AWS website. It’ll take some time to download the dataset.
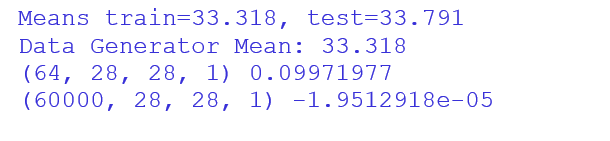
A single batch consisting of 64 standardized images is retrieved, the mean and standard deviation are close to 0.0 and 1.0 respectively as expected standard gaussian.

The ImageDataGenerator class standardizes images and calculates statistical functions on the train set, thus fitting and evaluating the model.
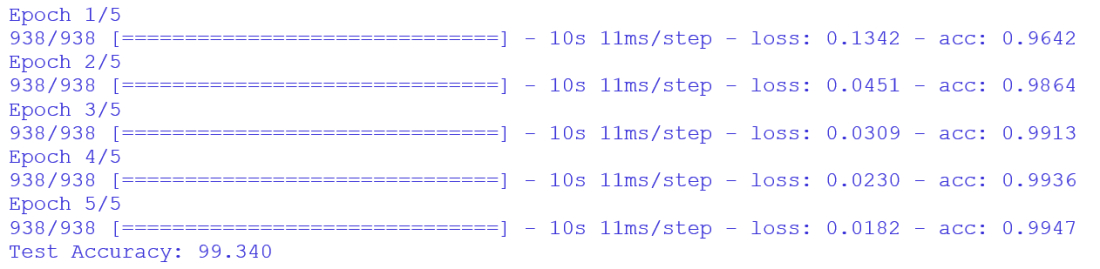
The accuracy of the neural network model comes out to be 99.34%.
These are the techniques discussed to Normalize, Center, and Standardize the Image Pixel values using Keras Open-source deep learning library.
Share your thoughts in the comments
Please Login to comment...