KVM, short for Kernel-based Virtual Machine, is a complete virtualization solution for Linux running on x86 hardware (Intel VT or AMD-V). Since version 2.6.20, the mainline Linux kernel has featured KVM, a complete virtualization solution for Linux running on Intel 64 and AMD 64 hardware that is fast and stable for the majority of workloads. It consists of a processor-specific module, kvm-intel.ko or kvm-amd.ko, and a loadable kernel module, kvm.ko, that provides the basic virtualization architecture. Multiple virtual machines running unmodified Linux or Windows images can be operated using KVM. A network card, disc, graphics adapter, and other private virtualized hardware are available to each virtual computer with the Linux kernel.
How to Manage KVM Virtual Environment using Command Line Tools in Linux
To manage KVM Virtual Environment using Command line tools in Linux you can use the following steps:-
Step 1: Requirements for KVM usage and installation
To install KVM and manage KVM, we must check the compatibility, as we discuss the processor must consist of the virtualization plugins to run the virtualization process, in order to check the compatibility run these commands:-
Verify if hardware virtualization is supported by your CPU
A processor with hardware virtualization capabilities is required to run KVM. Both Intel and AMD have created processor extensions, named respectively Intel VT-x (code name Vanderpool) and AMD-V. (code name Pacifica). Check the result of this command to see if your processor can handle one of these:
$ egrep -c '(vmx|svm)' /proc/cpuinfo
If the value is 0, your CPU isn’t capable of supporting hardware virtualization.
If 1 or more this means KVM is supported, but you still need to check if virtualization is turned on in the BIOS. So make sure virtualization is enabled in BIOS configuration.
To verify KVM one step further you run this
$ kvm-ok
The output will verify if your CPU has KVM exists or not.

KVM virtualization checks
Check Kernel Architecture for KVM
$ uname -m
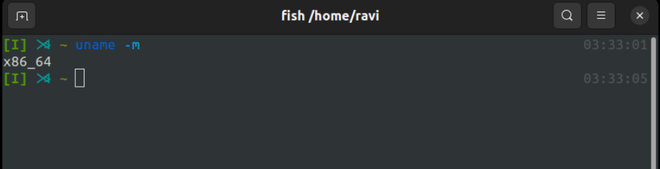
CPU architecture checks
A 64-bit kernel is active when the flag x86 64 is present. You are using a 32-bit kernel if you are using an i386, i486, i586, or i686 processor.
Note that the terms “x86 64” and “amd64” are interchangeable. It is recommended to use a 64-bit kernel for KVM but not required, A 64-bit system can also support both 32-bit and 64-bit guests. Only 32-bit guests can be hosted on a 32-bit machine.
Step 2: KVM Package Installation in Linux
We can use the various package manager for various Linux distros in order to install the KVM packages, the process is the same, we are using ubuntu to install KVM, which provides an apt package manager to install, to install the KVM packages run these commands
First update repositories
$ sudo apt update
Install required packages for KVM
$ sudo apt install qemu-kvm libvirt-daemon-system libvirt-clients bridge-utils

kvm packages install
Type Y and wait for installation. after successful installation, you are ready to use KVM manager and all the nice features of KVM.
There is also a GUI way to check what changes we made using the virtual machine package, so we have created the pool and run the arch line which can we see in it.
To install the GUI package for managing virtual machines we can run this command
$ sudo apt install virt-manager

GUI based Virtual Machine Manager for KVM
Verify the existence of the libvirtd daemon
This indicates the virtualization process is running in the background, to check run the command:
$ sudo systemctl status libvirtd.service

libvirt virtualization status
Add Users to KVM packages Groups
we can add the current user to KVM and libvirt groups to use it effectively, to check if libvirt is added run the following commands
$ sudo usermod -a -G libvirt-qemu <username>
also, we can check groups for the users
$ groups <username/entity>
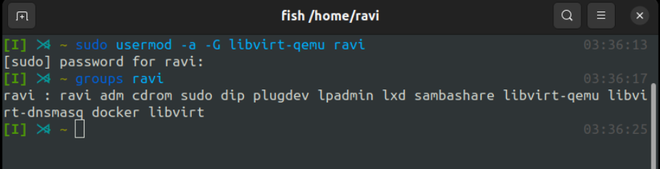
add KVM packages groups to current user groups
likewise, you can install other KVM packages and add users to those package groups if needed.
Step 3:- Creating a Storage Pool using virsh
In order to handle virsh guest domains, one can utilize the virsh CLI tool. A command and its arguments can be entered on the shell command line and then run through the virsh program.
We’ll utilize it to build a storage pool for our KVM environment in this part. Use the command below to learn more about the utility.
$ man virsh
Here are the steps to create a storage pool
1. To define a new storage pool using the command pool-define-as with virsh, you must also give the name, type, and type’s parameters
In this instance, the name is pool2, and the type is dir. By default, you might give the type five arguments:
- source-hosts
- source-path
- source-dev
- source-name
- target
To indicate the path to the storage pool for the (Dir) type, we need the final argument, “target,” although we can leave out the other arguments by using the symbol “-.”
$ sudo virsh pool-define-as pool2 dir - - - - "/mnt/personal-data/pool2/"

define pool
2. Use the following command to inspect every storage pool you have in the environment
$ virsh pool-list --all

list pool
3. Use the command below to construct the storage pool that we previously defined
$ virsh pool-build pool2

build pool
4. Active/enable the storage pool that we just generated above using the virsh command pool-start.
$ virsh pool-start pool2

start pool
5. Set up libvirtd to automatically start pool2
$ virsh pool-autostart pool2

autostart pool
6. Let’s finally show details regarding our new storage pool.
$ virsh pool-info pool2

pool info
Step 4:- Set Up Storage Volumes/Disk Images using qemu-img
It’s now time for the disc image, which will be created from Spool1 using qemu-img. Use the man page to learn more about qemu-img.
$ man qemu-img
The disc image format, the path to the disc image you wish to produce, and the size should all be specified along with the qemu-img command “create, check,…etc.”
$ sudo qemu-img create -f raw /mnt/personal-data/pool2/SysVol1.img 10G

creating qemu image
Never alter an image that is currently being used by a virtual machine or another process using qemu-img; doing so could lead to image destruction.
Step 5:- Building and Installing the Virtual Machine
We will use virt-install to build virtual machines in the final and most recent sections. With the “libvirt” hypervisor management library, new KVM virtual machines can be created using the command line utility virt-install. To learn more about it use:-
$ man virt-install
You must execute the following command with all the information as stated in the following paragraphs in order to establish a new KVM virtual machine.
- name: VM name.
- disk location: Path of the disk image.
- graphics: usually be SPICE graphic.
- vcpu : number of virtual CPUs.
- ram: allocated ram memory in megabytes.
- location: installation source path.
- cdrom: local mount path of iso files
- network: Usually be vibr00 bridge.
To run and build the system from a local iso file we will use cdrom flag and run the following command
$ virt-install --name=archlnx --disk path=/mnt/personal-data/pool2/SysVol1.img --graphics spice --vcpu=1 --ram=1024 --cdrom=/home/ravi/Downloads/archlinux-2022.11.01-x86_64.iso --network bridge=virbr0
This will install the iso image in our storage pool name, pool2 on the disk image SysVol1.img storage.

install machine

arch linux initial log
Step 6:– Quick Manual for Managing the Virtual Machine for KVM Virtual Environment using commands
Here is the list of commands we can use to manage the virtual machine, using virsh command
To list all available KVM virtual machines, use the command:
$ virsh list --all
To start a specific virtual machine, use the command:
$ virsh start <vm name>
To stop a specific virtual machine, use the command:
$ virsh shutdown <vm name>
To suspend a specific virtual machine, use the command:
$ virsh suspend <vm name>
To resume a suspended virtual machine, use the command:
$ virsh resume <vm name>
To destroy a specific virtual machine, use the command:
$ virsh destroy <vm name>
To get detailed information about a specific virtual machine, use the command:
$ virsh dominfo <vm name>
To connect to the console of a specific virtual machine, use the command:
$ virsh console <vm name>
To list the available storage pools, use the command:
$ virsh pool-list --all
To create a new storage pool, use the command:
$ virsh pool-create-as <pool name> <pool type> <target path>
To delete an existing storage pool, use the command:
$ virsh pool-destroy <pool name>
Conclusion
This article served as a command-line tutorial for installing a virtual machine using KVM. We have highlighted some of the most important options to specify in order to guarantee the virtual machine’s successful installation. We also went a step further and showed how to use the virsh utility to communicate with the virtual machine via the command line. So in this tutorial, we learned how we can manage the KVM in the command line and see how to view and create a storage pool for installing a virtual machine in the command line. We also learn how we can install arch Linux using the command line tool in a virtual machine.
Like Article
Suggest improvement
Share your thoughts in the comments
Please Login to comment...