How to make a website using WordPress (Part – 1)
Last Updated :
03 Nov, 2022
Hi guys, most of us at some instances of time face a problem with how to start something for a minor or major project. Many of us wish to make a website-based project but do not know how to proceed. To assist all my friends, today I’ll walk you through the process of installing and getting acquainted with the WordPress environment. Below I give step by step process along with screenshots to make a website using WordPress. Just follow them and you are done!!
-
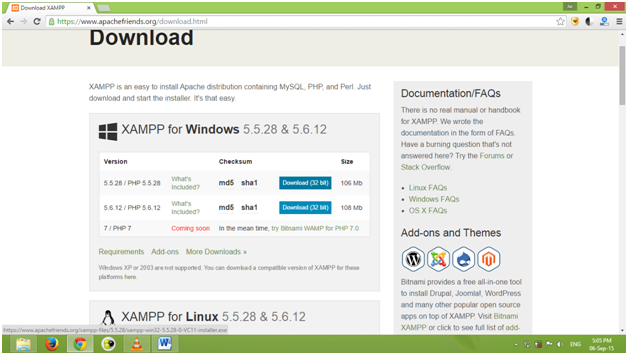
Installing local server: Xampp (https://www.apachefriends.org/index.html)
Go to the link: https://www.apachefriends.org/download.html, choose your platform (windows / Linux, mac), and click on download.
-
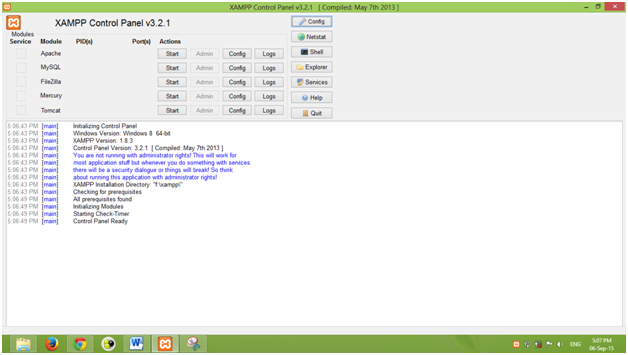
After installing Xampp, go to programs and run it, you should see something like this.
-
Just click on start in front of Apache and MySQL, this will start your local server.
If you’re facing problems with this step, chances are that your port no. 80 is being used by other applications (for example Skype). To resolve this issue, click on config in front of Apache, locate the line “Listen 80” and change it to some other value, say “Listen 1234”.
-
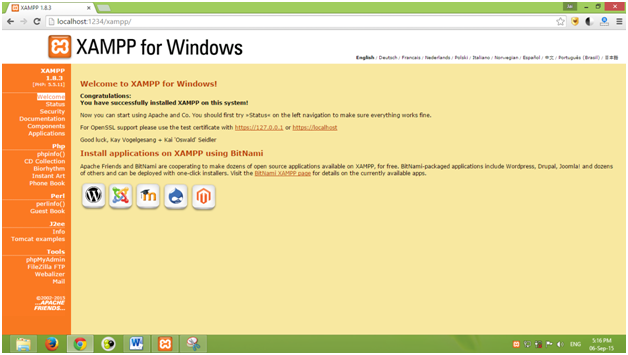
Now that your localhost is running, check it by typing “localhost” in your browser URL (if you changed the port number in 3rd step, then type “localhost:1234” whenever I refer to “localhost”). You should see the following screen.
-
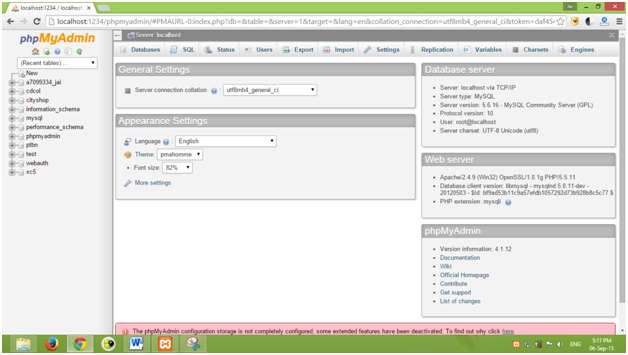
Goto phpMyAdmin is located under “Tools” in the bottom left corner. This is your MySQLdatabase, here all the information on your website (comments, posts, username, password, etc.) is stored. You can run SQL queries here, make tables, etc.
- Till now we’ve configured our localhost, now let’s move to the next step of installing WordPress, download it from here: https://wordpress.org/download/
- Now go to C:\xampp\htdocs and paste the zip file you downloaded in step 6 here.
- Extract the zip file in the htdocs folder and you should see a new folder named “wordpress” created.
- Go to your browser and type “localhost/phpmyadmin/” and click on New
-
Write any name you want under “Database name” and click on create. Remember this name, this is the name of your site’s database.

-
Type the URL “http://localhost/wordpress/” in your browser and you should get this screen.
>
- Click on “Let’s go”. On the next page fill in the following details:
- Database name: The database you created in step 9.
- Username: root
- Password: Leave it empty.
- Database Host: localhost
- Table prefix: It’s “wp_” by default, you can change it whatever you want, but you can’t keep it empty.
- Click on submit.
- Click on “run the install”

- On the next screen just fill in all the details like site name, username, password, and email. Remember the username and password you choose are the Admin login credentials, so keep the password secure and robust, anyways you can change it later if you want. Click on “install WordPress”.
- On the next screen, you’ll be asked to log in using the credentials you created in step 13, do it to make sure everything is working.
- That’s it, you are good to go!
-
Go to the URL “http://localhost/wordpress/index.php” and you’ll see a default homepage something similar to this

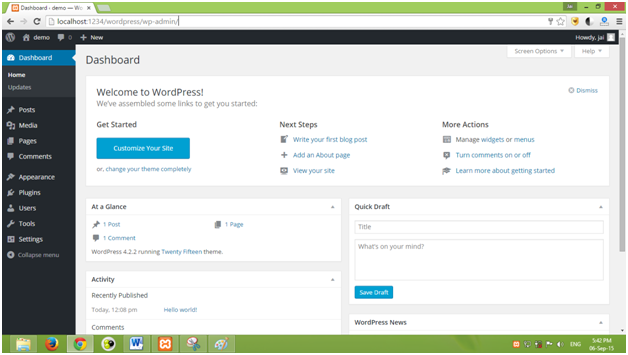
- Enter the URL “http://localhost/wordpress/wp-admin/” and you’ll see the admin dashboard similar to this, here you can customize your website, about which we will be learning in “How to make a website using WordPress (Part – 2)”.
Part 2: How to make a website using WordPress (Part – 2)
References :
- https://codex.wordpress.org/Installing_WordPress
- https://www.apachefriends.org/faq_windows.html
- http://stackoverflow.com/questions/11294812/how-to-change-xampp-apache-server-port
Like Article
Suggest improvement
Share your thoughts in the comments
Please Login to comment...