How to Install XGBoost in Pycharm?
Last Updated :
16 Jan, 2023
This article will teach you how to install xgboost in pycharm in simple steps with snapshots. There are tons of articles already on Google, but they didn’t explain each and every step clearly. After reading it, you’ll know how to install xgboost with a only couple of steps and you will also learn prerequisites to install xgboost which will make them work properly. First, whenever you will try to install xgboost in pycharm(from pycharm available packages) you will get an error, but don’t be afraid. Now follow these steps properly, definitely, you can install it successfully.

Steps to install XGBoost:
Step 1: Make sure that you have already installed python on your machine. If not then visit here and download the latest version of python first then follow step 2 or in case you have already installed python then once definitely check the version of it using the command prompt.
Download Python from the official site.
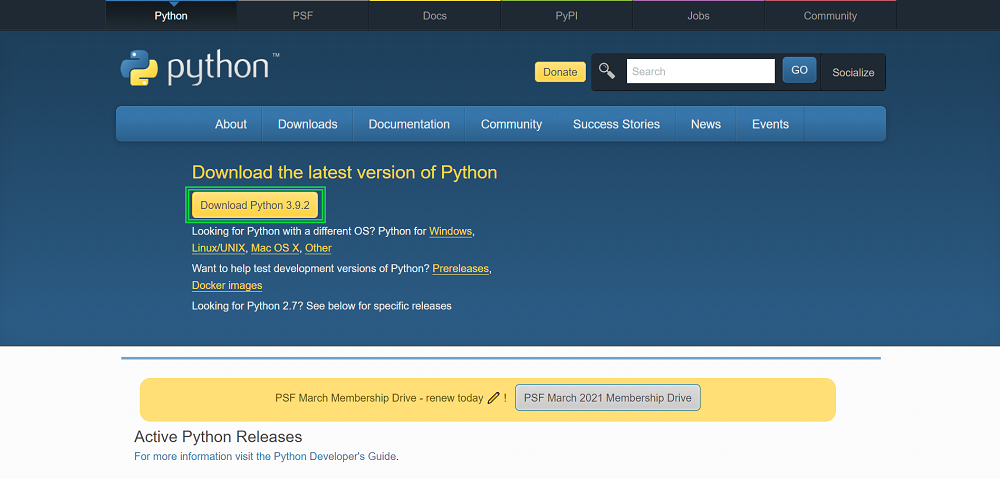
Downloading Python
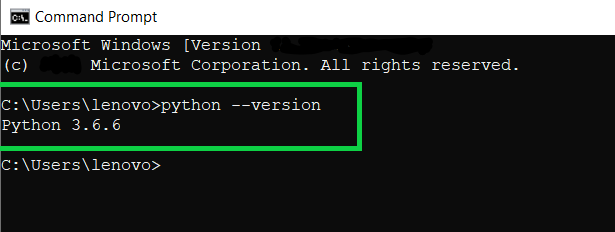
If already installed then check the python version using the command prompt.
Command : python --version

Step 2: Now install wheel package from pycharm packages store.

Step 3: Now download the external python extension package for xgboost from here but remember one thing that you must download the correct version of xgboost package. Python version and xgboost package version should be matched. Suppose you have installed python 3.8 version in your machine then xgboost package which has cp38 in its name and you must check your system config before installing it, if your machine has 64-bit config then go for “win_amd64.whl” file or if you are using 32-bit config then go for “win32.whl” file. It will be mentioned in xgboost package name so that you can easily download the correct version of xgboost for your system.
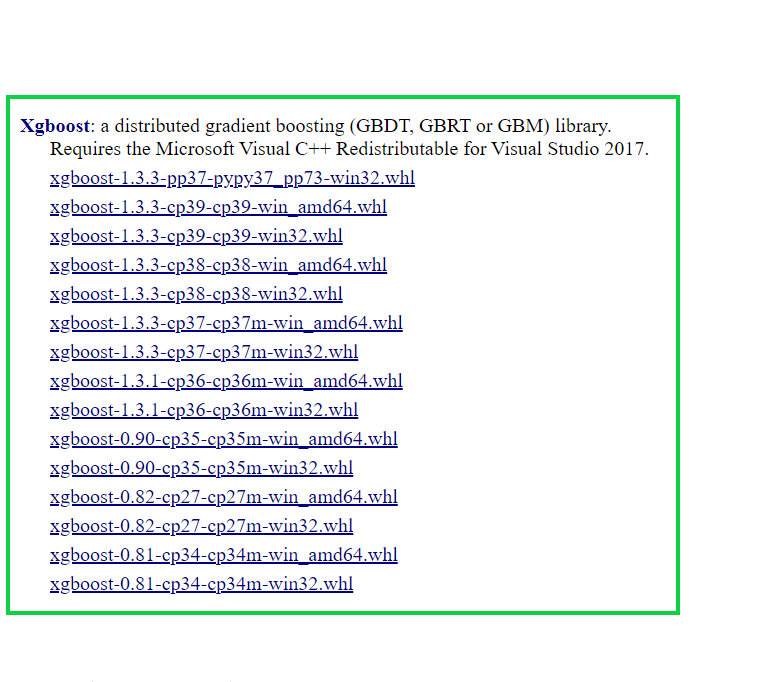
XGBoost Wheel File

Be careful while downloading xgboost wheel file. Suppose you are using Python version 3.6, and you are using the 32-bit system then your wheel file name will be the same as an above snapshot, the only difference will be that at the place of the python version there will be “cp36-cp36” and at the place of system config. There will be “win32”. If you are using a 64-bit system, and you have installed the python 3.8 version in your system then xgboost wheel file name will be the same as mentioned in the above snapshot. While you will be required wheel file for any purpose make sure you have checked these two things before downloading it. Suppose if you downloaded wheel file for the 32-bit version, and currently, you are using 64 bit then you will unable to install xgboost in your system.
Step 4: After downloading the correct version of xgboost create a folder on the desktop and paste the downloaded file in that folder.
Step 5: Before come to step 5 make sure you have followed the above steps till step 4. Now open your command prompt and go to our desktop location where we have stored our xgboost wheel file. Once you reached then write “pip install xgboost_wheel_filename” and click enter. After click on enter xgboost will start downloading and get downloaded shortly. Now, whenever you will visit pycharm packages you will notice that xgboost package will available there. Congratulation you have successfully installed xgboost in your system.
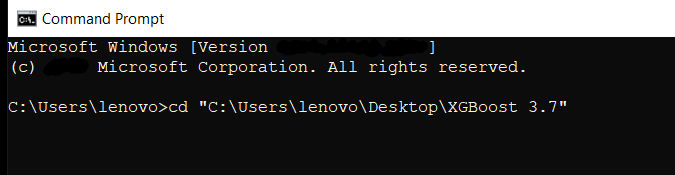
Step 5.1 – Move to Desktop folder where whl file is present.
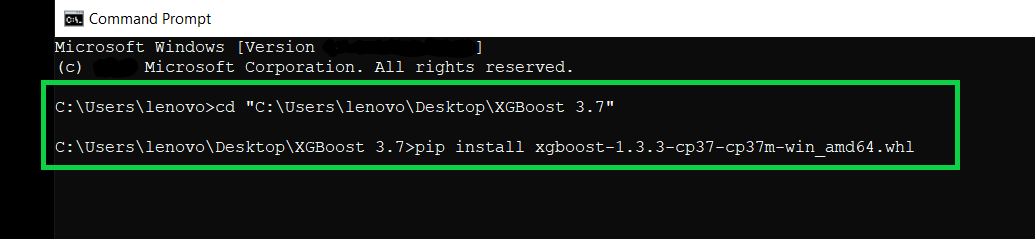
Step 5.2 – Now install xgboost whl file
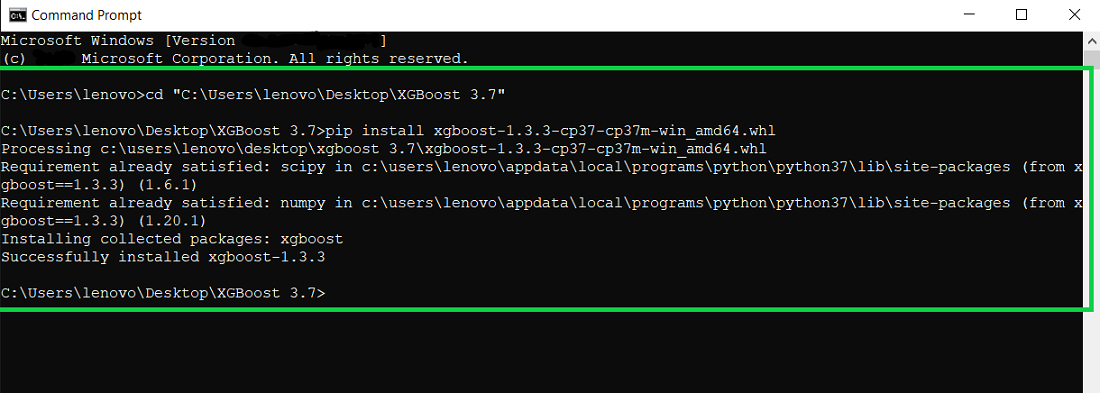
Step 5.3 – Successfully Downloaded
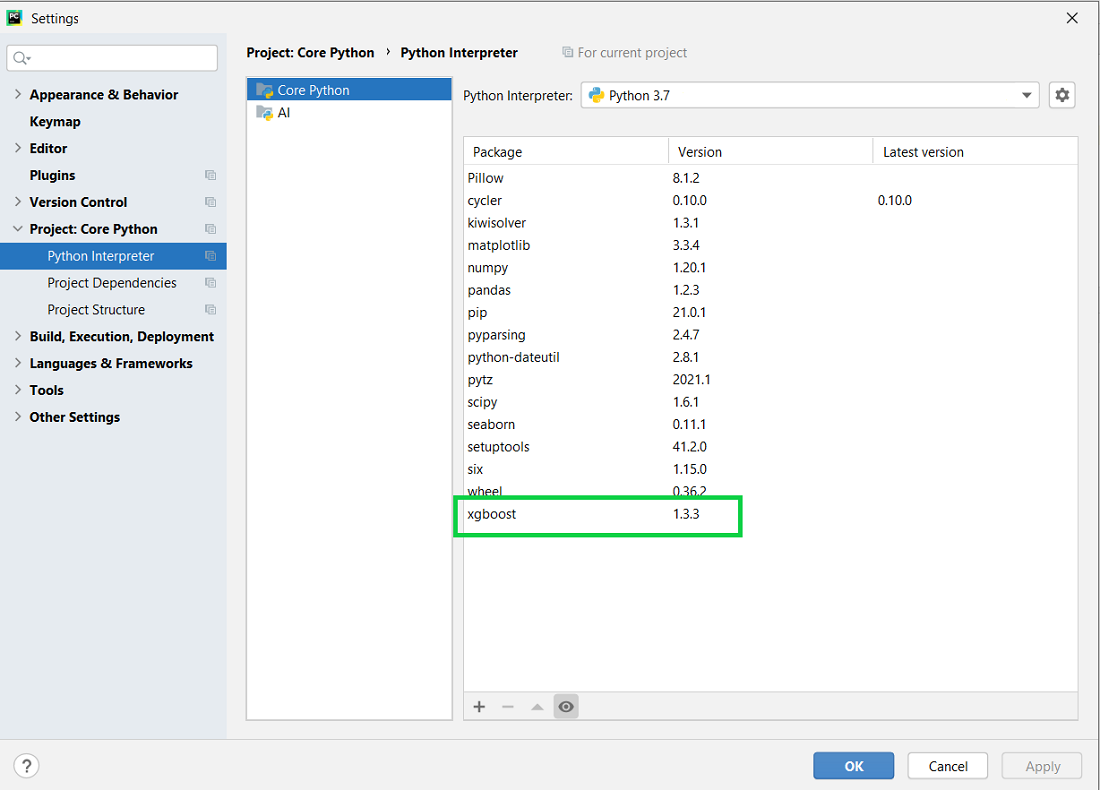
Step 5.4 – After successfully installation, xgboost will be automatically displayed in pycharm installed packages
Note: Suppose you have installed 4 to 5 versions of python in your system and you want to change default version of python in your system then follow the below steps. In the system that we currently using have installed 3.6, 3.7 ,3.8 and 3.9. Whenever i am checking python version in command prompt then it is showing me as 3.6 version. Suppose if you want to change it to 3.8 then follow below steps.
Before
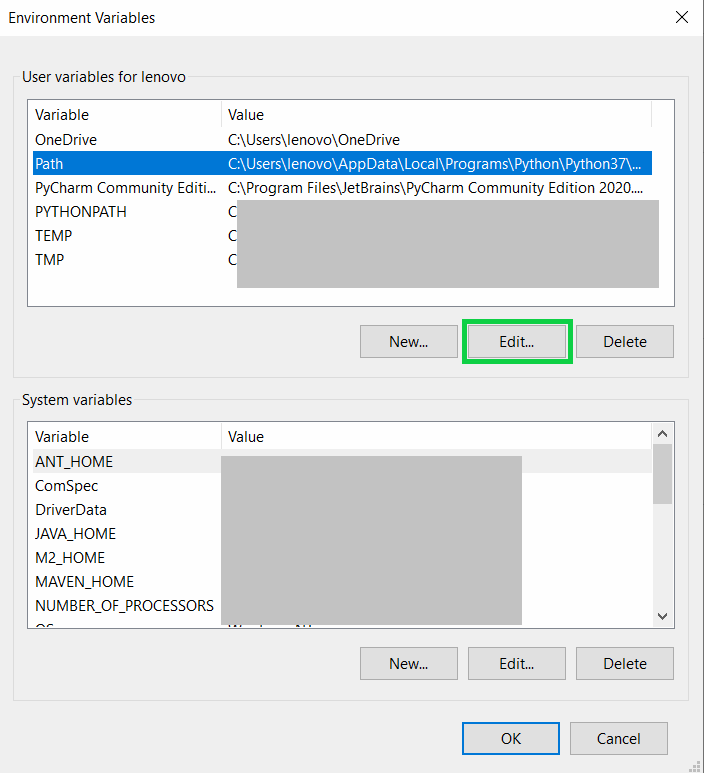
Step 1: Go to my pc, left-click and select properties and then open Advance System Setting.
Step 2: Now click on Environment Variables. Click on Path then click on Edit and then select the python version that we want to make default and move them up till the first position then save it.
Select path then click on Edit
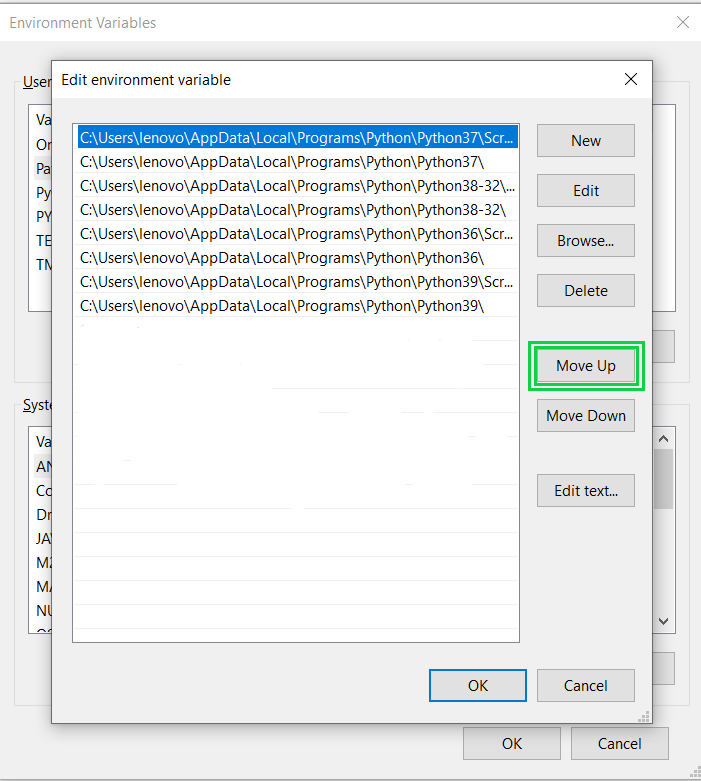
Select Python version that we want to make default and move it up.
Step 3. Now don’t forget to click on ok then open the command prompt and check the python version.
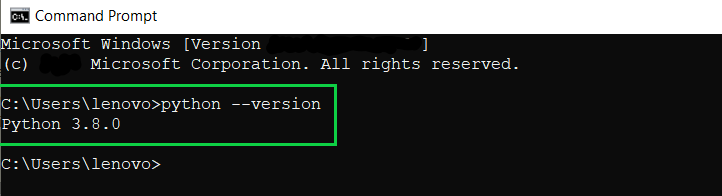
Successfully change default python version
You will be thinking that whenever it will help us or whenever we have to make such changes in the python version. Suppose you have created a separate virtual environment for your pycharm project in which you are using a specific python version that time you have first check which version is the default. You have to make that particular version a default version otherwise the file will get installed in that default python version.
Like Article
Suggest improvement
Share your thoughts in the comments
Please Login to comment...