How to Install Visual C++ on Windows?
Last Updated :
16 Oct, 2021
In this article, we will discuss the process of installing Visual C++ on Windows. Visual C++ is part of the general “C suite” of programming languages often used for many different types of development projects. The full name of the product is Microsoft Visual C++, which is sometimes abbreviated as MSVC or VC++.
Installing Visual C++ on Windows:
Follow the below steps to install visual C++ on Windows:
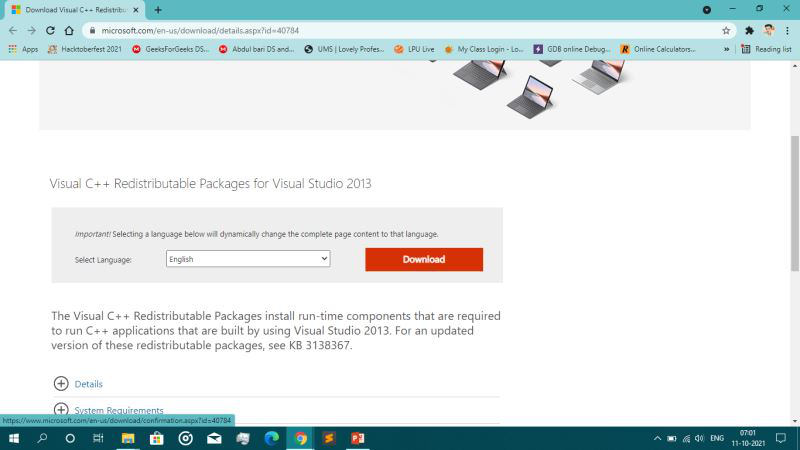
STEP 1: Click here to go to the download page of “Visual C++ Redistributable Packages for Visual Studio 2013”.

STEP 2: Click on the download button as shown in the screenshot below:
Step 3: In most cases, you should install both the x64 (64-bit) and the x86 (32-bit) versions. If you’re using a 32-bit version of Windows, then you only need to install the x86 version.

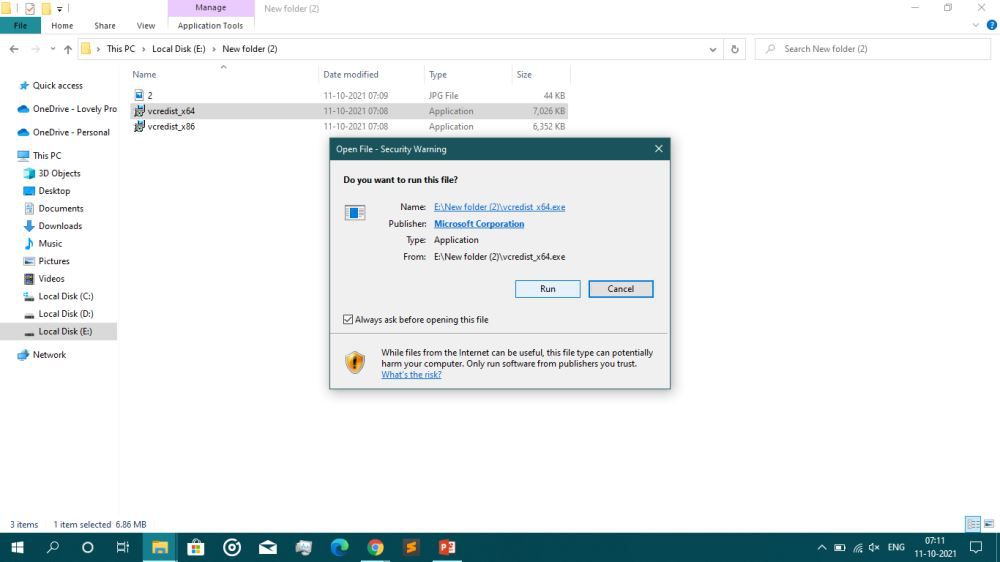
Step 4: Now go to your downloads folder and install the file :
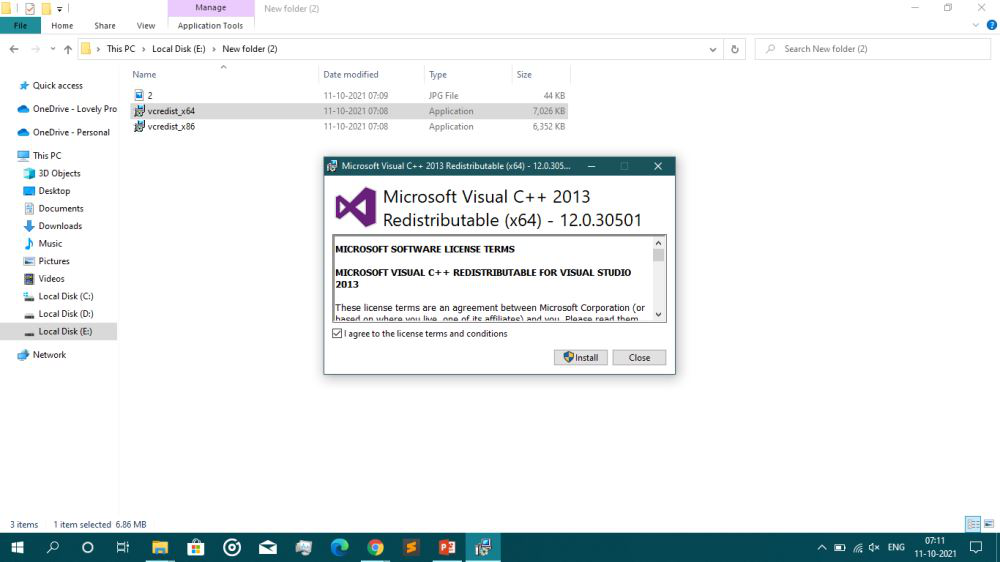
Step 5: Follow all the instructions and agree to the Licenses and conditions and hit the Install button. It will not take much time to install the software.
After the successful installation, you will get the below-shown page:
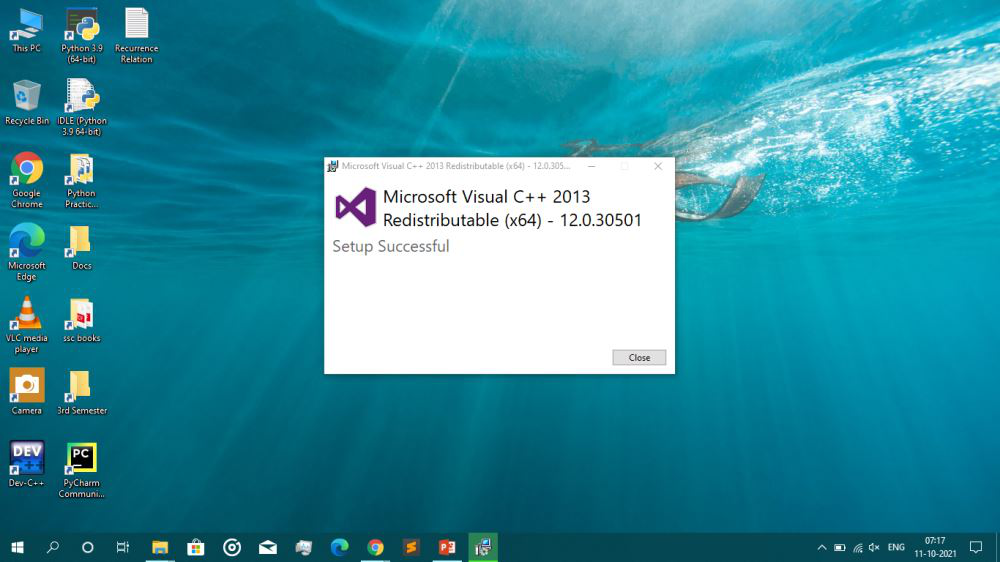
Finally, we have successfully installed Visual C++ on Windows.
Like Article
Suggest improvement
Share your thoughts in the comments
Please Login to comment...