How to Install Solidity in Windows?
Last Updated :
11 May, 2022
To install solidity on windows ensure that you are using windows 10, as only windows 10 provides built-in Linux Subsystem. With the help of this feature, we can run the Ubuntu terminal on the Windows machine. Below are the steps to setup Solidity on windows:
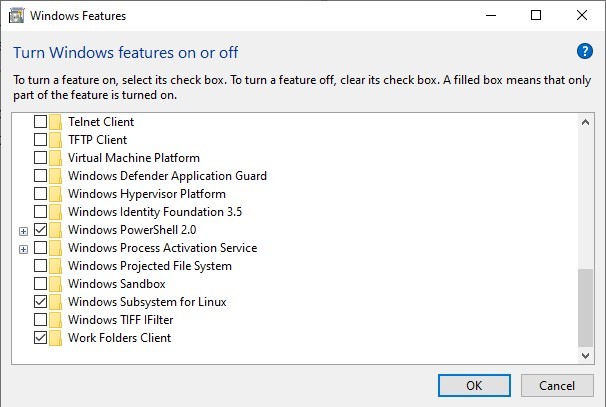
Step 1: Open control panel on your system and toggle to Windows Subsystem for Linux under Control Panel>Programs>Programs and Features>Turn Windows features on or off.
Step 2: After your system restarts install “Ubuntu LTS 18.04” from Microsoft store and after installation set it up.
Step 3: After setting up Bash install and check necessary dependencies like cURL, Node version manager(NVM), NodeJS and Node Packet Manager(NPM) using the following commands:
- Installing cURL :
sudo apt-get install curl
curl --version

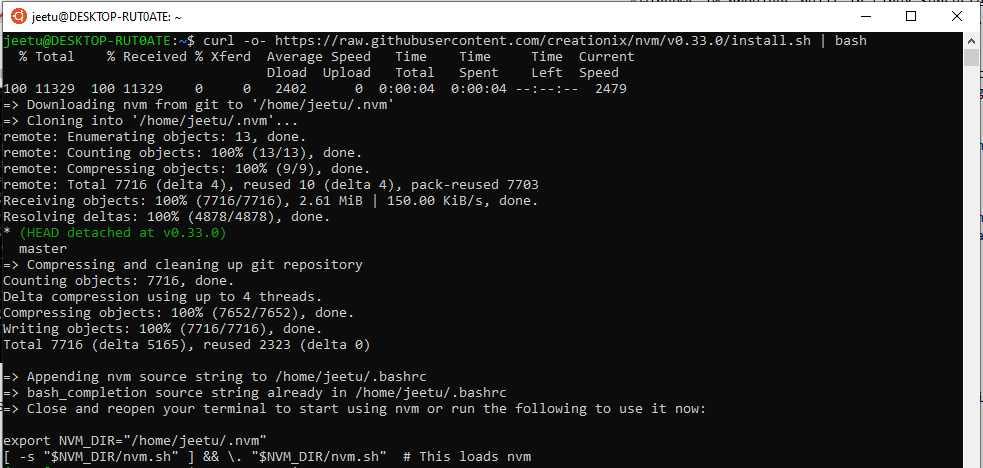
- Installing NVM:
curl -o-https://raw.githubusercontent.com/creationix/nvm/v0.33.0/install.sh | bash
nvm --version
- Installing NodeJS and NPM:
nvm install node
node --version
npm --version

- After installing the dependencies, install and check solidity compiler solc by using following code:
npm install -g solc
solcjs --version

Like Article
Suggest improvement
Share your thoughts in the comments
Please Login to comment...