How to Install PyGTK in Python on Windows?
Last Updated :
29 Oct, 2021
PyGTK is a Python package or module that enables developers to work with GTK+ GUI Toolkit. This is how WikiBooks describes GTK+:
“GTK+ is a highly usable, feature rich toolkit for creating graphical user interfaces which boasts cross platform compatibility and an easy to use API.”
And this is how gtk.org the official website of GTK markets it:
Offering a complete set of UI elements, GTK is suitable for projects ranging from small one-off tools to complete application suites.
Although Python comes with a built-in module called Tkinter which is used to make simple GUI applications. But many developers are unsatisfied by the appearance of the application made by it and it is not even feature-rich so as to help in making elaborate software. Therefore GTK+ in association with Python is considered to be a great alternative to Tkinter. Although GTK library supports many programming languages such as C, JavaScript, Perl, Rust and Vala. But it is most widely used in association with Python which employs a language wrapper to fully utilize the capabilities of the official GNOME binding to produce the most stable applications.
GTK library comes jam-packed with features that enable developers to do whatever they want. Here are some of the main selling points of GTK.
- Portability
- Stability
- Language Binging
- Interfaces
- OpenSource
- API
- Accommodation
- Foundations
Listing some of the famous applications which are made by this GTK are as follows:
- GIMP
- Transmission
- Evolution
- Polati
- Games of all sorts
- Etc.
Below we will go through all the steps to install PyGTK in the windows operating system in detail.
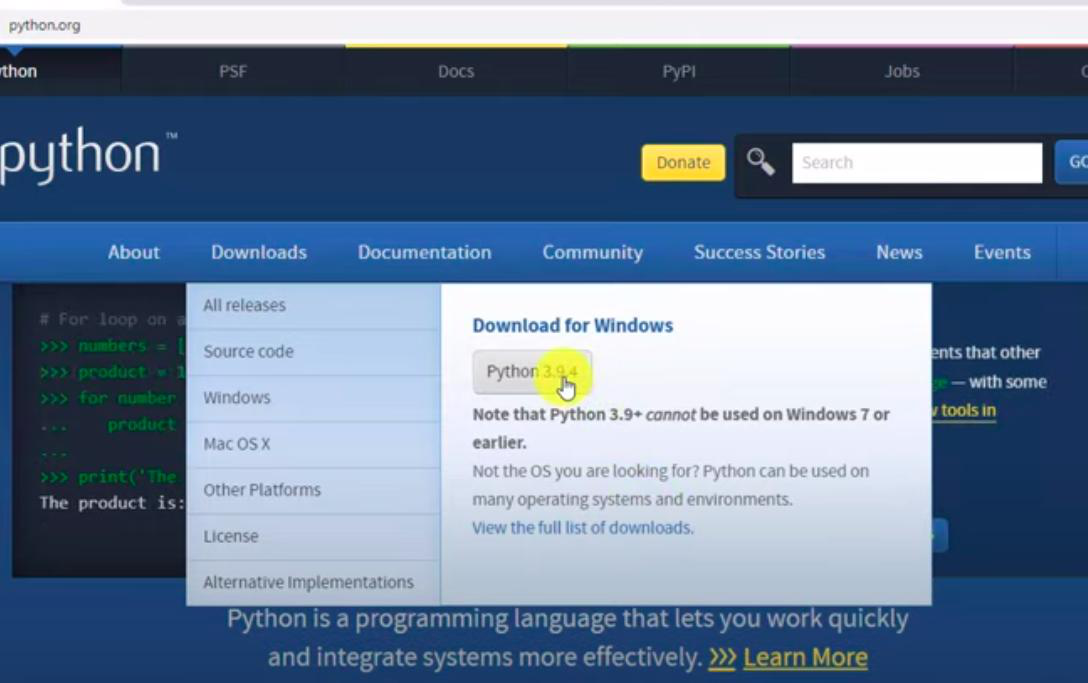
Prerequisite: Install Python interpreter.
If you don’t already have Python installed on your Windows system then follow this tutorial.
Step 1: Install MSYS2
The first step in order to install PyGTK in our system is to install MSYS2. MSYS2 is a set of libraries that makes it easy to install and work with native programs in Windows. To put it simply it is a command-line tool similar to what we get in Linux-based operating systems. This command-line tool is called Minty. It uses bash and is somewhat similar to Git version control system. Developers who have used Linux-based operating systems for development would very well understand the powers that this feature-packed toll brings to developers. It comes with a package manager of its own called Pacman. Some of its simple use cases are the complete upgrades of systems and packages.
To install this application we first need to visit the msys2.org . There on the home page itself, there is an installation guide and in the first step, one can find the button to download the 64-bit executable file of MSYS2.
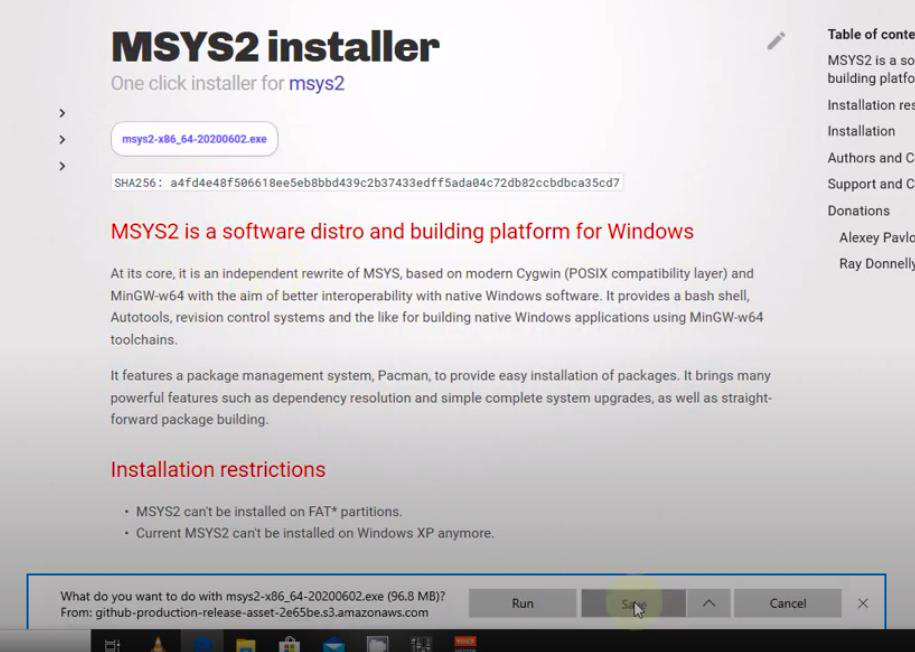
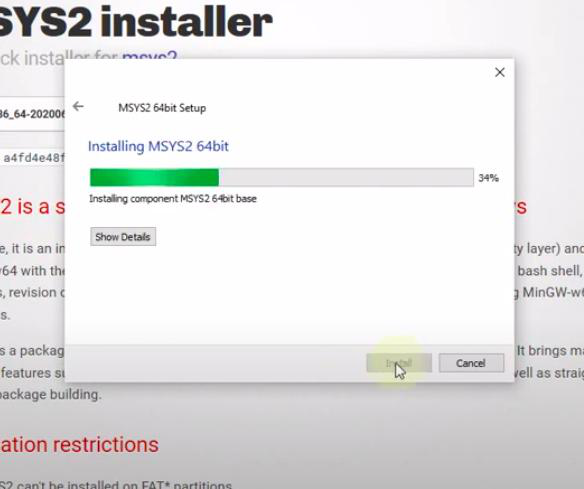
After the download is complete the installer will be launched on double-click. There is nothing much to the installation process, only the destination folder is to be selected. But it is recommended you leave it as it is.
And when the installation process is finished remember to check the run option at the last window and click finish button.
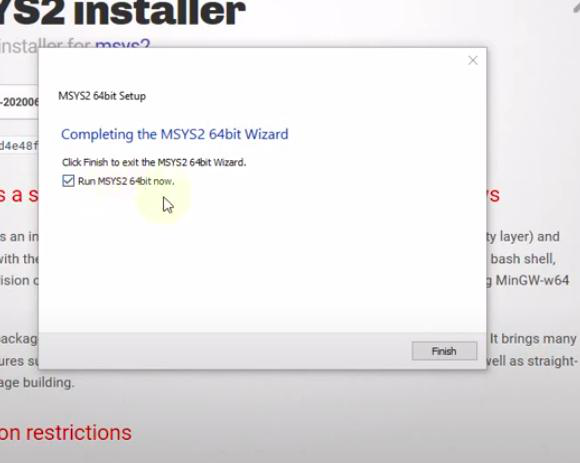
Now we must be having a terminal window open after clicking on the finish button. This means the installation process was completed successfully.
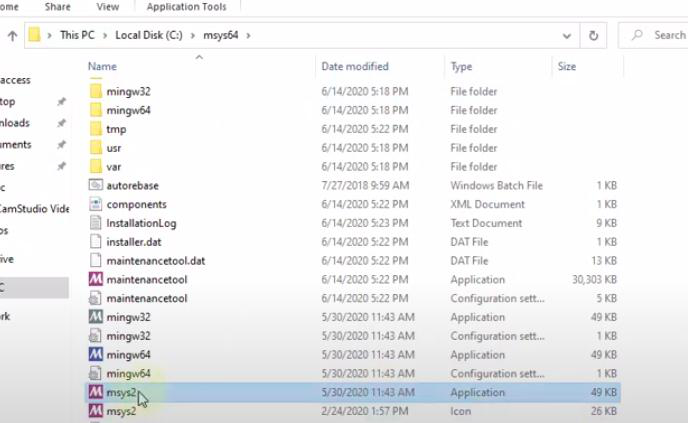
You can also add the installation location of the MSYS2 in the Environment Variables so as to access it from anywhere in your system.
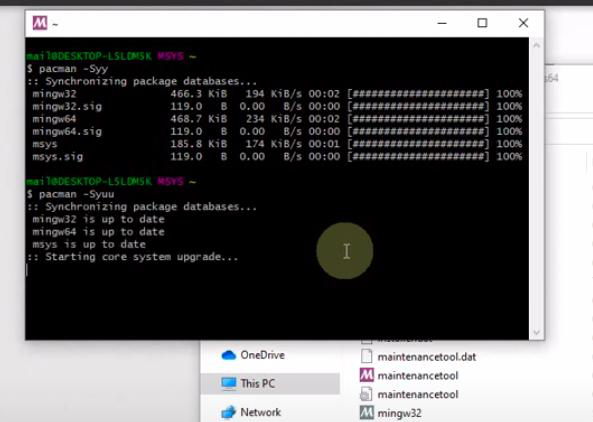
Step 2: Update System
Now what needs to be done is to issue two commands which will upgrade our system and all the existing packages to prevent a breakdown in the future. The first thing to do is to visit the installation location of MSYS2 in the C drive and open the mys2 application.
So the first command to be issued in the command line tool is as follows:
pacman -Syy
The above command will not take more than a minute to complete on a decent internet speed. And the second command is as follows:
pacman -Syuu
The above command will ask for confirmation, which can be given by pressing the y key.
Step 3: install GTK3
Now that the system is up to date we can proceed with the install of the GTK3 library. And for that, we need to run a command in the same terminal window as in the previous step.
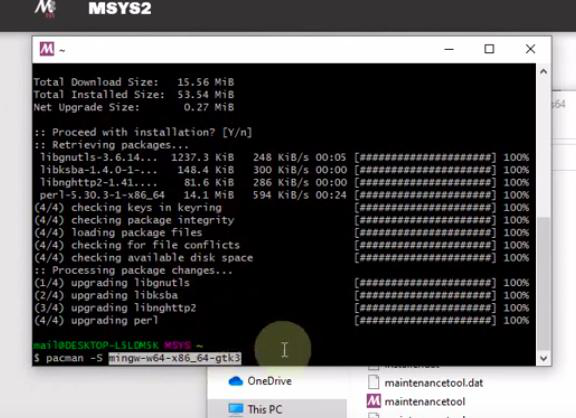
pacman -S mingw-w64-x86_64-gtk3
Once this command is completely executed it will signify that all the main stuff for our endeavour is ready. Now only a few tweaks are needed which will be done in the coming steps.
Step 4: Install Glad
Glad is a tool which whose main function is to act as the GUI designer for GTK3. To install this tool we need to run the below command:
pacman -S mingw-w64-x86_64-glade
Step 5: Install Python Binding
Since our main motive is to work with GTK3 along with Python we also need to download one last tool or library that will bridge the gap between the Python script and GTK3 commands. The tool that is needed here is Python binding. Depending on whether you have python 2 or python 3 installed on your system you can run the suitable command.
Python 3:
pacman -S mingw-w64-x86_64-python3-gobject
Python 2:
pacman -S mingw-w64-x86_64-python2-gobject
So this completed all the steps that are there for the installation of PyGTK in a Windows system.
Like Article
Suggest improvement
Share your thoughts in the comments
Please Login to comment...