How to Install PSAD on Ubuntu Linux?
Last Updated :
07 Jun, 2022
PSAD(Port Scan Attack Detection) is used to block post scanning on the server. psad tool keeps on monitoring firewall(iptables)logs to determine port scan or any other attack occurred. If some successful attack on the server happens psad also takes action to detect the threat. This is a collection of lightweight system daemons that run on a Linux system.
Features:
- This supports both ipv4 and ipv6 logs generated by iptables
- Free and distributed under the GNU General Public License
- Email notifications with TCP, UDP, ICMP scan characteristic, reverse DNS
- Autoblock suspicious IP addresses via iptables and TCP wrappers based on scan level
Before installing, update, and upgrade the system.
The command for update:
sudo apt update
The Command for upgrade:
sudo apt upgrade
Installing PSAD:
sudo apt install psad
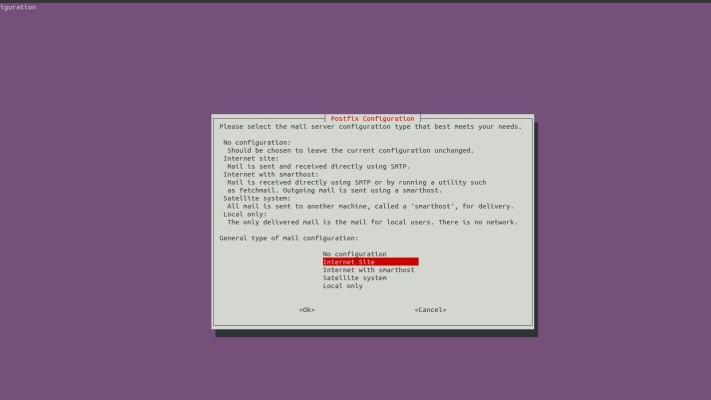
Psad requires many dependencies that are installed automatically from the Ubuntu repository. So during the installation, we will get a pop-up like in the below image it is a psad prompt for mail server configuration.
Configuration:
PSAD uses firewall (iptables) logs to detect any malicious activity in the machine. So to enable logging of packets on input & forward chains of iptables. commands are given below
sudo iptables -A INPUT -j LOG
sudo iptables -A FORWARD -j LOG
Hereafter executing the above two commands you will not get any output. Like in the below image

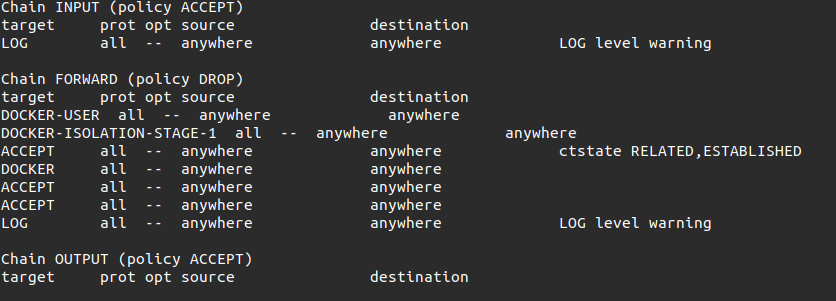
After enabling the logs using the above commands run the following command to list the current configuration of iptables:
sudo iptables -L
After executing the above command you will get the output as in the below Screenshot:
Configuring PSAD:
By default, Psad stores their configuration files, snort rules & signatures are under /etc/psad directory. Let us start by editing the main psad configuration /etc/psad/psad.conf, this has many parameters to change while deploying to the production server. So let’s not dive so deep into the concept here we will change few things in PSAD so that it detects iptables logs and takes necessary action to detect the attack.
nano /etc/psad/psad.conf
After executing the above command you will get the output as in the below Screenshot:
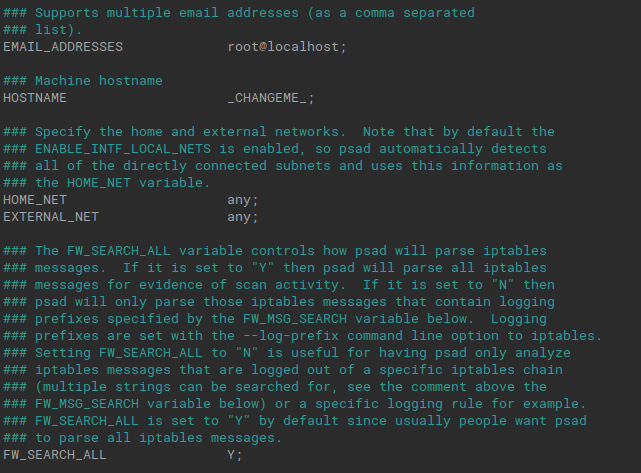
So Change the file as given below:
EMAIL_ADDRESSES   root@localhost; ##change it your email id to get psad alerts

HOSTNAME          test-machine; # your host machine name

HOME_NET          192.168.154.0/24; # Set LAN network

EXTERNAL_NET      any; # Set Wan network

ENABLE_SYSLOG_FILE      Y; #by default set yes
One of the main configurations of PSAD is setting the IPT_SYSLOG_FILE parameter. by default it searches for logs in /var/log/messages, but in ubuntu, it is in /var/log/syslog so we have to change the path so that PSAD detects malicious activity.
IPT_SYSLOG_FILE /var/log/syslog; #change it from /message to /syslog
Here we will be using PSAD as IDS/IPS, so enable it. This will automatically change the iptables rules to block scan from the attacker.
ENABLE_AUTO_IDS Y; # disable by default
So after doing the changes in your psad.conf which I have in the above lines(like changing: email address, hostname,home_net, External_net, IPT_SYSLOG_FILE, ENABLE_AUTO_IDS) just save your file and exit it.
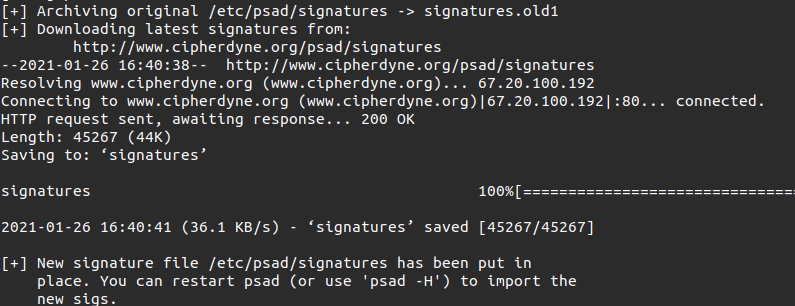
So now the basic configuration psad file is completed. Now we can update the signatures so that it can correctly recognize known attack types.
sudo psad --sig-update
After executing the command you will get a result like in the below screenshot:
So now to start the PSAD use the following command:
Command: /etc/init.d/psad start
This will start the PSAD tool As you see in the below screenshot

We can stop the psad tool by just replacing the start with a stop in the above command.
Like Article
Suggest improvement
Share your thoughts in the comments
Please Login to comment...