How to Install PowerShell in Linux?
Last Updated :
06 Oct, 2021
PowerShell is well-known among Windows administrators. It is a.NET-based task-based command-line shell and scripting language. You can quickly automate tasks for operating system maintenance and much more with PowerShell. PowerShell was once only available for Microsoft Windows. This admin tool, on the other hand, can now be installed and used on Linux.
Installing PowerShell using Snap packages
1. The least complex approach to install PowerShell using snap is as per the following :
sudo snap install powershell --classic

Installing PowerShell using snap
2. Now you can simply launch PowerShell by using a simple command :
pwsh
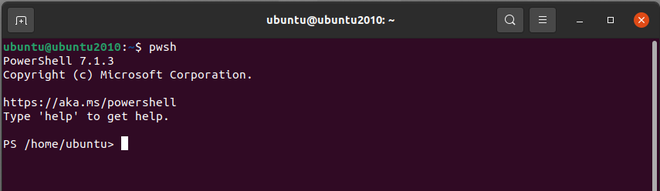
Opening PowerShell
Installing PowerShell using a package repository
Installing PowerShell from a package repository is the preferred approach in Linux.
1. First update list of system packages using below command :
sudo apt-get update
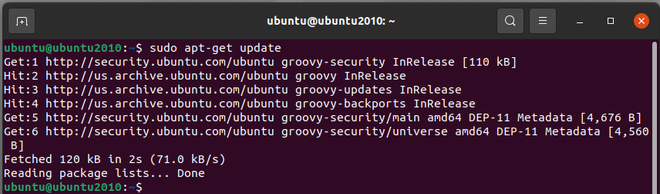
Update system source
2. Install pre-requisite packages using the below command :
sudo apt-get install -y wget apt-transport-https software-properties-common
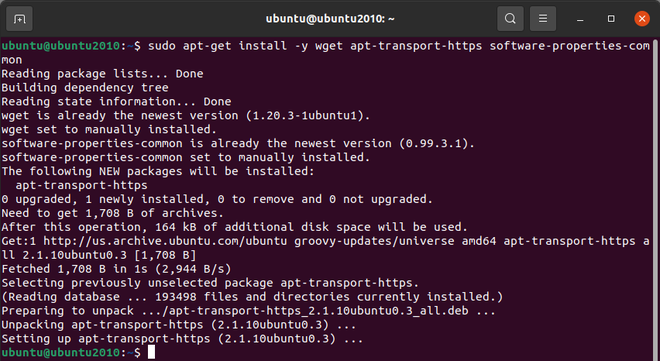
Installing pre-requisite packages
3. Now download the Microsoft repository GPG keys :
wget -q https://packages.microsoft.com/config/ubuntu/20.04/packages-microsoft-prod.deb

Downloading Microsoft GPG key
4. Then register the Microsoft repository GPG keys :
sudo dpkg -i packages-microsoft-prod.deb

Registering GPG key
5. Then update the system source :
sudo apt-get update
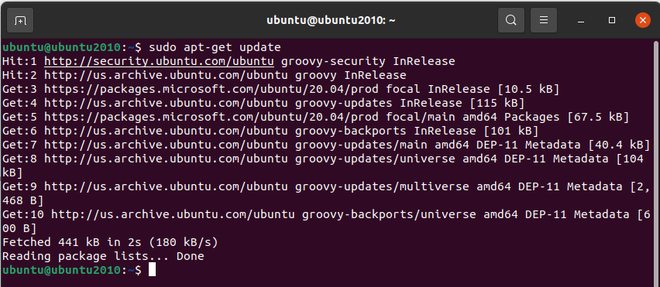
Updating system source
6. Enabling the universe repositories :
sudo add-apt-repository universe
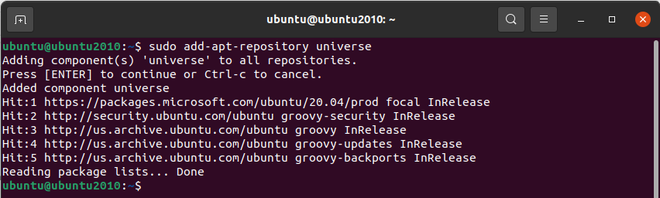
Enable universe repositories
7. Now we can finally install PowerShell using the below command :
sudo apt-get install -y powershell
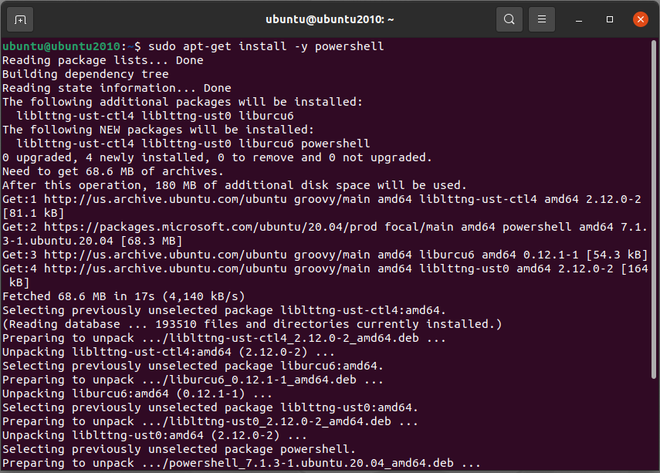
Installing PowerShell
8. Now we can start PowerShell by simply typing the below command :
$ pwsh
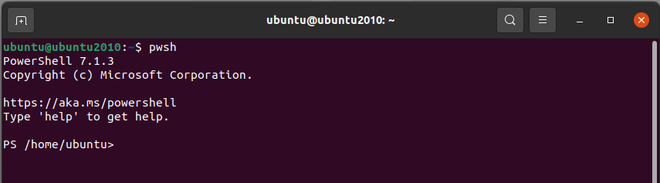
Starting PowerShell
Like Article
Suggest improvement
Share your thoughts in the comments
Please Login to comment...