How to install Peppermint OS in Virtual Box
Last Updated :
14 Sep, 2021
Peppermint Operating System is a Linux OS based on Lubuntu. It is a derivative of the Ubuntu Linux operating system which uses the LXDE desktop environment. Its aim is to give a familiar environment for Linux beginners, which requires relatively low hardware resources to run.
Features:
- It is based on the new Ubuntu 18.04 LTS.
- Uses Xfwm4 window manager and Xfce bottom panel in LXDE desktop environment.
- Extremely lightweight and is a stable operating system.
Requirements:
- At least 512 MB of RAM.
- Processor: Intel x86 architecture.
- Minimum 3.8 GB of available disk space.
- VirtualBox which can be downloaded from here.
- Peppermint OS file which can be downloaded from here.
Why Peppermint OS?
Peppermint OS bring forth a hybrid desktop environment of Xfce and LXDE. It’s a Linux distro that demands fewer hardware requirements, thus it is an excellent choice for the older machine. It is unique because of its Ice application which makes and manage web-based desktop application efficiently. It is a minimalistic masterpiece with the smallest footprint and economical use of resources which is ideal for machines with older hardware
Installation
Creating a new virtual machine:
Step 1: Open your Virtual Box and hit on the new button, to create a new virtual machine for your Peppermint OS.
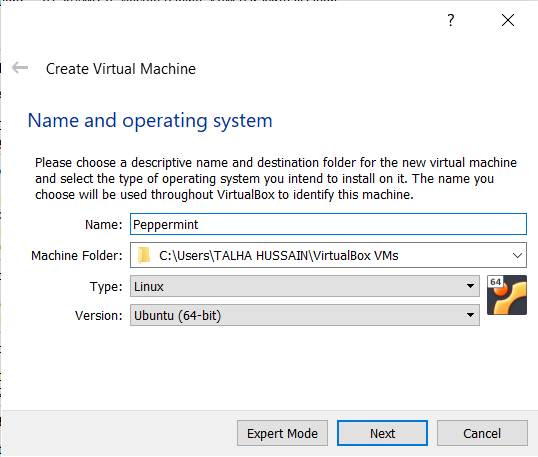
Name and operating system:
Step 2: Enter the name which you prefer for your virtual machine, select version to Ubuntu-based 64bit Linux architecture, and specify the path for your machine.
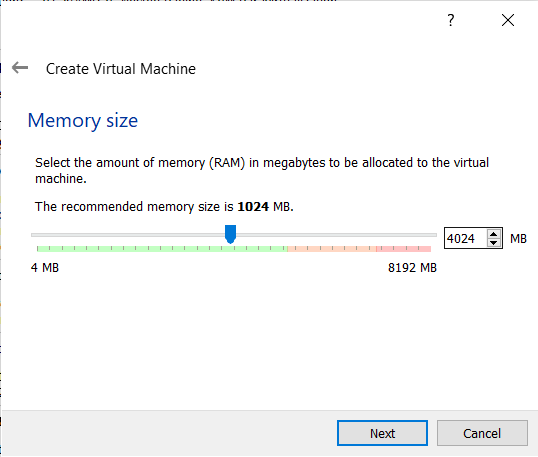
Memory size:
Step 3: Allocate the size of RAM you want to allocate to the Virtual Machine of Peppermint OS, It is generally recommended to allocate at least 1028MB.
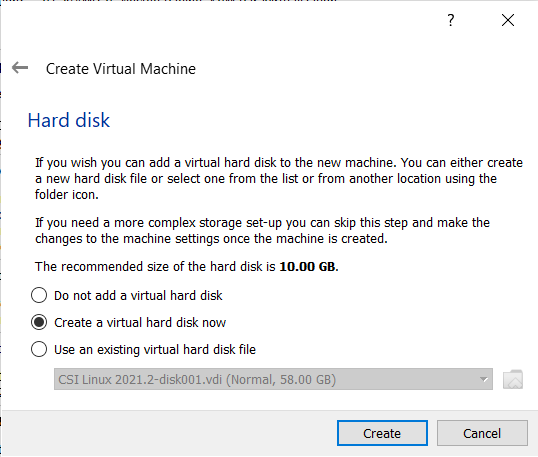
Hard Disk:
Step 4: Check the option to create a virtual hard disk now, click on the create button. It will add a virtual hard disk to your new machine. It is recommended to give at least 5-10GB.
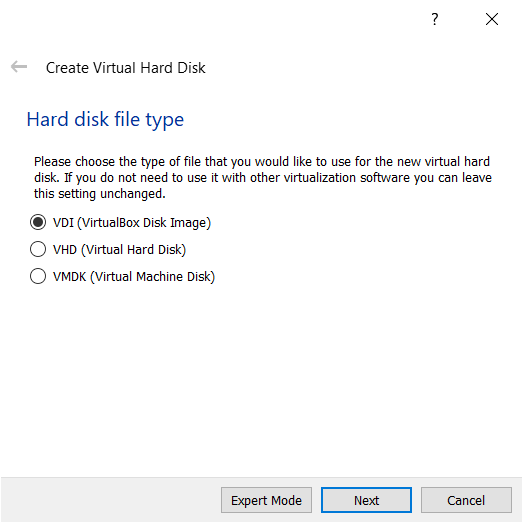
Hard disk file type:
Step 5: Select the Hard Disk File type for VDI.
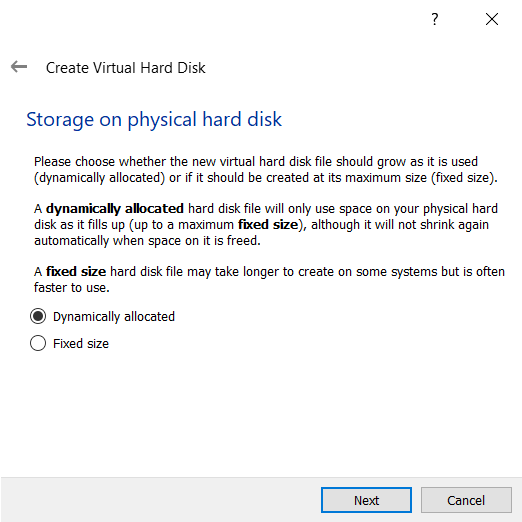
Storage on physical hard disk:
Step 6: Select the storage type on Physical Hard Disk Storage to dynamically allocated as it uses the amount of data that one has on disk while fixed disks use the complete space that one has specified.
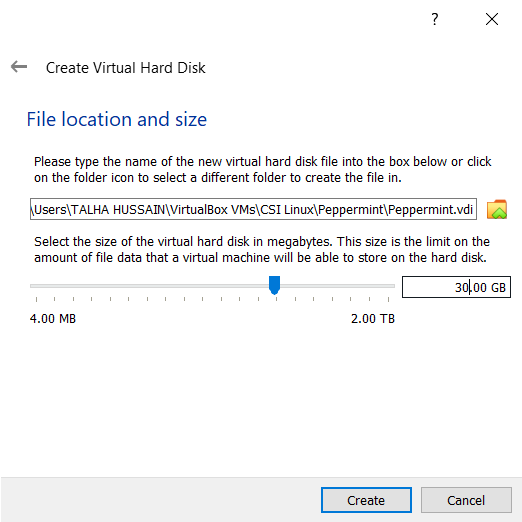
Allocating size and location:
Step 7: Now, in this final step of creating your virtual machine, you need to select the size of your virtual hard disk, minimum should be 10GB, and also the location where you want to save your machine and its files.
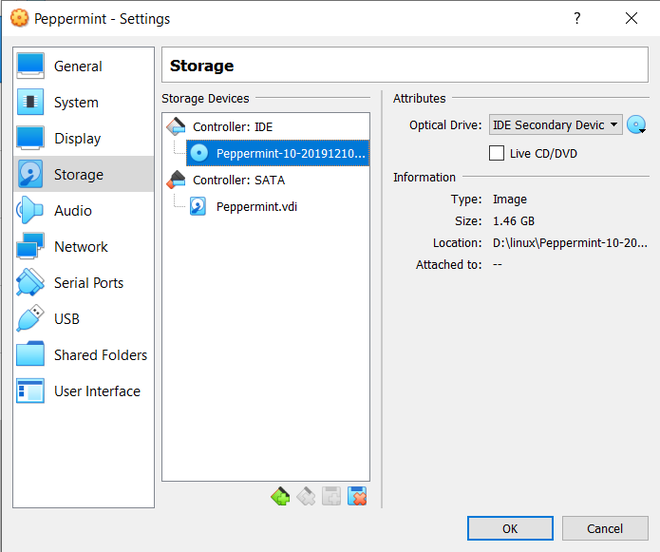
Adding Peppermint OS to the machine:
Step 8: Click on the settings icon after selecting peppermint machine and select your downloaded peppermint ISO file and then click on the start button.
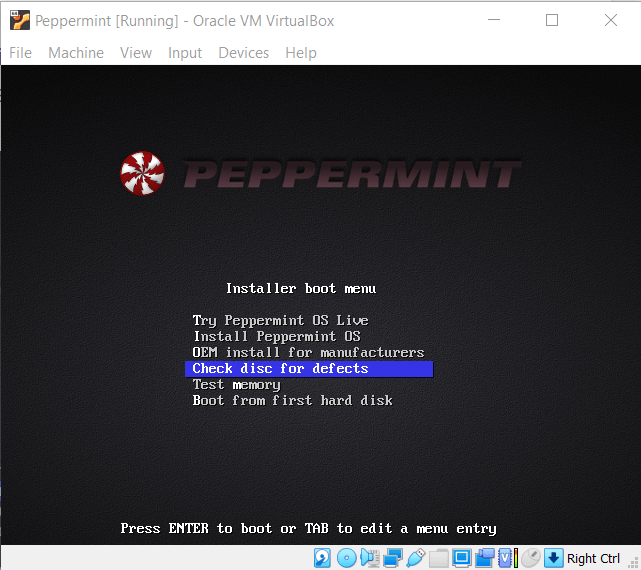
Installation menu:
Step 9: Next, you will see the installation menu with various options, select the second option which is “Install Peppermint OS” and hit enter.
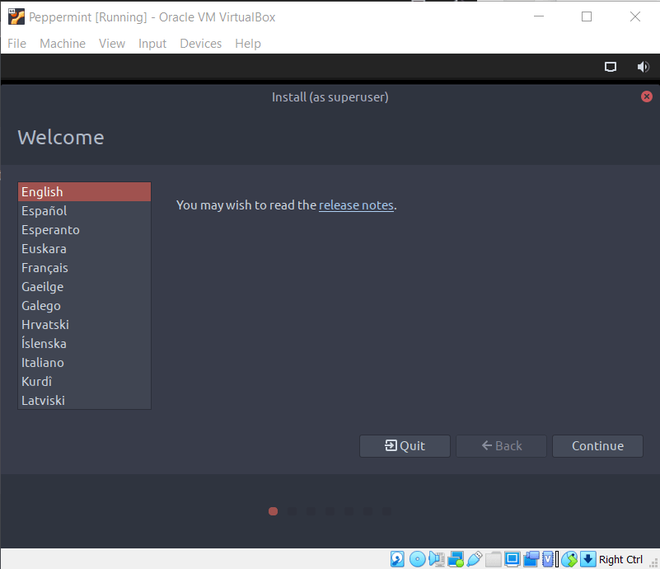
Language:
Step 10: After the installation process has started, it will take you to the screen to select your preferred language of installation setup.
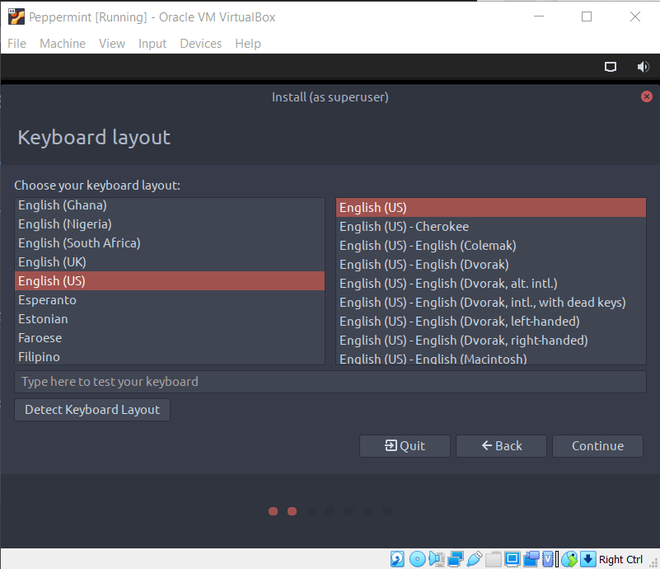
Keyboard Layout:
Step 11: Next is to select your desired keyboard layout.
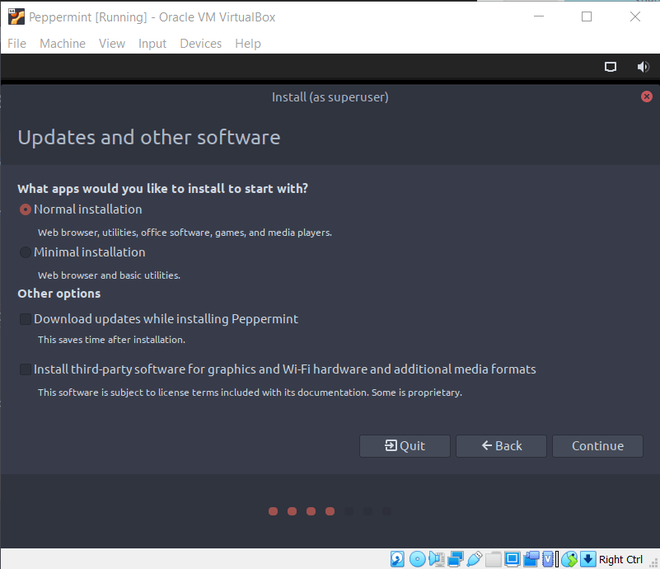
Download updates:
Step 12: If you want to download updates while installing peppermint, then check its box otherwise hit continue but downloading updates while installing Peppermint will slow down the installation process.
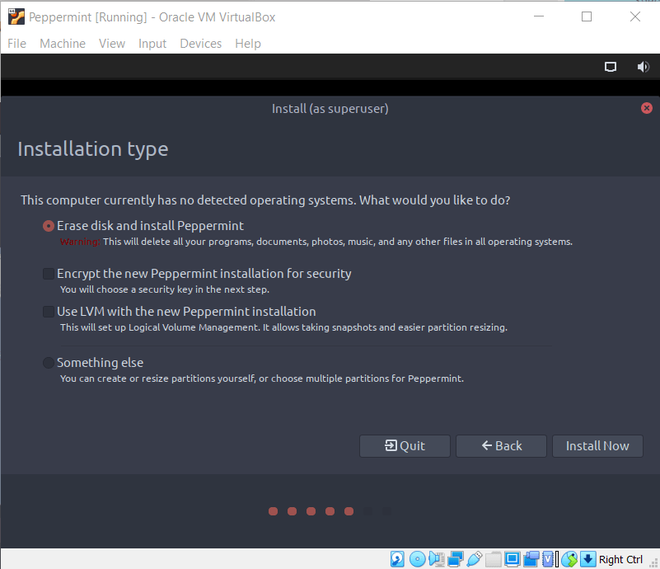
Installation type:
Step 13: Since we are installing Peppermint OS on VirtualBox so select the option- Erase disk and install Peppermint OS and hit on install now.
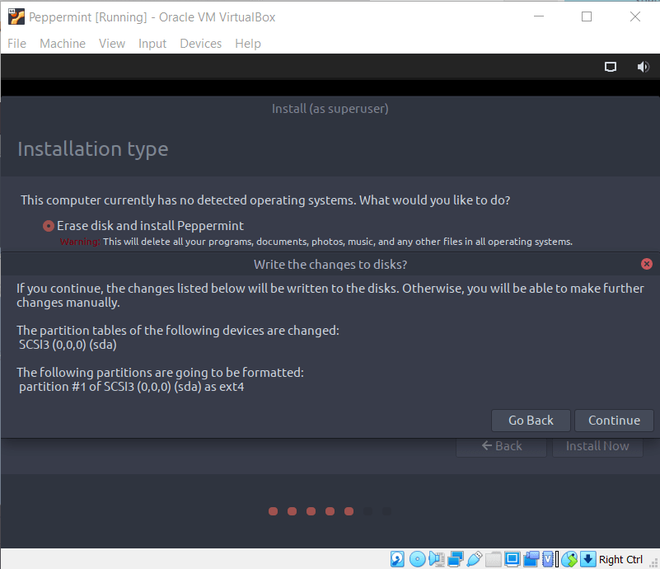
Step 14: Click on continue.
Location:
Step 15: Select your location and press continue. If you are connected to the internet, then it will automatically set your location.

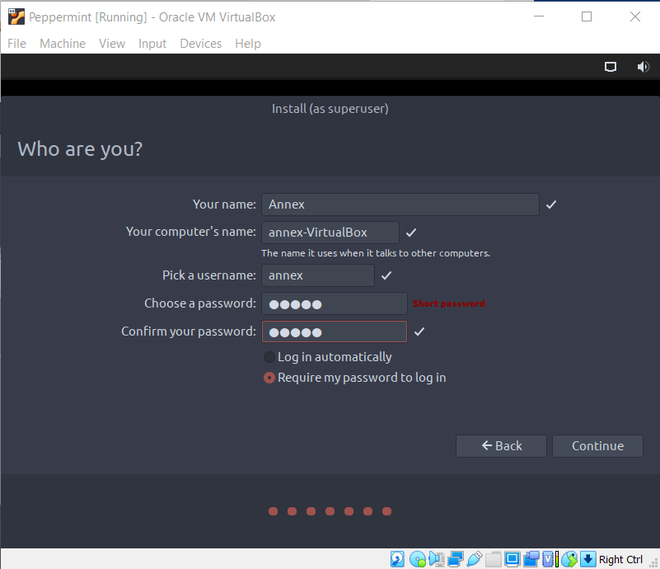
Setting up an account:
Step 16: Now we need to set our account like its username, password, etc. Type your name and computer’s name. Pick any username you want and enter a strong password which will be required whenever you or anybody else tries to access peppermint. Then click on continue.
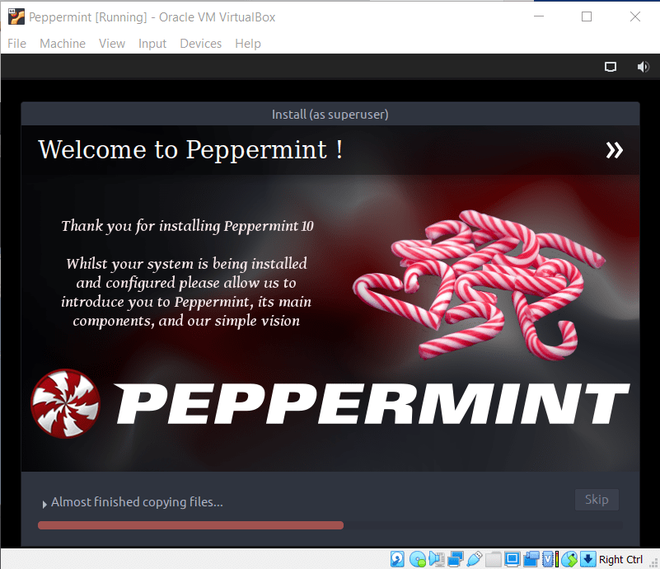
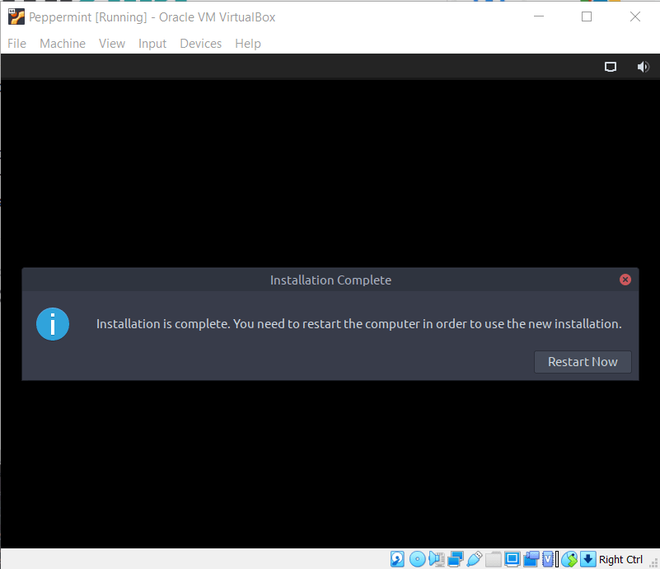
Installing Peppermint OS:
Step 17: Wait for the installation process to complete, it will take 5-10 minutes to successfully install the peppermint.
Step 18: After installation, you will be asked to restart. Now click on the restart to restart your Peppermint OS.
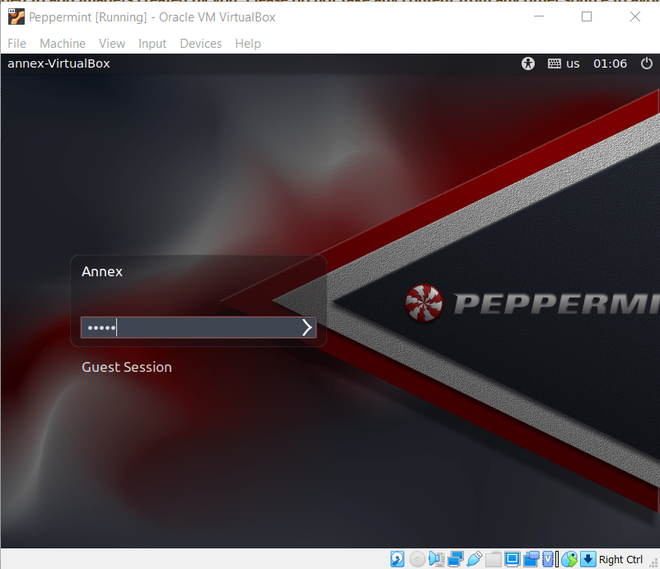
Logging-in:
Step 19: Enter your credentials to log in.
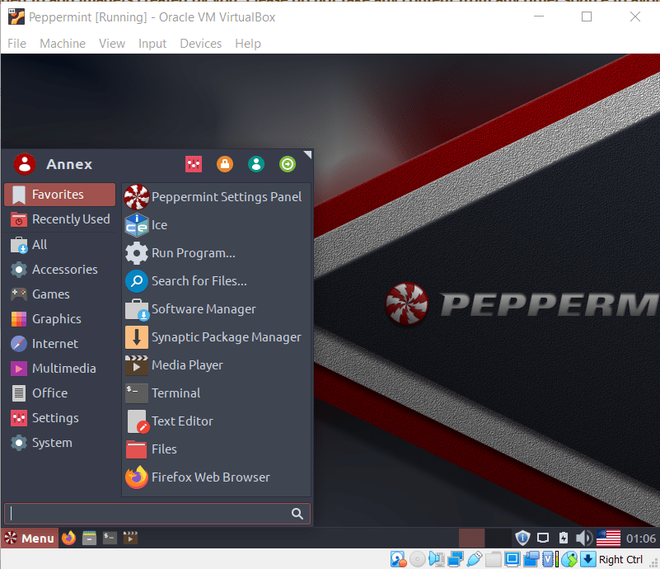
Peppermint OS is successfully installed, now let’s explore a few things.
Let’s run a few basic commands.
whoami
ls
cd Desktop
cd /
ping geeksforgeeks.org

Now you can go ahead and explore what Peppermint OS has to offer.
Like Article
Suggest improvement
Share your thoughts in the comments
Please Login to comment...