Parrot OS :
Parrot is similar to Kali Linux, which means it is also used for security purposes and ethical hacking. Similar to Kali, it is also a Linux-based distribution. Now the question arises, which one is better, Kali or Parrot. Both the OS supports 32-bit and 64-bit architecture, supports cloud VPS, support for embedded and IoT devices, and comes pre-installed with an arsenal of hacking tools. So, according to the software perspective, both are roughly different.
When it comes to the hardware, they slightly differ:
| Parrot OS |
Kali |
|
No Graphical Acceleration Required
|
Graphical Acceleration Required
|
|
320MB RAM
|
1GB RAM
|
|
1GHZ dual-core CPU
|
1GHZ dual-core CPU
|
|
Can boot in legacy and UEFI
|
Can boot in legacy and UEFI
|
|
16GB of hard disk space
|
20GB of hard disk space
|
So we can clearly see that on hardware Parrot OS fairly wins because it requires less RAM to work due to its lightweight nature and its installation is pretty easy as well. So, anyone can install Parrot OS, either a beginner or a security professional.
We can also use Parrot OS in dual boot as well, but for a beginner, it is better to install it in VirtualBox so that first they learn how to use Linux commands, learn to use its security tools, and much more. The advantage of using VirtualBox is that if somehow the operating system gets corrupted or crashed, then it won’t harm your base operating system since it is installed in a virtual environment and we can remove it whenever we want.
Prerequisites for Parrot OS :
- At least should have 16GB of free disk space on another OS.
- Parrot OS ISO File that can be downloaded from here
- Install Virtual Box on Windows. Refer to the article – Installing Virtual Box
- Minimum of 5-10 GB free space in your hard disk
- A minimum of 4GB of RAM is recommended, but better to have 8GB for smooth working.
Who Parrot is made for :
- Security Experts
- Digital forensics experts
- Computer Science/Engineering Students
- Researchers
- Wannabe Hackers
- Software developers
- Journalists, Hacktivists, and Whistleblowers
- Police officers and security agencies
For more information on Parrot OS visit its website, here and to learn about its usage you can refer to its documentation.
Install Parrot OS in VirtualBox :
1. Open the virtual box and click on the New Button.

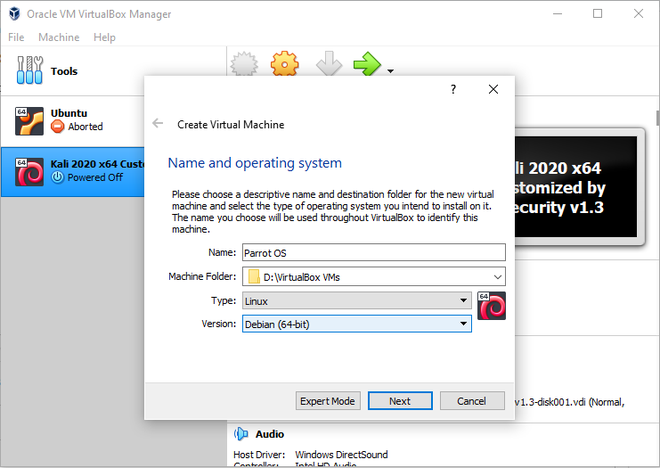
2. Give the name to your virtual machine, add Machine Folder, Type=Linux, and version as Debian (64-bit).Click on next.
A machine folder is the location where the instance of your virtual os is saved. You don’t need to provide it, it will select its default location automatically.
3. Now, to allot the RAM size for a virtual machine, if you have 4GB RAM, give a Memory Size of 15045MB RAM at least so that your virtual machine, as well as your local machine both, can work smoothly. For 8GB RAM and above can give a memory size of 2048MB to 4096MB. Click on next.

4. Select the option “Create a virtual hard disk now” and then click on Create button.

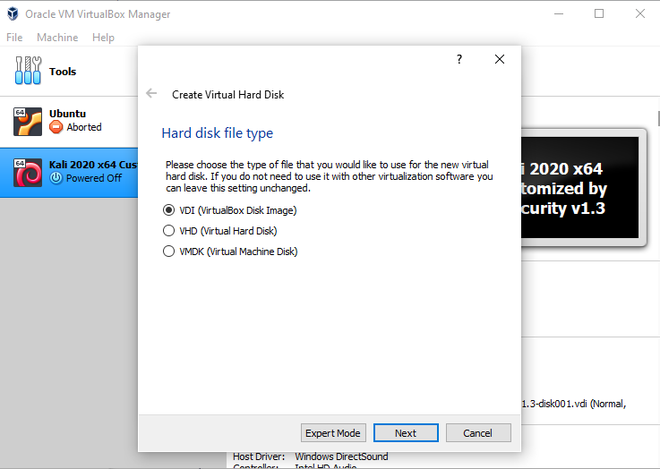
5. Now select the hard disk type for Virtual Hard Disk(For daily purposes it’s better to choose VDI). Click on Next
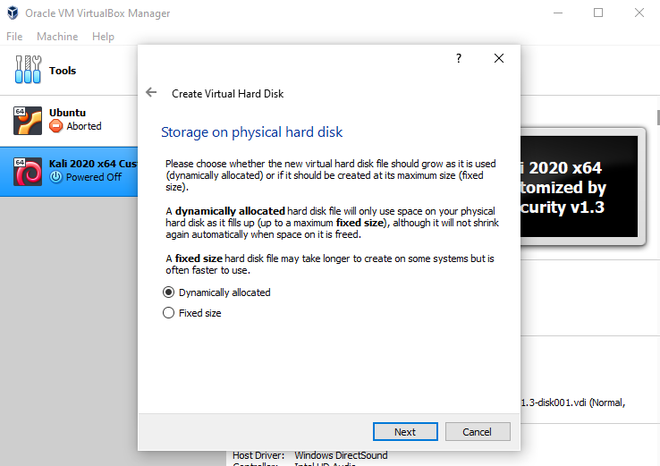
6. Now select dynamically allocated space for storage on the physical hard disk.
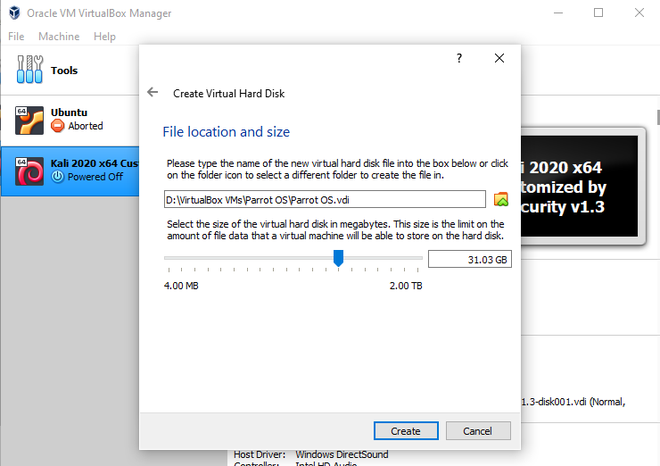
7. Give the size to virtual hard disk, recommended size is 20GB but you can give greater than it also. The location should be kept as default. Now click on Create button.
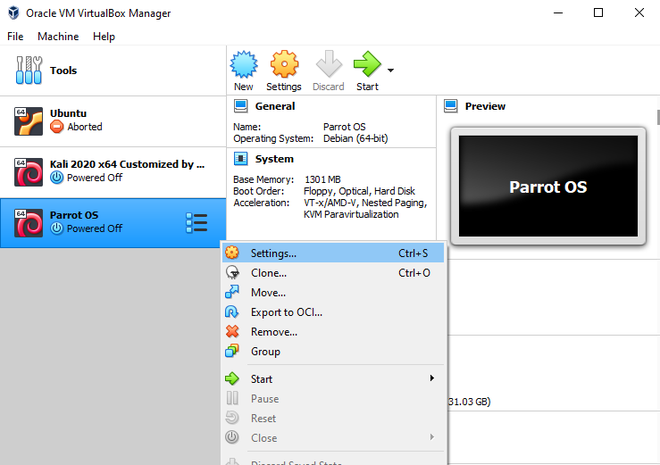
8. As soon as the process is completed, right-click on the machine name that you created and open Settings.
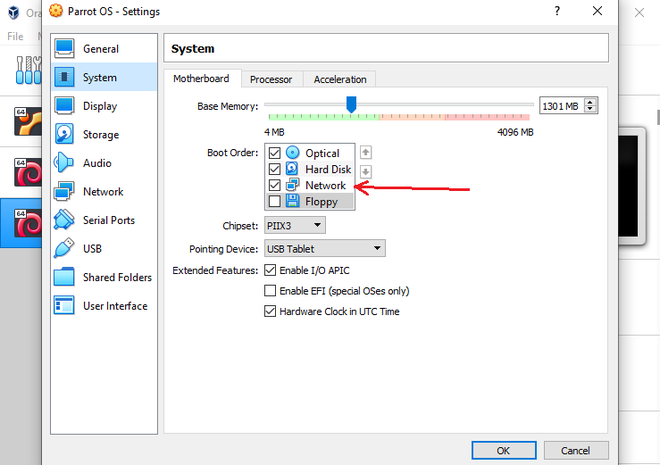
9. In the Settings window on the left pane, select System, and in Motherboard click on the Network option in the Boot order to enable it.
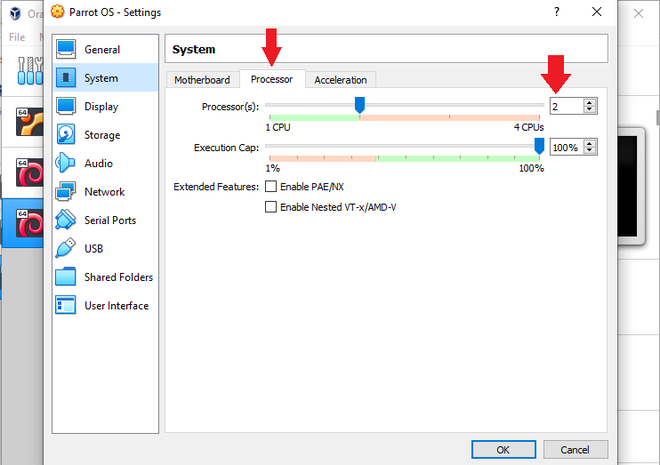
10. In the Processor section give 2 processors for smooth performance.
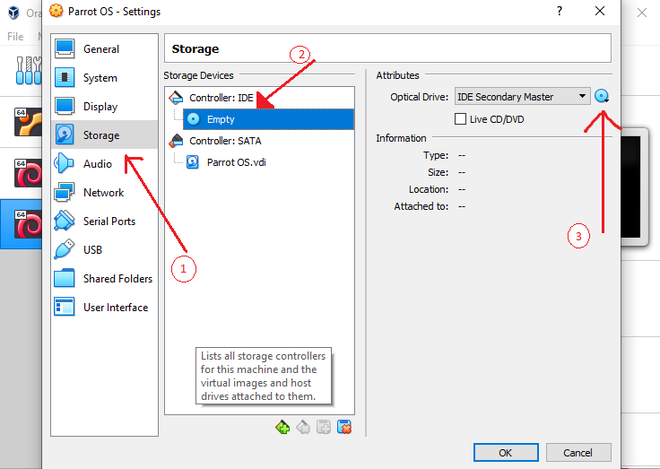
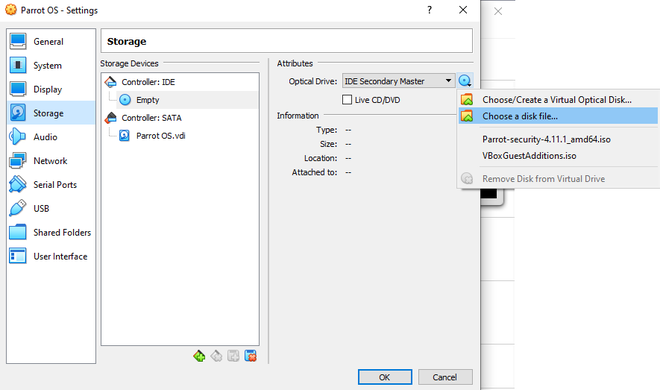
11. Again in the left pane, click on the Storage option and then select the “Empty” option given under “Controller: IDE” in the middle pane and then click on the CD image given on the right pane on the right side of “Optical drive”.
It is marked with the sequence of 1,2 and 3 in the figure given below.
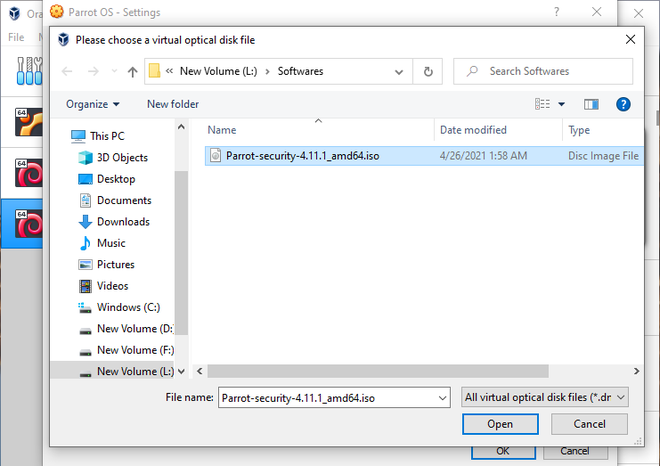
12. Click on choose a disk file and navigate it to the location where the Parrot OS ISO image you have downloaded. Then click on Open
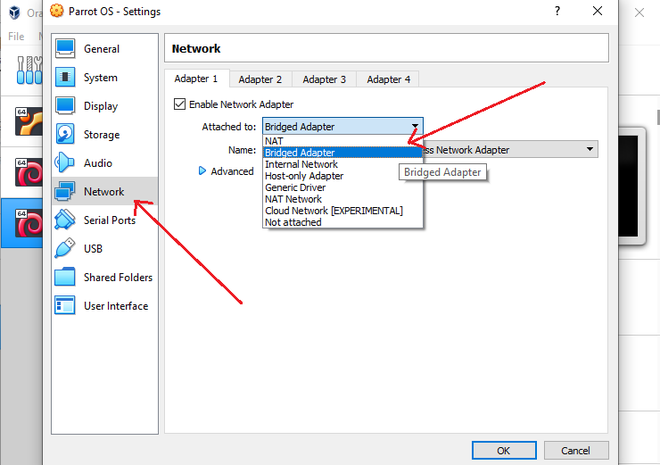
13. In the Network section in the left pane select Bridged Adapter to use the internet in your virtual machine. It is of no use if you can’t access the net on your virtual device. Now click on OK at the Bottom.
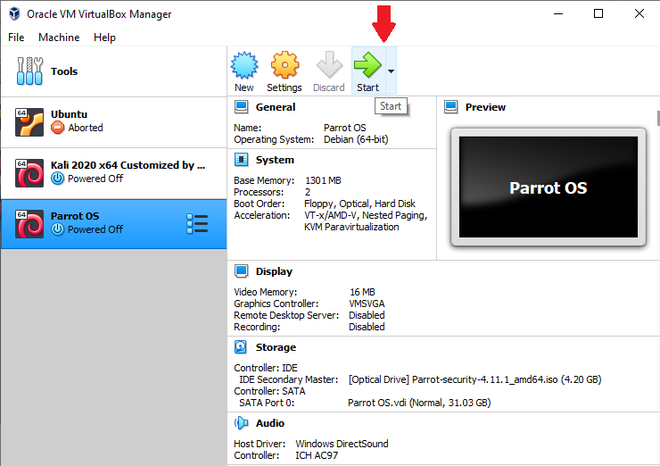
14. Now all the settings are done and ISO location is provided. Click on start to begin the installation.
15. There are two ways to install first by selecting the Live Mode and 2nd by selecting the Install option and both will work the same. we will go with the 1st method
Select the Parrot OS in Left Pane and click on start for installation.

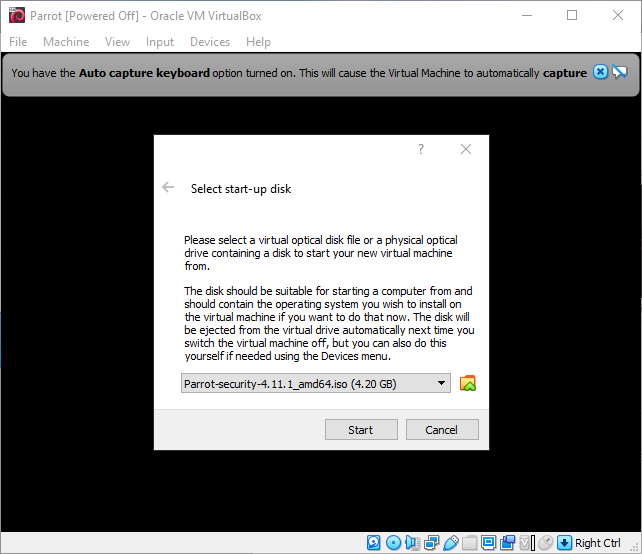
16. As soon as the installation starts, it prompts you to select the ISO file which you want to install since we have already given its path in settings. We can see the selected iso image, so click on the start button to launch the installation.
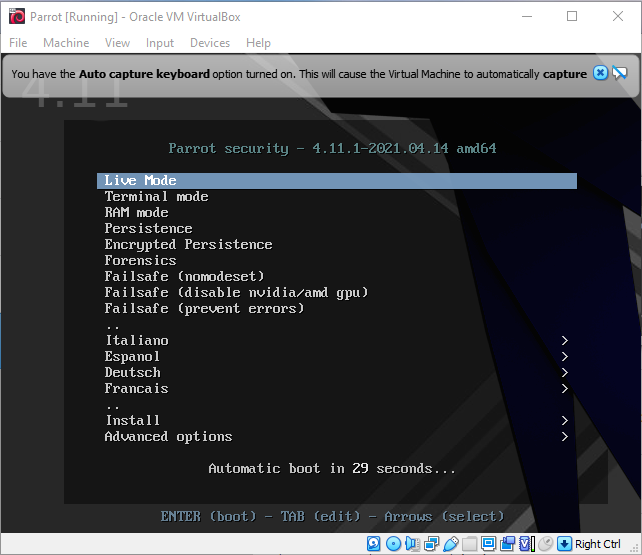
17. Click on Live Mode. It will directly start your Parrot OS and you can see its home screen. From there we can proceed with the installation.
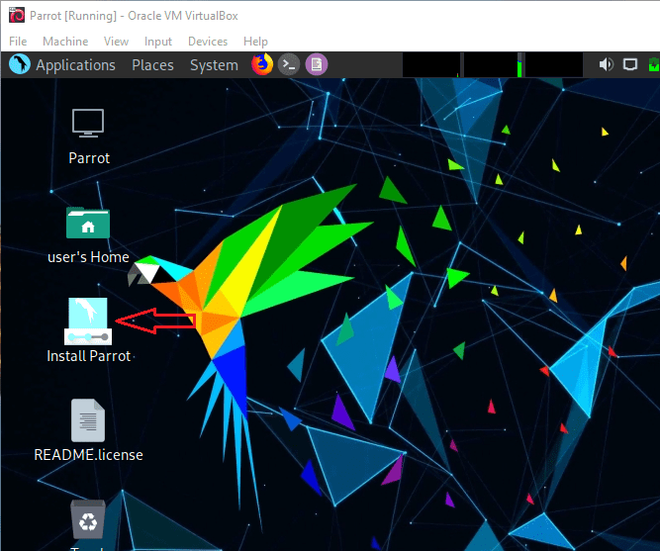
18. In its home screen, Select Install Parrot to begin the installation.
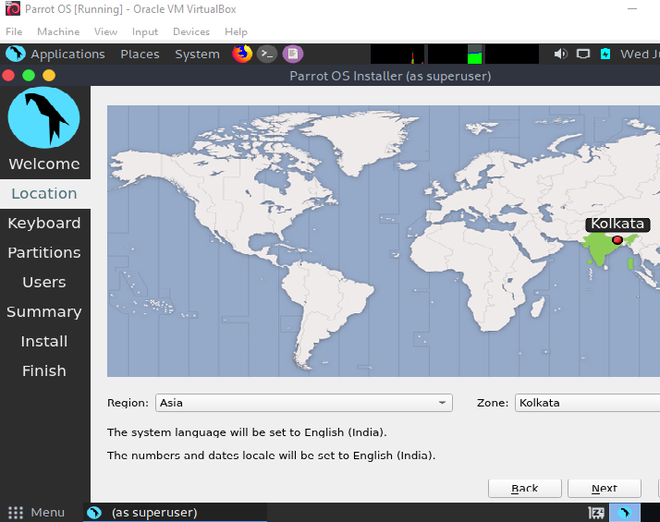
18. Provide your location. Click on Next.
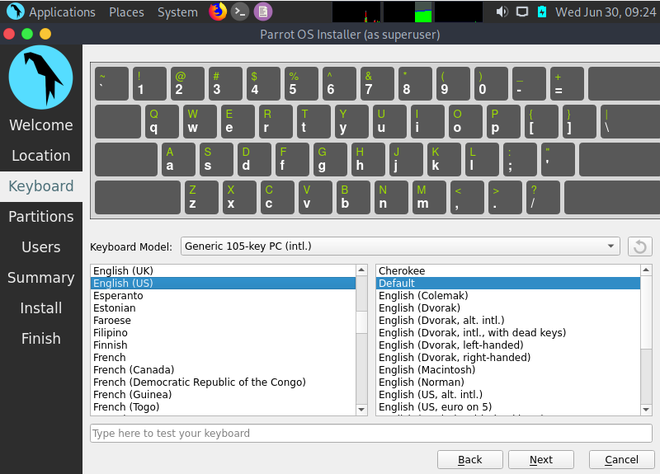
19. Select the default language according to your keyboard( below is selected for QUERTY keyboard layout.
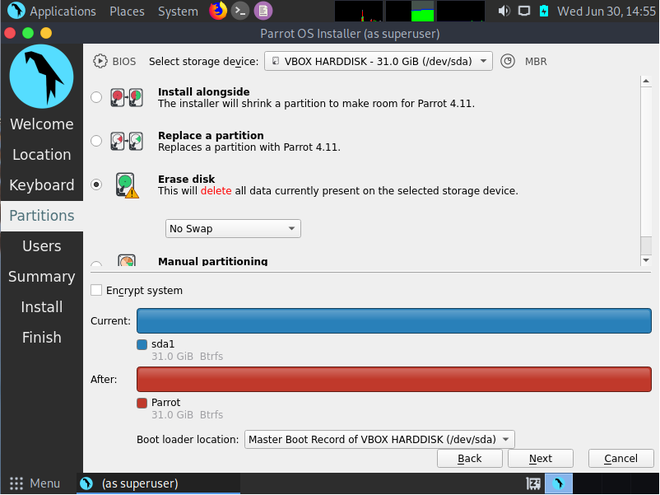
20. Click on the “Erase Disk” radio button (recommended for beginners ). It will automatically partition your virtual disk according to the size you have provided to it. Click on Next.
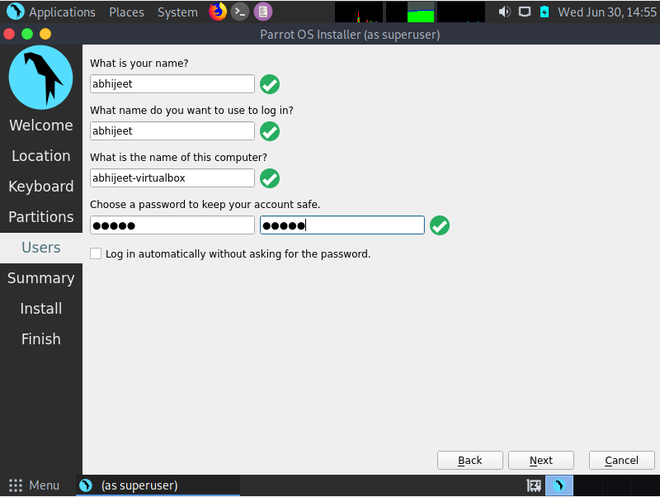
21. Finally, you just need to create a user( root user) and password to access it whenever you want so that your data is saved.
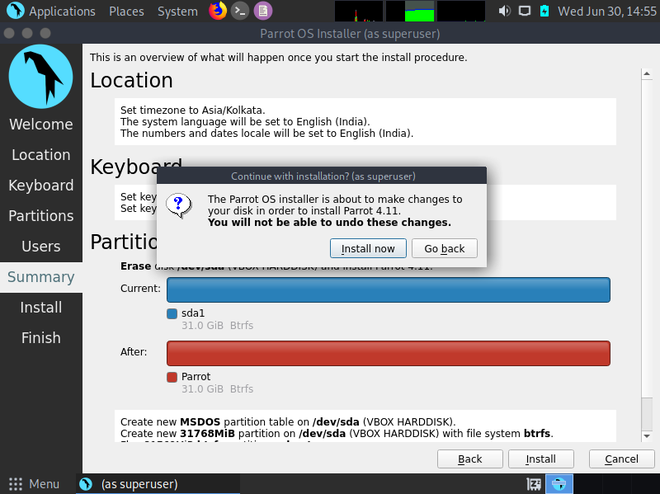
22. On the last page, it will show all the settings that you have selected or done till now so that you can verify it one last time before the final install procedure starts.
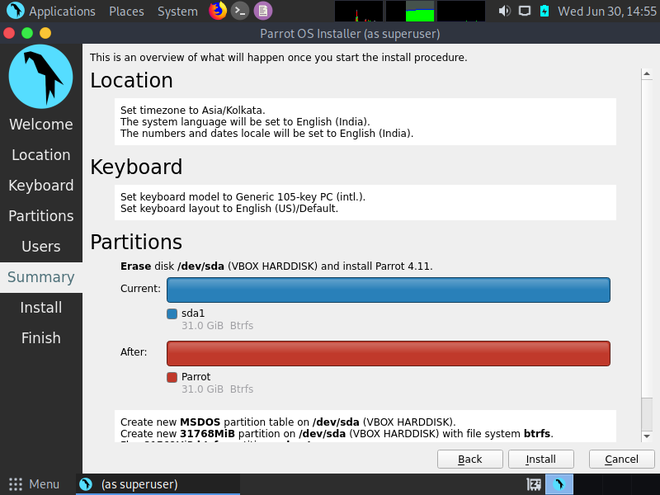
23. After verification, if you are not satisfied and change some settings then you can either click on the Back button or click on the Cancel button. If satisfied, then click on the Install button, it will prompt you to continue installation, then click on Install Now, to begin the installation.
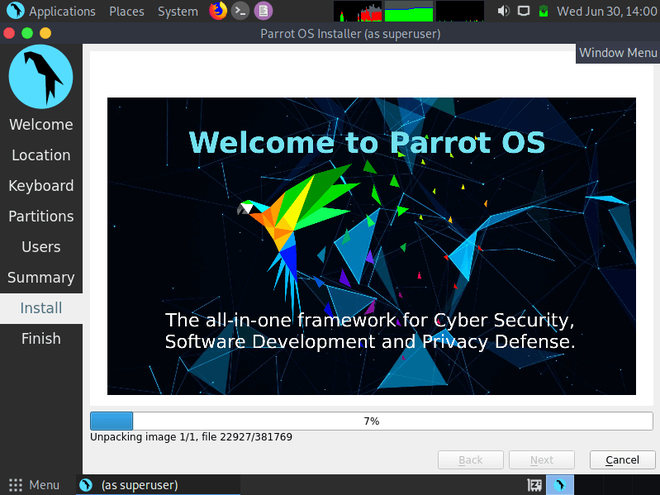
24. Now we just need to wait for at least 20-30 minutes for the installation to finish up. After it has done, it will prompt to restart. Click on it restart so that your virtual machine will save all the necessary changes that have been made.
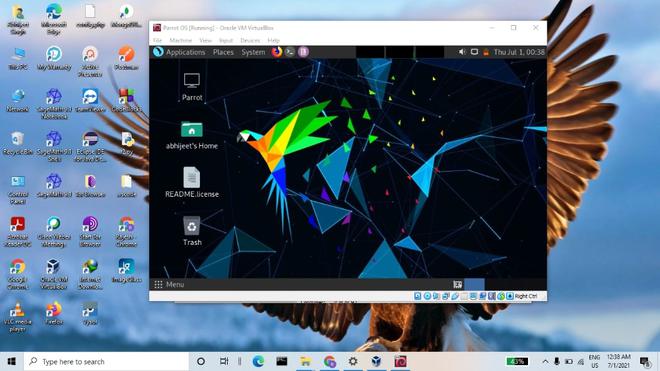
25. After restart you will see that it’s not full screen and it’s quite annoying also to work on it. Therefore, to solve such issues, VirtualBox includes Guest Additions iso to install it and make it full screen to enhance its user’s experience.
Resize VirtualBox to Full Screen :
1. Start your Parrot OS virtual machine and click on the “Parrot GNU/Linux” option or do nothing since it will automatically open Parrot GNU/Linux after 5 seconds.

2. login to the system and at the top in the Menu bar, click in Devices and select “Insert Guest Additions CD image”. This will add Guest Additions iso image for your Linux distribution that helps it to fit in the screen.

3. Now open the folder path “/media/<user-name>/” to reach the folder location where this image is added( user-name is the name that you provided while creating the user during installation).

4. Right-click on the page and select “Open in Terminal”.
Now we run a few commands to install Guest Additions and it will enable full-screen mode to your virtual machine.
Command –
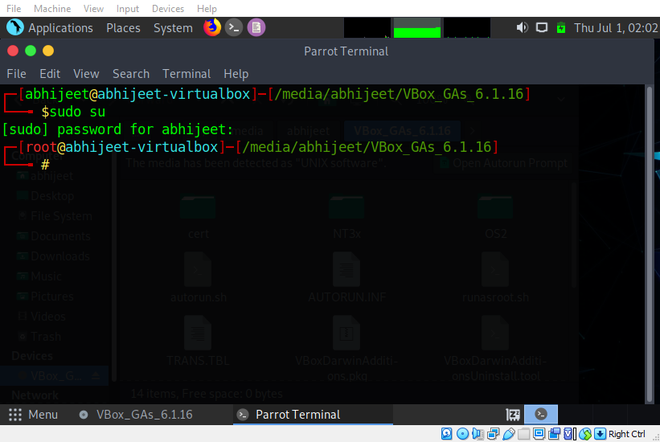
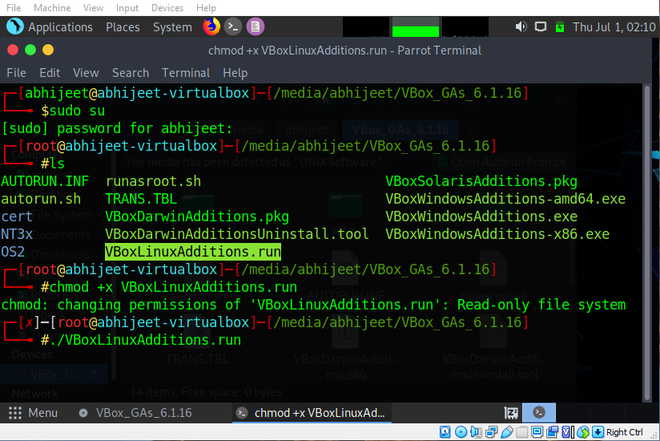
$ sudo su
It will prompt you to enter your password: <password>( password text is hidden so don’t panic) then click enter.
By this way, you become a root user
5. change the mode of file “VBoxLinuxAdditions.run” to executable and then run the file to install Guest Additions.
Command –
# chmod +x VBoxLinuxAdditions.run
it will change the mode of the above file to executable.
# ./VBoxLinuxAdditions.run
It will install Guest Additions
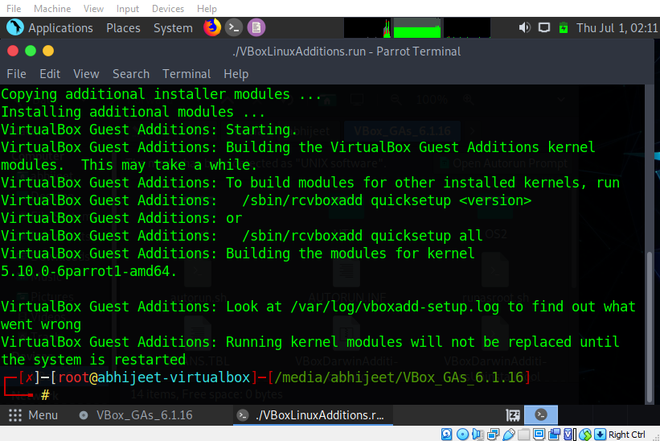
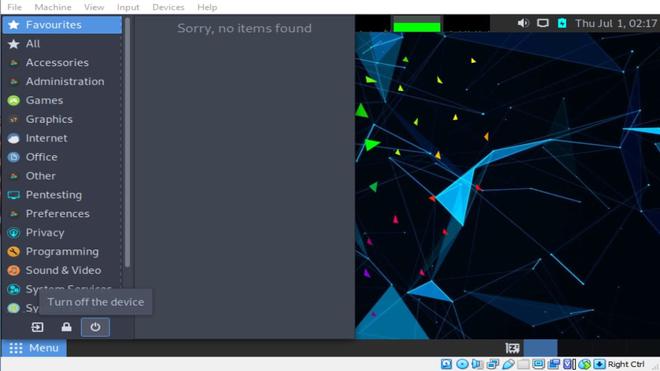
6. After installation is completed to apply the changes, restart your virtual machine.
7. After restarting, to make your virtual machine full screen either click on the top right corner. Maximize button or press “Host+F”( host button is CTRL button present in the right bottom ) on the keyboard.

Now Your Parrot OS is successfully installed in VirtualBox with all the basic functionalities that are required. To shut down your Parrot OS, follow step 6, it will automatically close your virtual machine.
Like Article
Suggest improvement
Share your thoughts in the comments
Please Login to comment...