How to install Node.js on a webserver ?
Last Updated :
06 Oct, 2021
To access web pages on any web application, we need a webserver to handle all the HTTP requests for the web application.Node.js provides the capabilities to create our own webserver which will handle HTTP requests asynchronously.
Below are the steps to install a simple HTTP web server on our local machine using NodeJS:
Step 1: Download and install Node js: Use this link to download the latest version of Node.js and then install it on your local machine using all the default options.
Step 2: Install the http-server package from npm: You can run the Node.js application directly from a command prompt or a command-line window. Now, you need to install the http-server module, it should be installed as a global npm package.
Open command prompt/command line and enter the following command:
npm install -g http-server
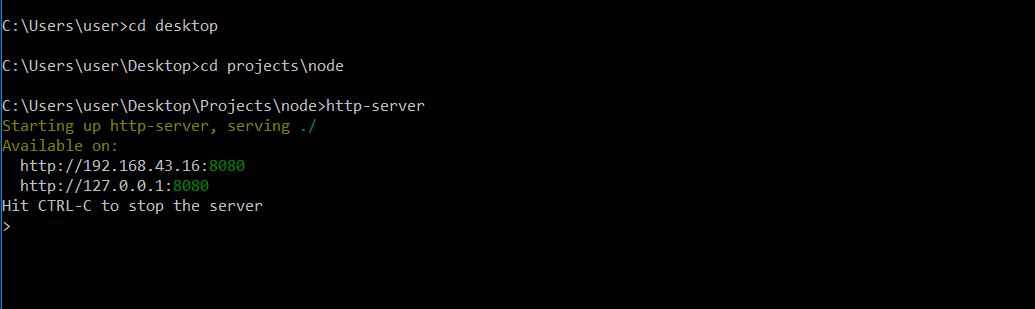
Step 3: Start a web server from a directory containing static website files: Now, after installing the module, you need to start the server. For that, you first need to change to the directory containing your static web files (HTML/CSS/JS, etc). Use the cd command for that.
In command prompt/command line, enter the following command:
cd projects\node
Now, start the server with the following command:
http-server
Now, you will see the following output on screen:
 Step 4: Browse to your local website with a browser: Open any browser and go to http://localhost:8080/ (URL which we get from as output after we execute the above command).
Now we can see our local website running, this is how we can install Node.js on a web server.
Like Article
Suggest improvement
Share your thoughts in the comments
Please Login to comment...